Wednesday, July 30, 2008

Almond Gateau - More than a "Challenge"!

Interestingly enough this month's Daring Baker's challenge was a filbert gateau and our July host is Mele Cotte Her inspiration for this gateau comes from Great Cakes by Carol Walter, a book which she has had for quite a while now.

A gateau (pronounced as ga-toe) is a French cake, often specifically a sponge cake that may be made from almond flour instead of wheat flour.

When I read the instructions to making this month's challenge, first thoughts that came to mind was "geez ... this is another long set of instructions". After having read it a few times, I realized that the preparation could be broken down into different stages and made over a few days. But rather than waste the entire week-end, I decided to cramp everything into a Saturday and also modify the recipe. Instead of hazelnuts, I used almonds instead. I decided not to add the whipped cream which was in the original receipe - I don't really like too much cream in my cakes! I also omitted doing a praline buttercream and instead settled on an orange marmalade (with chunky bits in the jam) buttercream frosting. Chocolate ganache and orange. This should be a nice combination!

On Saturday morning, my husband and I woke up early and did our morning exercise - a 5 km walk followed by breakfast. We popped into a nearby supermarket to get the rest of my ingredients before heading for home. I started on the challenge about lunch time and if everything goes according to plan, I should be finish way before dinner time. Lo and behold .. I didn't know what was in store for me that afternoon!

I followed the recipe to the teeth and eagerly poured the cake batter into my 9" pan. It rose well in the oven but 25 minutes into baking time, the gateau started to go lop-sided and had a slight depression. Oh no I hope it's not going to be a cave-in! By the time it was done, it sank some more! I almost cried! No way in hell could I get 3 layers of cake from that! Whatever shall I do! Breathe! Breathe!


I calmed myself and decided I'll do another batch of batter. Whilst the 2nd gateau was baking in the oven, I started on my syrup, glaze and buttercream. The 2nd gateau faired slightly better than the first - but still not up to expectation. Okay at least now I have 2 gateau which I could cut in half and have 4 layers. I put them aside to cool. Next item on the agenda was the ganache. I took out the bottle of cream from the fridge which I had purchased earlier in the week. Poured it out into a bowl and got a whiff ... what, don't tell me it's off! Sure enough it was. It was already late and I was not in the mood to go out and get another bottle of cream. This will have to wait until the next day.


My strategy on Sunday was pretty clear and simple, or so I thought. I just needed to cut the gateau, brush it with syrup, add the buttercream, make the ganache and finish off the decoration. I proceeded to slice the first gateau, brushed it with syrup and added the buttercream. I then worked on the 2nd piece, brushed with syrup and in my haste to put the gateau on top of the other 2 pieces, it slipeed and fell onto the table. Because it was thin and slightly moist with the syrup, it broke into several pieces. How much more bad luck do I need! Not much else I could do but to end up with a 3-layer gateau instead of 4. Luckily after this, everything else went smoothly.

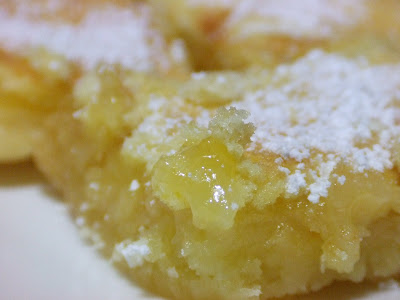
Final result - the gateau tasted fantastic and I must say that the chocolate and orange marmalade paried off very well. My husband who is not a cake fan said that this is "the best ever" - and that's quite a lot coming from a non-cake person! He had a slice in the evening and asked for MORE. I couldn't believe it!

Thank you Melle Cotte for choosing this recipe. It has certainly been more than a "challenge" for me.


Almond Gateau

Ingredients for the Gateau:

1 1/2 cups almonds, toasted/skinned
2/3 cup cake flour, unsifted
2 Tbsp cornstarch
7 large egg yolks
1 cup sugar, divided into 3/4 and 1/4 cups
1 tsp vanilla extract
1 Tbsp grated orange rind
5 large egg whites
1/4 cup warm, clarified butter (100 - 110 degrees). Alternatively you can use ghee

Method:

1) Position rack in the lower 3rd of the oven and preheat to 175 or 350 degrees. Grease and flour a 10” X 2” inch round cake pan.

2) Using a food processor, process nuts, cake flour, and cornstarch for about 30 seconds. Then, pulse the mixture about 10 times to get a fine, powdery mixture. You’ll know the nuts are ready when they begin to gather together around the sides of the bowl. While you want to make sure there aren’t any large pieces, don’t over-process. Set aside.

3) Put the yolks in the bowl of an electric mixer, with the whisk attachment, and beat until thick and light in color, about 3-4 minutes on med-high speed. Slowly, add 3/4 cup of sugar. It is best to do so by adding a tablespoon at a time, taking about 3 minutes for this step. When finished, the mixture should be ribbony. Blend in the vanilla and grated orange rind. Remove and set aside.

4) Place egg whites in a large, clean bowl and with an electric mixer beat on medium speed, until soft peaks. Increase to med-high speed and slowly add the remaining 1/4 cup of sugar, over 15-20 seconds or so. Continue to beat for another half a minute.

5) Add the yolk mixture to the whites and whisk for 1 minute.

6) Pour the warm butter in a liquid measure cup (or a spouted container). * It must be a deep bottom bowl and you must work fast.* Working quickly, sprinkle about 2 Tbsp of the almond meal at a time onto the mixture – folding it carefully for about 40 folds. Be sure to exclude any large chunks/pieces of nuts. Again, work quickly and carefully so as not to deflate the mixture. When all but about 2 Tbsp of almond meal remain, quickly and steadily pour the warm butter over the batter. Then, with the remaining almond meal, fold the batter to incorporate, about 13 or so folds.

7) With a rubber spatula, transfer the batter into the prepared pan, smoothing the surface with the spatula or back of a spoon. **If any collected butter remains at the bottom of the bowl, do not add it to the batter! It will impede the cake rising while baking.**

8) Tap the pan on the counter to remove air bubbles and bake in the preheated oven for 30-35 minutes. You’ll know the cake is done when it is springy to the touch and it separates itself from the side of the pan. Remove from oven and allow to stand for 5 minutes. Invert onto a cake rack sprayed with nonstick coating, removing the pan. Cool the cake completely.

*If not using the cake right away, wrap thoroughly in plastic wrap, then in a plastic bag, refrigerator for up to 3 days. If freezing, wrap in foil, then the bag and use within 2-3 months.

Orange Honey Syrup:

1/2 cup honey
3 Tbsp orange juice

Mix the honey and orange juice together. Microwave for 1/2 minute. Cool slightly before using on the cake. The syrup can be made in advance.

Orange Buttercream Frosting:

1 stick butter, room temperature
2/3 cup of orange marmalade (try to find one with orange bits in it)
3 cups powdered sugar
2 Tbsp heavy cream
1 tsp vanilla extract
1 tsp orange extract or essence

Beat butter until creamy. Add in the marmalade. Beat in powdered sugar. Then add in the cream, followed by vanilla and orange extract. If using immediately, refrigerate 10-15 minutes first.

Otherwise the buttercream can be made earlier. Refrigerate buttercream in an airtight container for up to 5 days, or can be frozen for up to 6 months. If freezing, store in plastic containers and thaw in the refrigerator overnight or at room temperature for several hours. Stir the cream a few times before using.

Orange Marmalade Glaze:

2/3 cup thick orange marmalade preserves
1 Tbsp water

In a small saucepan, bring the water and preserves to a slow boil and simmer for 2-3 minutes. If the mixture begins to stick to the bottom of the saucepan, add water as needed.

Remove from heat and, using a strainer, press the mixture through the mesh and discard any remnants. With a pastry brush, apply the glaze onto the cake. If the glaze is too thick, thin to a preferred consistency with a few drops of water.

Ganache Glaze:
Makes about 1 cup, enough to cover the top and sides of a 9 or 10 inch layer

6 oz. bittersweet chocolate
6 oz. (3/4 cup) heavy cream
1 Tbsp light corn syrup
3/4 tsp vanilla
1/2 - 1 tsp hot water, if needed

1) Break the chocolate into 1-inch pieces and place in a bowl.

2) Heat the cream, vanilla and corn syrup in a saucepan, on low, until it reaches a gentle boil. Remove from stove and carefully pour over the chocolate. Leave it alone for one minute, then slowly stir and mix the chocolate and cream together until all the chocolate melts and is incorporated into the cream. If the surface of the ganache seems oily, add 1/2 - 1 tsp hot water. The glaze will thicken, but should still be pourable. If it doesn’t thicken, refrigerate for about 5 minutes, but make sure it doesn’t get too cold!

To Assemble the Gateau:

1) Cut two cardboard disks slightly larger than the cake. Divide the cake into 3 layers and then using a sharp serrated knife or cake leveller cut each layer, one at a time. Using the cardboard disk, gently slide under each layer away and set aside. Then using the same method, cut the 2nd layer. Using a pastry brush, moisten the cut side of the cake with 3-4 Tsp of warm sugar syrup.

2) Divide the buttercream into 2 containers. Using the first half, spread the bottom layer with a 1/4" thickness of the buttercream. Place the middle layer over the first, brush with sugar syrup and then cover with the remaining buttercream.

3) Gently, press the sides of the cake to align the layers. Refrigerate to chill for at least 30 minutes.

4) Remove the cake from the refrigerator. Holding a serrated or very sharp knife with an 8-ich blade held parallel to the sides of the cake, trim the sides of the cake so that they are perfectly straight. Brush the top and sides of the cake with warm orange marmalade glaze, sealing the cut areas completely. Re-chill the cake in the refridgerator whilst preparing the ganache.

5) Place a rack over a large shallow pan to catch the ganache drippings. Remove the gateau from the refrigerator and put it the rack. With a metal spatula in hand, pour the ganache onto the cake’s center. Move the spatula over the top of the ganache about 4 times to get a smooth and mirror-like appearance. The ganache should cover the top and run down the sides of the cake. When the ganache has been poured and is coating the cake, lift one side of the rack and bang it once on the counter to help spread the ganache evenly and break any air bubbles. (Work fast before setting starts.) Patch any bare spots on the sides with a smaller spatula, but do not touch the top after the “bang”. Refrigerate the gateau for 30 mins to an hour in order for the ganache to set.

6) Remove the gateau from the fridge. Using tip # 16 pipe the bottom sides of the gateau with shell design. Using a large star tip, pipe stars on the top of the gateau. Decorate the sides of the gateau with chocolate wafers.

7) Leftover cake can be covered with foil and kept in the refrigerator for up to 5 days.


Saturday, July 26, 2008

Cinnamon Rolls

Nothing beats hot cinnamon rolls fresh out of the oven first thing in the morning.

Not that I made mine in the morning, it was more like late morning when I started and by the time they were baked it was time for tea. Funny thing was I wasn't even sure if my rolls would turn out like what cinnamon rolls should taste like.

Why you may ask ...... simple - I've never made cinnamon rolls before and this would be my first attempt at it.

The instructions to this recipe seems some what lengthy but don't despair, it's actually quite simple after all. It's the "waiting around" for the dough to proof that takes time. I ended up watch telly in-between the proofing period.


The end result was well worth it! The smell of cinnamon rolls baking in the oven permeated the entire apartment. Heavenly! I ended up with more rolls that what the recipe states - more like 12 rolls.

My husband and I whacked 2 rolls during tea time. I packed about 6 rolls for a friend of my husband who had volunteered to be a guinea pig for my cooking ventures. He also volunteered his wife and 3 teenagers as "tasters" as well - hmm not sure if they had signed the consent form or not. The remaining rolls I packed away for next morning's breakfast.


Cinnamon Rolls
(Recipe from Joy of Baking)
makes 8 rolls


Ingredients for the Dough:

4 1/2 - 5 cups (630 - 700 grams) all-purpose flour
1 package (1/4 ounce) (7 grams) active dry yeast
1 cup (240 ml) milk
1/3 cup (75 grams) unsalted butter
1/3 cup (66 grams) granulated white sugar
1/2 teaspoon (2.5 grams) salt
3 large eggs

Ingredients for the Filling:

3/4 cup (160 grams) packed light brown sugar
1/4 cup (35 grams) all-purpose flour
1 tablespoon ground cinnamon
1/2 cup (113 grams) unsalted butter, cold (cut into pieces)
1/2 cup light raisins (optional)
1 tablespoon half-and-half (light cream)
Powdered (Confectioners or Icing) Sugar Glaze

For the glaze:

In a medium-sized bowl stir together:
1/2 cup (58 grams) powdered (confectioners or icing) sugar
1 tablespoons half-and-half (light cream)
Make the glaze thin enough to drizzle over cinnamon rolls

Method:

1) In the bowl of your electric mixer, with the paddle attachment, combine 2 1/4 cups (315 grams) of the flour and the yeast.

2) In a small saucepan, stirring constantly, heat the milk, butter, sugar, and salt just till warm (120 -130 degrees F) (49 - 54 degrees C) and the butter is almost melted.

3) Gradually pour the milk mixture into the flour mixture, with the mixer on low speed. Add eggs, one at a time, beating after each addition. Scrape down the sides of the bowl. Beat this mixture on high speed for 3 minutes. Replace the paddle attachment with the dough hook (or do the kneading by hand), and knead in as much of the remaining 2 1/4 to 2 3/4 cups (315 - 385 grams) flour until you make a moderately soft dough that is smooth and elastic (3 to 5 minutes). (Dough will no longer be sticky to the touch.)

4) Shape into a ball. Place the dough into a greased bowl, turning once. Cover and let rise in a warm place till double (approximately 1 - 1 1/2 hours).

5) When the dough has doubled in size punch it down. Place onto a lightly floured surface, cover with a clean towel, and let rest for 10 minutes.

6) Meanwhile, combine the ingredients for the filling. In a medium-sized bowl place the brown sugar, flour, and cinnamon. Stir to combine. Cut in the cold butter with a pastry blender, or two knives, until the mixture is crumbly. Set aside.

7) After about 10 minutes, roll the dough into a 12 inch (30 cm) square. Sprinkle the filling evenly over the rolled out dough and top with raisins (if desired). Carefully roll the dough into a log and pinch the edges to seal. Slice the log (roll) into eight equal-sized pieces. Arrange dough pieces in a greased 13 x 9 x 2 inch (33 x 23 x 5 cm) baking pan.

8) Cover dough loosely with clear plastic wrap, leaving room for rolls to rise. At this point you can refrigerate the dough for anywhere from 2 to 24 hours. If overnight, the next morning remove the rolls from the refrigerator, take off the plastic wrap, and let stand at room temperature for 30 minutes. (If you are making the cinnamon rolls immediately, don’t chill dough. Instead, cover loosely with plastic wrap, and let dough rise in a warm place till nearly double, about 45 minutes to 1 hour.)

9) Break any surface bubbles with a toothpick. Brush dough with half-and-half or light cream. Bake in a 375 degrees F (190 degrees C) oven for 25 to 30 minutes or till light brown. (Can tell if done by inserting a toothpick into one of the buns, and it should come out clean. Also, if you lightly tap on the top of the buns it should sound hollow.)

10) If necessary, to prevent over-browning, cover rolls loosely with foil the last 5 to 10 minutes of baking. Remove rolls from oven. Brush again with half-and-half or light cream. Cool 5 minutes and then invert onto a baking rack and re-invert onto a serving plate or platter.

11) Drizzle with the Powdered Sugar Glaze and serve warm or at room temperature.


Wednesday, July 23, 2008

Coconut Cake with Lemon Sour Cream Icing

Haha ... it's another lemon recipe. This time with a twist, I added an extra ingredient, dessicated coconut.

I remembered I had a small pack of dessicated coconut which I had purchased months ago from a bake shop. I cannot remember why I had bought it now but on two separate "spring cleaning" occassions, I had been tempted to throw it out. Luckily I didn't.

So it was quite timely that I came across this recipe whilst browsing the internet for a lemon cake. I also happen to have 4 lemons in my fridge. No I'm not stocking upfor a rainy day - I just bought more than I required. Don't you have one of those days when you think buying more saves you some $ ....! Some times it does and some times I end up throwing up stuff that's gone bad. Such a waste!


Any way it was mid week that I decided to bake this cake. I told my office colleage if I was "hard working" that evening, I'll bake. Her usual response would be "ok be hard working then" with a smile, that's because she'll have cake the next day.

Coconut cake with lemon sour cream icing
(Recipe source: Super Foods Ideas)
serves 8


Ingredients:

125g butter, softened
1 cup caster sugar
1 large lemon, rind finely grated
2 eggs, lightly beaten
1 1/2 cups self-raising flour, sifted
1 cup milk
1/2 cup desiccated coconut

Lemon sour cream icing:

1 1/2 cups icing sugar mixture
1/4 cup sour cream
1 lemon, rind finely grated

Method:

1) Preheat oven to 180°C. Grease a 6cm deep, 9cm x 19cm (base) loaf pan. Line base and sides with baking paper, allowing a 2cm overhang at both long ends.

2) Using an electric mixer, beat butter until light and fluffy. Add sugar, 1 tablespoon at a time, beating until sugar is dissolved. Add lemon rind and half the egg. Beat well. Add remaining egg and beat until well combined.

3) Using a large metal spoon, gently stir flour, milk and coconut into butter mixture (do not over-mix). Spoon mixture into prepared loaf pan. Smooth surface. Bake for 50 minutes or until a skewer inserted into the centre comes out clean. Allow cake to cool for 10 minutes in pan. Lift onto a wire rack to cool completely.

4) Make lemon icing: Sift icing sugar into a bowl. Add sour cream and lemon rind. Stir until well combined. Pour icing over cake. Allow to set before serving

5) Decorate the cake with toasted coconut, if desired.

Saturday, July 19, 2008

Lemon Bars

I'm not sure what it is about lemon in desserts but everyone seems to love it. I certainly do and my niece for one just loves lemons. She's 9 years old now but since she was 4, she'll put slices of lemons between her teeth and suck on them. She still does it now and will ask for the lemons floating in our ice lemon tea whenever she has the chance.


So it was with lemons in mind that I decided to try a lemon bar recipe by Stephanie Jaworski. This recipe is a combination of a buttery shortcrust biscuit as the bottom layer and topped with a tangy lemony filing. The crust is pre-baked first to ensure that it stays crips and crumbly. After that the topping is poured on top and baked again. I can assure you that these are highly addicive treats and can be served either warm from the oven, at room temperature, or chilled.

Lemon Bars
(recipe from Joy of Baking)

Ingredients for the crust:

1/2 cup (1 stick) (113 grams) unsalted butter room temperature
1/4 cup (25 grams) confectioner's (powdered or icing) sugar
1 cup (140 grams) all purpose flour
1/8 teaspoon salt

Ingredients for the filing:

1 cup (200 grams) granulated white sugar
2 large eggs
1/3 cup (80 ml) fresh lemon juice (approximately two large lemons)
1 tablespoons (5 grams) grated lemon zest (2 lemons)
2 tablespoons (25 grams) all purpose flour

TOPPING:

Confectioner's (powdered or icing) sugar
Lemon Zest - The yellow outer rind of the lemon that contains the fruit's flavor and perfume.

TIP: Always remove the zest first before halving and squeezing the lemon. Use a fine strainer to remove the seeds and pulp from the juice.

Method:

Preheat oven to 350 degrees F (177 degrees C) and place rack in center of oven. Grease with butter (or use a cooking spray) a 8 x 8 inch (20 x 28 cm) pan.

FOR CRUST:

In the bowl of your electric mixer, or with a hand mixer, cream the butter and sugar until light and fluffy. Add the flour and salt and beat until the dough just comes together. Press into the bottom of your greased pan and bake for about 20 minutes, or until lightly browned. Remove from oven and place on a wire rack to cool while you make the filling.

FOR FILLING:

In your electric mixer, or with a hand mixer, beat the sugar and eggs until nice and smooth. Add the lemon juice and zest and stir to combine. Fold in the flour. Pour the filling over the shortbread crust and bake for about 20 minutes, or until the filling is set. Remove from oven and place on a wire rack to cool.

To serve:

Cut into squares or triangles and dust with powdered sugar. These are best eaten the day they are made but can be covered and stored in the refrigerator for a day or two.

Yield: 16 - 2 inch (5 cm) squares

Wednesday, July 16, 2008

Chicken Briyani Rice with Vegetable Pickles

It was 10 pm on a Saturday night right after an early dinner and coffee with friends that my husband decided to take me to Mustafa. I am embarrassed to say that this is would be my 2nd trip to Mustafa even though I've stayed in Singapore for more than 15 years now.

For those who are not familiar with Mustafa, it is a 24-hour shopping mart located in a part of town called “Little India”. Why is this part of town called “Little India” you may ask. Well, Singapore first and foremost is a multi-racial and multi-cultural. Because of this, shops and eateries of different cultures will tend to predominantly operate at certain locations eg. Eu Tong Sen/Outram area is known as Chinatown, Kampung Glam/Arab Street is the Malay Muslim community and Serangoon is where you’ll find the Indian eateries and shops, thus the name “Little India”.

We also have a large number of non-professional migrant workers who come from third world countries hoping to earn a decent living here in order to support their families back home. A large percentage of these migrant workers would work in the building & construction sectors. On Sundays, which is their off day, they would congregate with their friends and fellow countrymen at various locations in Singapore, depending on the country they come from. The Indian nationale will gather at “Little India”, the Thais will hang out at Golden Mile Complex (the locals call this place “Little Thailand”) and the Burmese can be seen at Peninsular Plaza (“Little Burma”). It’s a sight to behold on weekends and usually we stay clear of these places on Sundays as it gets pretty crowded.


Shopping at Mustafa can be somewhat of a challenge especially on weekends, even more so if at night. The traffic around the area is bad and there are lots of people on the streets and inside the shopping mart. This six storey shopping space offers everything one could possibly need, from electronics and souvenirs, to clothes and fragrances. There is also a large supermarket on the second level that carries a range of food products that could rival any good supermarket, but at much cheaper prices! Mustafa attracts not only the locals but tourists as well. In fact it’s listed in some of the tourist guides which one can pick up at the airport upon arrival.

The aisles at Mustafa are narrow and because of the number of shoppers there, we had to squeeze our way around. This is certainly not a place for anyone who has a phobia of crowds or cramped areas! My mission that evening was to get some spices as I’d wanted to try my hand at cooking Briyani Chicken Rice. The recipe called for cinnamon sticks, cloves, cardoman pods, tumeric, garam masala and chilli powder. I also had to get among other items Basmati rice. We were stumped with the variety of Basmati rice being sold – I easily counted 15 types if not more. I didn’t know what to choose so my husband made the choice. His logic was the least brand of rice remaining in each rack means it’s the most popular. And it was true – we found that out when we checked out our groceries at the payment counter. Well being a man that he is, he had a smirk on his face upon hearing this.


We then headed to the spice area and I was totally blown away by the variety of spices and sauces. This is certainly spice heaven! I ended up with not only the spices I needed but other premix and sauces as well. With our shopping basket almost ¾ full, we headed towards the supermarket section. The frozen sections had 3 long open freezers for pratas, naan and leavened bread. They had so many varieties of pratas that I cannot even remember – plain prata, flaky prata, onion prata, prata filled with potato, spinach, peas, minced chicken, cheese, corn ….. We ended up loading the remaining empty space in our shopping basket with frozen pratas. By the time we finished and we only covered 2 floors it was already past 12.30am. I couldn’t believe that we had spent about 3 hours at Mustafa.

Here's the recipe for the chicken briyani rice with vegetable pickles. The recipe looks complicated but I can assure that it's really easy to prepare. I can attest to this as it's my 1st time attempting this dish.


Chicken Briyani Rice with Vegetable Pickles

Ingredients for the chicken:

1 chicken weighing about 1.5kg - cut into 4 pieces, wash and drain
4 slices ginger - 1 cm each (grind to smooth paste)
4 clovers garlic (grind to smooth paste)
1 red chillie and 1 green chillie -slit halfway
4 small tomatoes, cut into cubes
3 tbsp, slightly heaped meat curry powder
2 small bundles coriander leaves - chopped coarsely
Small bunch of mint leaves
4 tbsp plain yoghurt
1 tsp pepper
Salt to taste
1 1/2 cups water
10 tbsp ghee
1 big onion - sliced thinly
1 stick cinnamon - 4 cm (ingredient for frying)
4 cloves (ingredient for frying)
4 cardoman pods (ingredient for frying)
6 almonds - scald and remove skin (grind finely)
6 cashew nuts (grind finely)
1 1/2 tbsp tomato paste
2 medium sized onions - sliced thinly and fry until golden brown
2 tbsp briyani spices (can be bought in supermarket and places that sell spices)
1 bunch of small coriander leaves for garnishing

Ingredients for rice:

600 Basmati rice
1 small tin evaporated milk
2 tsp yellow food colouring
3 tsp rose water (I couldn't find this so I omitted this in my preparation)

Method of preparing chicken:

1) Combine chicken with garlic-ginger paste, chillies, tomatoes, meat curry powder, chopped coriander leves, mint leaves, yoghurt, pepper, salt and 1/2 cup water.

2) Heat ghee in a pot then add ingredients for frying. Fry until golden brown. Add chicken and fry for a little while, turning it over a few times. Add 1 cup water and bring to a boil.

3) When boiling, lower heat, add ground almond and cashew nuts. tomato paste, fried onion slices and briani spices. Turn over chicken pieces, then leave to simmer until almost dry.

4) Remove chicken from the pot and set aside. Skim the oil from the chicken curry into a bowl and leave to cool. This pot will be used for cooking the rice.

Method of preparing rice:

1) Bring 3/4 of a large saucepan of slightly salted water to boil. Wash and drain rice. When water is boiling, put in the rice and boil till it is almost cooked.

2) When rice is almost cooked, remove from heat and drain off water. Mix evaporated milk with the oil skimmed from the chicken curry.

3) Into the pot used to cook chicken, put a layer of rice then a layer of chicken. Repeat till chicken and rice are used up, making sure that rice forms the last layer. Pour the oil-milk mixture over the rice.

4) Mix rose water with yellow food colouring and sprinkle over rice. Scatter a few mint leaves over rice.

5) Cook over low heat making sure the pot is well covered till steam emits from pot. Do not uncover pot while rice is cooking. To prevent rice from burning you may raise the pot higher. Alternatively this last method of cooking the rice can also be done in a rice cooker.

6) When serving, garnish rice with fried cashew nuts, raisins and chopped coriander.


Vegetable Pickles (or Acar)

Ingredients:

300g cucumbers
100 g carrots
1 teaspoon salt
2 tablespoons oil
4 slices ginger
1/2 tsp mustard seeds
1 tsp turmeric
1/2 tsp chili powder
1/2 tsp sugar
1/4 tsp salt
2 tbsp vinegar

Method:

1) Cut cucumber in half lengthwise and remove the seeds. Cut flesh into 3.5 cm juliennes.

2) Mix 1 tsp salt with cucumbers, and let sit for 15 minutes to draw out the extra moisture.

3) Cut the carrot into pieces the same size as the cucumber.

4) Heat oil in a wok and add ginger and mustard seeds, cooking until mustard seeds pop. Stir in the turmeric and chili powder, then add the vegetables, sugar, and salt and saute for 2 minutes (do not overcook, the vegetables should stay crunchy).

5) Remove from heat and mix well with vinegar. Allow the vegetables to cool in the pan, then place in a jar. Refrigerate overnight before serving.


Sunday, July 13, 2008

Buttermilk Chocolate Chip Crumble Cake

I was browsing through Food Buzz one afternoon and came across this recipe from Piggy of Piggy's Cooking Journal

The ingredients and method used in putting this creation together looked really interesting to me, especially the crumble topping. I could already visualize the crumble being similar to the topping of an apple crumble pie fresh from the oven. Yummy!

As I didn't have any buttermilk in the fridge, I wondered if I should drop by the supermarket on my way home to get a pack. I decided against it as I would then have a half pack left over and would have to source for another recipe so as not to waste the remaining buttermilk. Instead I substituted the buttermilk with milk instead, not the low fat kind.

It took me a bit more time (compared with just a normal choc chip cake) to work through the various stages of putting the batter and topping together. Once everything was done, I popped the filled cake pan into the oven, set the timer for an hour and went about doing other chores. I occassionally popped back into the kitchen to take a peek. As the crumble topping melted in the oven, I noticed that it reached to the top of the cake pan - I was a bit concerned at this stage - what if it started to spill over ... oh dear, it'll make a mess in my oven for sure! Luckily it didn't rise any further (insert sound effects of a "sigh of relief")!

After about a hour I inserted a tester into the middle of the cake - guess it needed another 5 minutes more in the oven. Once done I took it out of the oven and sprinkled the top with choc chips ... the bottom of the chocolate chips melted and glued onto the crumble. I really couldn't wait for it to cool and immediately cut a small slice to sample. DE...LICIOUS!


Buttermilk Chocolate Chip Crumb Cake

Ingredients for Butter Crumb topping:

3/4 cup plain flour
3/4 cup light brown sugar
3/4 cup (170 gm) cold butter, cut into chunks
1 tsp vanilla extract

Ingredients for Cake Batter:

1 1/4 cup plain flour
1/4 cup cake flour
1 stick (or 113g) butter
3/4 tsp baking powder
1/4 tsp baking soda
3/4 cup mini bitter-sweet chocolate chips
3/4 cup caster sugar
1/2 cup buttermilk (I substituted with milk)
1 1/2 eggs
1 1/2 tsp vanilla extract
1/2 tbs orange zest
3/4 cup mini bitter-sweet chocolate chips, for sprinkling on top of the cake
Icing sugar, for sifting on top of the cake

Method for the crumb topping:

1) Preheat oven to 175 deg C.

2) Lightly grease a 9X4 inch baking pan, then line baking sheet around the interior of pan.

To make the topping:

Thoroughly mix the flour and sugar in a large bowl. Drop in chunks of butter, using a table knife, cut the butter into the flour until it reduces to the size of large pearls. Sprinkle vanilla essence over, working with fingertips, knead the mixture together until moist, clumpy lumps are formed. DO NOT overmix.

Method for the cake batter:

1) Sift the plain flour, cake flour, baking powder and baking soda. Then toss the chocolate chips with 1 tablespoon of the sifted mixture in a small bowl.

2) Cream the butter in the bowl of a stand mixer for about 3 minutes.

3) Add in orange zest, then add the sugar in 3 additions, beating for 1 minute after each portion is added

4) Add in egg and beat for 45 seconds.

5) Mix in the vanilla essence.

6) Alternately add in the sifted mixture in 3 additions with the buttermilk in 2 additions, beginning and ending with the sifted mixture. Scrape down the sides of the mixing bowl to ensure even mixing.

7) Stir in chocolate chips.

8) Spoon the batter into the baking pan, and spread evenly, smooth the top with rubber spatula.

9) Sprinkle the streusel topping evenly on the cake batter, make sure that the whole surface is covered.

10) Bake the cake for 1 hour or until a toothpick inserted in the center of the cake turns out clean. The baked cake should pull away slightly from the sides of the pan.

11) Remove the pan from the oven and sprinkle the chocolate chips evenly on top of the baked cake immediately.

12) Let the cake cool completely. Peel off the baking sheet from the cake, then sift some icing sugar on top of the cake.

Wednesday, July 9, 2008

Mango Sago with Pomelo

I simply cannot remember the first time I ever ate this dessert. All I can recollect was how delicious it tasted, the refreshing chilled concoction of mango puree with sago pearls mingled with the slight sourness of the pomelo.

Mango sago with pomelo seems such a mouthful for a simple dessert. I much prefer its Chinese name 杨枝甘露. Literally means "honeyed dew drops falling from a willow tree branch" - it sounds so poetic!

This dessert is now a regular on most Chinese restaurtants menus and certainly a "must" in Hong Kong sytle cha chan teng ("cha chan teng" is Cantonese for casual style cafes). It's tropical flavours have propeleed this dessert to the top 5 selling list in restaurants and dessert shops here in Singapore, right up there with sesame cream, peanut cream and almond cream.

It's a simple dessert to make and definitely taste great on a hot day. Great to serve to guest after a meal and they'll probably think it took you ages to prepare this.

By the way you wouldn't believe this but my hubby ate 4 bowls in one sitting!

Mango Sago with Pomelo

Ingredients:

60 - 70 gm of mango puree
1 fresh mango, peeled and diced
1/4 fresh pomelo, peeled and separated
80 gm sago pearls, cooked
120 ml coconut milk (fresh or in can)
80 ml full cream milk
250 ml evaporated milk (low fat can also be used)
150 g white sugar
200 g ice cubes
200 ml water

Method:

1) Place about 6 cups of water in a pan and bring to a boil. Then add the sago pearls and cook until it becomes translucent. If the water reduces during cooking process, top up pan with more water. Remove and strain using a sieve under running water until cool. Set aside.

2) In a separate pot, mix the coconut milk, full cream milk, evaporated milk, white sugar and water together. Still well and bring to a boil.

3) Add the mango puree and ice cubes into the milk mixture. Stir until ice cubes are all melted. Then add in the sago and mix into the mixture.

4) Allow to cool completely before refrigerating for another 3 hours.

5) Thereafter serve immediately in a bowl with fresh diced mango and pomelo.


Sunday, July 6, 2008

Lazy Sunday!

Sunday ... day of rest! And this applies to me, my husband and our 2 boys. We didn't do much today - basically chilled out at home and did laundry.

Thought I'd share some pics of Benji and Milo, our 2 boys (shitzus) having their Sunday snooze.

This is Benji, half way into dreamland!


And here's Milo - he can sleep with both his eyes half open!

Blueberry Choc Chip Cupcakes

I know it's berries season! It's evident as the blogs I frequently visit are now featuring delicious recipes with fresh raspberries, blueberries, strawberries ..... all sorts of summer berries. It just makes me drool imagining my teeth sinking into an explosion of sweetness and tartness all at once.


Unfortunately the berries that we get here in Singapore are usually tart and expensive because they're all imported. The frozen version is usually cheaper but then again, I still do find them expensive!

So it was by chance when I was at the supermarket that I came across some blueberries which were being sold for $4.50 (Singapore Dollars that is) - the package weighed about 125 gm. Definitely a steal as it would usually cost about $7.90. I could not resist adding one pack to the rest of my groceries. Whilst waiting for my turn at the check-out counter, I was trying to decide whether I should add it to a cake or a tart. Decisions ... decisions! Life is tough!

I finally opted for cupcakes - I hadn't baked those in quite a while!

The blueberry cupcakes (with the addition of chocolate chips as a twist) turned out soft and moist, and the mixture of fresh blueberries and choc chip was an excellent combination. It so happened that I was meeting some friends for dinner that night, so they ended being the happy recipients of my baking venture!


Blueberry Choc Chip Cupcakes
(makes about 15 cupcakes)

Ingredients

1/2 cup (about 113 gm) unsalted butter
2 large eggs
2 cups flour, all-purpose
1/2 tsp salt
1 1/4 cups sugar (I had reduced the 1/4 cup by half)
1/2 cup milk
1 tsp vanilla extract
2 teaspoons baking powder
1 1/2 cups fresh blueberries
1 cup semi-sweet choc chips (I used Hershey's)

Method:

1) On slow speed, cream butter and sugar until soft and creamy. Add the vanilla extract.

2) Add eggs one at a time and mix until blended.

3) Sift all the dry ingredients together. Add into the butter mixture, alternating with milk. I usually start with dry ingredients and end with it as well.

4) Fold in the blueberries and choc chips into the mixture.

5) Fill cupcake moulds to about 3/4. (I use an ice-cream scoop for this part - it's easier and the amounts are more consistent)

6) Bake 375 F, 25-30 minutes. Remove from pan to cool. Before serving, dust cupcakes with some icing sugar.


Wednesday, July 2, 2008

Udang Nenas Masak Lemak (Pineapple & Prawns in Coconut Milk)

As if our recent Malacca trip was not enough, I had to have a craving for udang nenas masak lemak (or pineapple and prawns cooked in coconut milk). This is a very typical nyonya dish.

Now what is nyonya food?

Nyonya food is also known as the Straits Chinese food which is an interesting amalgamation of Chinese and Malay dishes thought to have originated from the Peranakan (Straits Chinese) of Malacca. Besides Malacca, Nyonya food is also native to Penang and Singapore. However, over the years, distinct differences have evolved in the Nyonya recipes found in Penang than that in Malacca and Singapore due to the proximity of Malacca and Singapore to Indonesia and Penang to Thailand.


Influences aside, Nyonya recipes are complicated affairs, often requiring many hours of preparation and is about the blending of spices, using pungent roots like galangal, tumeric and ginger; aromatic leaves like pandan leaf and fragrant lime leaf together with other ingredients like candlenuts, shallots, shrimps paste and chilies. Lemon, tamarind, carambola and green mangoes are used to add a tangy taste to many dishes. For dessert, fruits are seldom served but instead colorful cakes are served. Nyonya cakes are rich and varied, often made from ingredients like sweet potato, glutinous rice, palm sugar and coconut milk.

Here's a simple recipe to introduce you to nyonya food and it doesn't require hours of preparation and stirring the pot. Serve with white rice.

Udang Nenas Masak Lemak

Ingredients:

16 big tiger prawns or 20-24 small prawns
1 cup thick coconut milk
1 cup thin coconut milk
2 rice bowls of water
1 whole small pineapple,cubed

Grind into a Paste:

1 piece of belachan (2x2inch)
4 candlenuts
fresh tumeric root (2x2inch)
fresh galangal root (2x2inch)
15 shallots
2 garlic cloves

Method:

1) Heat a pot, kuali or wok. Add 1 cup thick coconut milk to dry paste and cook on medium heat until fragrant.

2) Add water and turn heat to high until mixture reaches a rolling boil.

3) Turn back down to medium heat and add pineapple. After mixture heats up to near boil again, add the 1 cup of thin coconut milk.

4) Add prawns. When prawns are pink and float to the top they are ready to serve.

Related Posts with Thumbnails