Sunday, June 12, 2011

Baked Pandan Cake (Kuih Bakar Pandan)

When we were kids we used to tag along with my dad to visit his Muslim colleagues during Hari Raya (the Muslim New Year). My dad's colleagues would have "open house" during the two days of the Muslim New Year. "Open House" is a local custom whereby you literally open your house for friends and relatives to visit you during the celebrations. During such festivities, you would visit and at the same time partake of either a meal which could be snacks or even lunch.

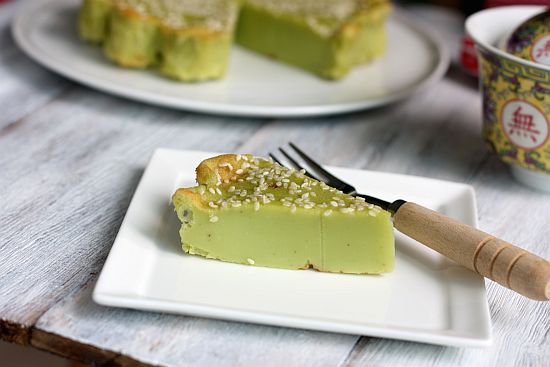
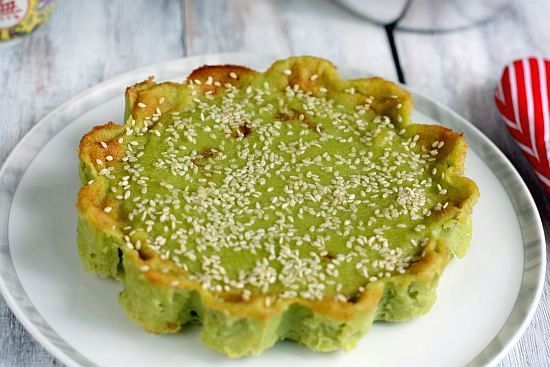
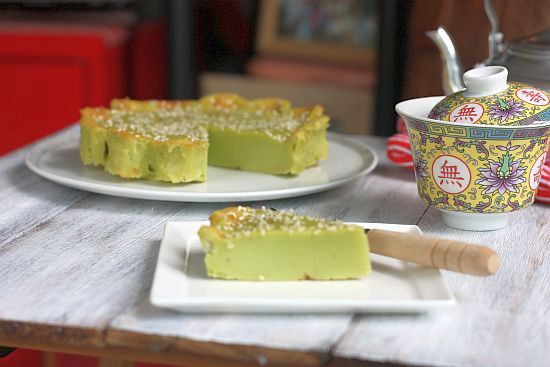
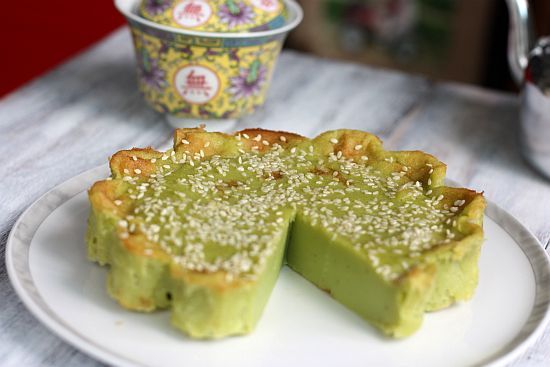
I remember we loved going to a particular "open house" as my dad's collegue's wife bakes the most amazing Kuih Bakar Pandan. The cake was soft, rich with coconut flavour and had the constitency of very thick kaya (coconut jam). It was so, so good that we would eat at least two piece per person. Unfortunately when his wife passed on, no one else seemed able to replicate the recipe.
kuih pandan 2


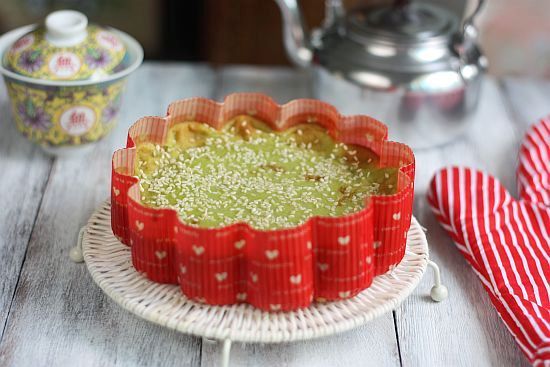
So can you imagine my excitment when I came across this recipe in Zurin of Cherry On A Cake's blog. Her pictures reminded so much of the Kuih Bakar I used to love when I was a kid. And the mere sight of her pictures made me want to try out the recipe as well. Coincidentally I also realized that I had the same flower paper cake mold as Zurin's. I had bought a few packs from Daiso a few months back and had used some for previous bakes.
kuih pandan 1


Baked Pandan Cake (Kuih Bakar Pandan)
Recipe Adapted from Here
Makes one 7" round cake

Ingredients:

300ml coconut cream (I used Kara brand)
100ml water (divide equally into 2 glasses)
4 fresh pandan leaves (each about 15 inches in length), snipped
125g granulated sugar
4 eggs
150g plain four
1/4 tsp salt
1/2 tsp all spice
1 Tbsp sesame seeds
1 Tbs unsalted butter

Method:

1) Preheat oven to 180C.

2) Combine coconut cream and 50ml of room temperature water. Keep aside

3) Into a blender add 50ml water and the pandan leaves. Blend until the leaves become a pulp. Remove and strain the liquid through a sieve. Squeeze the pulp to extract all the juice. Pour the strained pandan juce into the coconut cream mix and keep aside.

4) Sift flour, salt and all spice.

5) Beat eggs and sugar together with a whisk until well combined (about half a minute). Do not over beat. Add the coconut cream and pandan mixture and stir to combine.

6) Add the sifted flour mix and using the whisk fold in the flour mix into the mixture until there are no lumps left. Strain the batter using a sieve to remove any lumps.

7) Add the butter into the cake pan. Place the pan into the oven for about 3 - 5 minutes until the butter has melted and starts to brown around the edges. Remove the pan from the oven and swirl the butter around to coat the pan's sides.

8) Then pour the pandan batter into the pan and bake for about 10 minutes. Remove the pan from the oven and sprinkle the sesame seeds on top of the cake. Continue baking for a total of about 35 to 40 minutes or until the centre feels firm and is not wobbly when gently pressed and the edges are a light golden brown and crusty. Allow to cool completely before cutting into wedges and serving.
kuih pandan 3


kuih pandan 4


kuih pandan 5

Monday, June 6, 2011

Thai Red Curry with Beef (Phat Phet Neua)

In Thai cooking, their curries come in two different types of bases, coconut based and water based. You would be surprised to find that the spiciest of the two is actually water based curries. The most typical water-based curry is sour curry (gaeng sohm plah) often prepared with fish. Thai coconut-based curries are numerous and the more well known curries are red, green, yellow, panang and masamam curries.

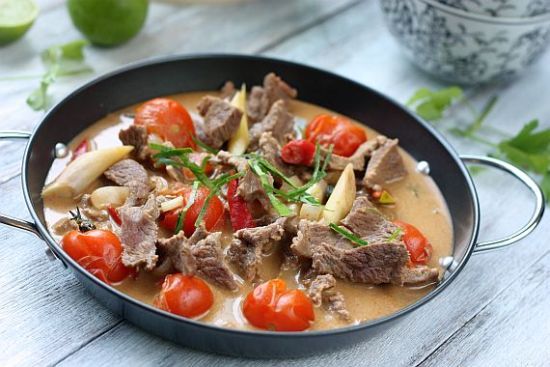
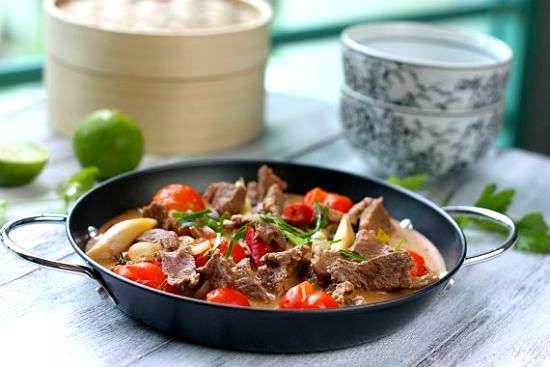
I personally think most people would be more familiar with a Thai green curry dish as compared with a Red curry one. The flavours are quite different. If you are making the paste at home, you can reduce the number of chillies used to get a milder heat. If you like it hot, you can add a couple of bird's eye chillies as well. A variety of meats could be used to cook this curry such as pork, beef, chicken and even roasted duck, cut into bite size pieces.

red curry 2


Thai Red Curry with Beef (Phat Phet Neua)
Serves 4

Ingredients:

300g good quality lean beef, thinly sliced
3 Tbsp cooking oil
4 Tbs packaged red curry paste or homemade(recipe below)
200ml (just under 1 cup) thick coconut milk or cream
1/2 cup of water or stock
8 cherry tomatoes, leave whole
5 peeled shallots, sliced thickly (use can use small onions)
2 lemongrass sticks, use the while part only, thickly sliced
6 kaffir lime leaves, stems removed, thinly sliced
1 fresh red chilli, thinly sliced
Small handful of coriander or chinese celery leaves, roughly chopped

Method:

1) Put the oil into a wok and when it is hot add the red curry paste and fry for 1-2 minutes. Then add half the thick coconut milk and fry for half a minute

2) Add in the shallots, lemongrass, lime leave and red chilli. Stir the fresh spices and then add in the beef.

3) Add in the water or stock and bring to a boil. Cook the curry for about 10 minutes on medium simmer.

4) Add the remaining coconut cream and the tomatoes. Bring to a boil. Season to taste with fish sauce and palm sugar. Cook for a further 4 - 5 minutes. Just before turning off the fire, throw in the coriander leaves and stir it into the curry.

5) Serve hot with steaming white rice.

Red Curry Paste (Nam Prik Gaeng Phet)

1 tsp shrimp paste
1 Tbsp coriander seeds
1/2 tsp cumin seeds
15 dried chillies, deseeded and soaked in warm water
1 stalk lemongrass, white part, finely sliced
2 tsp chopped shallots
1 clove garlic, minced
1 tsp grated galangal
1 Tbsp freshly ground black pepper
2 kaffir lime leaves, sliced
1 tsp kaffir lime zest, finely choppped
1 tsp salt

Method:

Pan fry the shrimp paste until fragrant. Toast the coriander and cumin seeds. Add all the ingredients in the food processor and grind until it becomes a fine paste. Store in the refrigerator. Will keep for about a week.

red curry 1


red curry 3

Thursday, June 2, 2011

Carrot Cake with Cream Cheese Frosting

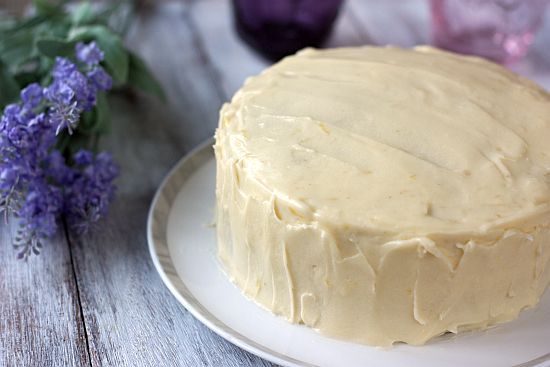
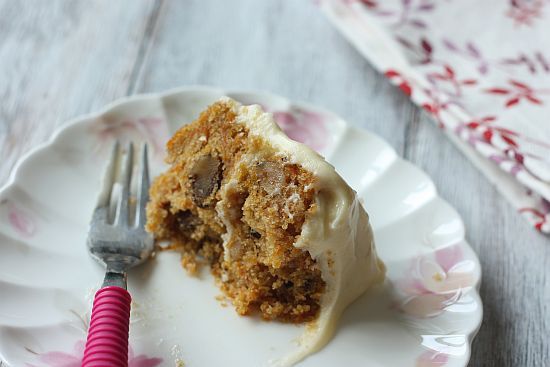
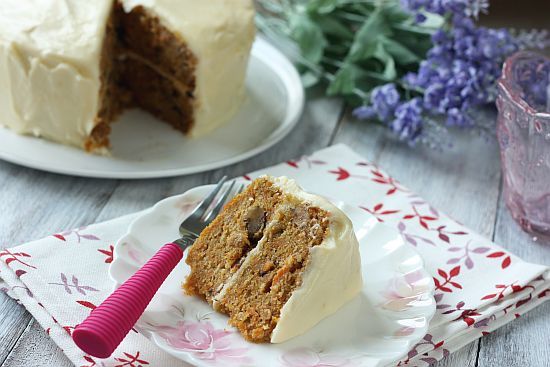
Funny thing is whenever I make a carrot cake and pass it to some of my Chinese friends or colleagues, they would immediately assume it would be a Chinese carrot cake - the kind that uses white radish and is steamed. I guess they are more used to eating this version as compared with the Western carrot cake that uses the carrots that Bugs Bunny would eat!

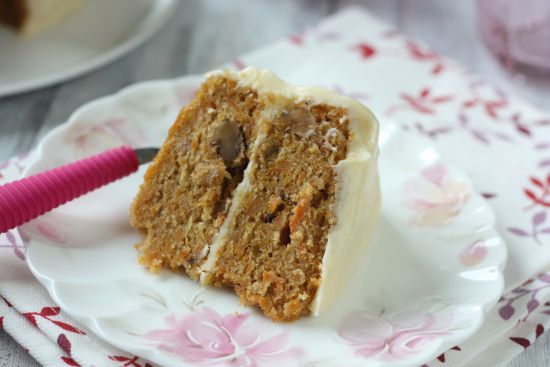
Honestly I like both! There are so many different Western carrot cake recipes out there and in fact I have posted a few already in this blog. I found this recipe from Joy of Baking and have in fact made this three times already. Carrot cakes are extremely moist and full of texture, some recipes even using crushed pineapple. I thought this sounded more of a Hummingbird Cake rather than a carrot cake. This particular recipe deviates from most carrot cake recipes I have come across as it required you to beat the eggs and sugar, similar to a chiffon sponge. The cream cheese frosting is to die for as well. All I can say is that I am definitely going to make this recipe again .... maybe sooner than you think!

carrort cake 3


carrot cake 5


Carrot Cake with Cream Cheese Frosting
Recipe Adapted from Joy of Baking
Serves 10 - 12

Ingredients for the Cake:

1/2 cup toasted pecans, chopped
1/2 cup toasted walnuts, chopped
2 1/2 cups raw carrots, finely grated)
2 cups all-purpose flour
1 tsp baking soda
1 1/2 tsp baking powder
1/2 teaspoon salt
1 tsp ground cinnamon
1/2 tsp nutmeg
4 large eggs
1 1/4 cup granulated white sugar
1 cup vegetable oil
2 tsp pure vanilla extract
1/4 tsp salt

Cream Cheese Frosting:

57g unsalted butter, room temperature
227g cream cheese, room temperature
1 2/3 cups icing sugar, sifted
1 tsp pure vanilla extract
1 tsp finely grated lemon zest(optional)

Method for the Cake:

1)Preheat oven to 350 degrees F (180 degrees C) and place rack in ceor spray two - 9 x 2 inch (23 x 5 cm) cake pans and line the bottoms of the pans with parchment paper.

2) In a bowl whisk together the flour, baking soda, baking powder, salt, and ground cinnamon.

3) In a separate bowl beat the eggs until frothy (about 1 minute). Gradually add in the sugar and beat until the batter is thick and light colored (about 3 - 4 minutes). Add the oil in a steady stream and then beat in the vanilla extract.

4) Add the flour mixture and beat just until incorporated, scrapping down the bowl at least once during the mixing.

5) Then add in the nuts, followed by the grated carrots and fold until it is mixed into the batter.

6) Divide the batter evenly into the two pans and bake for about 25 to 30 minutes or until a toothpick inserted in the center comes out clean.

7) Remove from oven and let cool on a wire rack. After about 10 minutes invert the cakes onto the wire rack, remove the pans and parchment paper, and then cool completely before frosting.

8) To assemble: place one cake layer onto your serving plate. Spread with about half the frosting. Gently place the other cake onto the frosting and spread the rest of the frosting over the top of the cake. If desired, garnish with toasted nuts on the top of the cake. Cover and refrigerate any leftovers.

For the Frosting:

In bowl of electric mixer (or with a hand mixer), beat the cream cheese and butter, on low speed, just until blended with no lumps. Gradually add the sifted powdered sugar and beat, on low speed, until fully incorporated and smooth. Beat in the vanilla extract, and lemon zest.

carrot cake 2


carrot cake 6


carrot cake 4

Monday, May 30, 2011

Farewell to a Faithful Companion

My faithful companion, Benji, passed over to doggie heaven last Friday. He was fourteen and a half years old. In doggie age he is considered really old - in fact older than my dad. In my head I knew he would not have many years left but nothing really prepares you when the time is near and in this case unexpected.

benji 2


Benji at his age has had his fair share of aches and pains. He has had inter-digital cyst on his paws for many, many years. We have taken him to so many vets over a span of four years and none could diagnosed what was wrong with him. Finally we found a vet who told us what that it was inter-digital cyst. Something that is pretty rare in Singapore. The vet said that there was nothing much we could do as by this time his front right paw was swollen until his paw pad were turned upwards. The vet said he could operate to ease the pressure on his paw but it would have meant amputing one of his digits. We were totally against it especially after hearing that the problem would eventually come back again. Benji was already eleven years old by this time. He didn't seem to be in much pain unless the cyst flared up and he would have some open sores on his paws. The sores would disappear in less than a week's time and in-between I would dab tea-tree oil on the open wound to sterilize it.

Last Friday morning, I would as usual give Benji and Milo (my younger shitzu) their morning meals. Benji did not eat much the night before and that particular morning, he didn't have much appetite as well. I gave them a quick treat before leaving, saying my good byes. I was slightly home later than normal timing that evening, arriving home at 7.30pm. Milo greeted me at the door and Benji was asleep (or so I thought at that time) on his cushion. I dumped my bag and some groceries on the dining table and went towards Benji wondering why he had still not moved at all. Upon looking closely I noticed his stomach was not going up and down with breathing motions. I could not help but scream in my head "no, no it can't be". I immediately touched Benji and he felt cold in my hands. I knew then that my faithful companion was gone. He was in a sleeping position on his favourite cushion and I can only hope that he had passed on quietly, without any pain, in his sleep.

benji 3


For a small little dog, Benji was quite a character. He has always been an independent dog, doing his own thing and had a mind of his own. If he was not happy about things he would definitely show it. I remember one time when I was on holiday, I had to put Benji in a pet boarding place. When Benji was sent back to the flat by the boarder upon my return, he absolutely ignored me for the entire day. I think he was showing me his displeasure for being sent away to a strange place.

I am sure wherever my faithful companion is right now, he would be enjoying his after-life and meeting a lot of doggie friends and probably snifing their butts too. Rest in Peace Benji - you have been a faithful friend!

benji 1

Tuesday, May 24, 2011

Red Bean Flower Bun

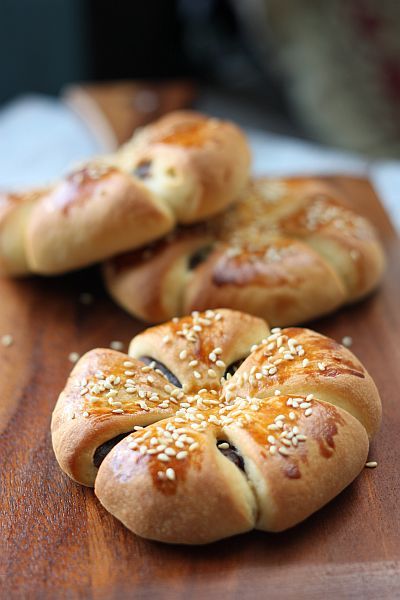
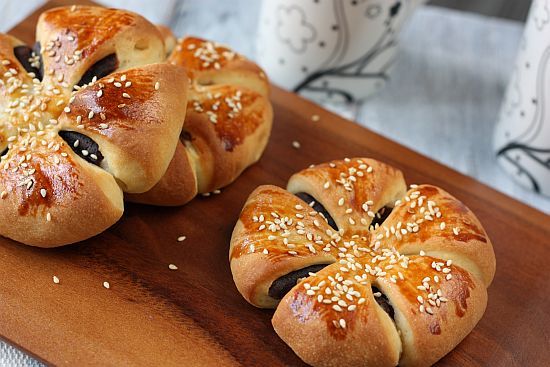
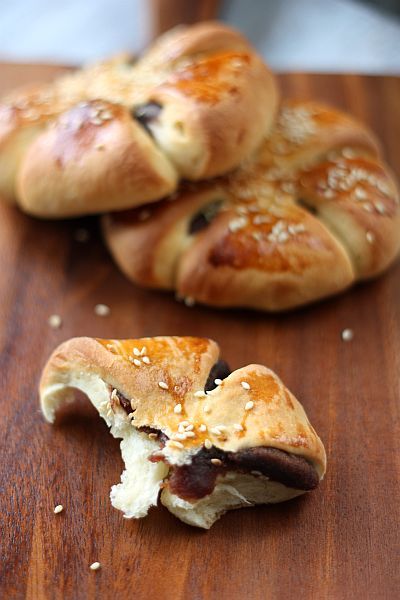
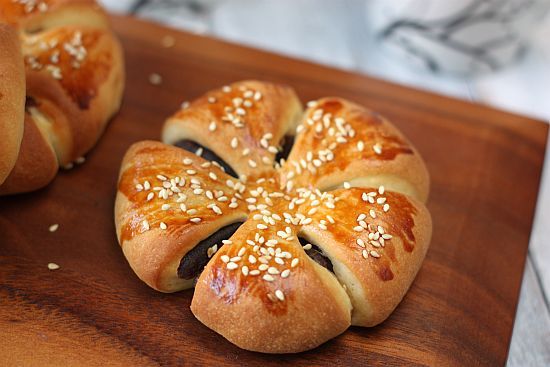
When I first saw these flower buns my first thought was "how pretty they were" and knew immediately that I would love to try my hand at making them. Luckily for me I had some left over red bean paste in the fridge so all I really needed to do was to make the bread dough.

flower bun 2


I really do like making bread especially when I don't have to knead the dough by hand. I leave this job to my trusty KitchenAid (boy am I glad I own one)and it is definitely a breeze! As with any bread recipes, it's not the kneading that takes up your time, it's the rising of the dough. If the recipe requires two rising, then you better set aside at least four to five hours to tackle the recipe. I found this bun to be extremely delicious on the day it was baked. The bread however hardens a bit the next day but if you warm it up quickly in a microwave, it becomes soft again. Altogether a delicious recipe and great for kids who love red bean paste.

flower bun 1


flower bun 3


Red Bean Flower Bun
Recipe Adapted from Happy Home Baking

Ingredients:

143g fresh milk (I used HL low-fat fresh milk)
35g egg (about 1/2 an egg)
25g caster sugar
1/4 tsp salt
250g bread flour
4g instant yeast
38g butter (unsalted)

For the Filing: Store bought red bean paste

Method:

1) Place milk, egg, followed by caster sugar, salt, bread flour and yeast into a large mixing bowl. Using a dough hook knead the mixture for about 12 to 15 minutes on number 2 of your KA. If the dough is still moist, sprinkle with a little bit more bread flour. The dough should be kneaded until it forms a ball and is no longer sticking to the side of the mixing bowl.

2) Lightly oil a separate bowl. Remove dough from the mixing bowl and place in th oiled dough. Coat the dough with the oil and then cover the bowl with cling wrap. Let proof for 60 mins.

3) Remove dough and punch out the gas.

4) Divide dough into 60g pieces and shape into balls. Let the doughs rest and relax for 20 mins. (this ‘relaxing’ time is needed so that the dough will be easier to roll out and shaped). Lightly cover with cling wrap.

4) On a lightly floured surface, flatten one dough into a round disk. Place 35g of red bean paste (rolled into a ball) in the middle of the disk and wrap the filing with the dough. Pinch the joints to ensure that each dough ball is sealed completed.

5) Again, flatten the ball down using a rolling pin. Using a very sharp knife, make deep cuts all the way down around the dough. This will give the bread the flower shape.

6) Brush the top of the bread with a little egg wash and then sprinkle with sesame seeds. Bake in a pre-heated oven of 190C for about 18 - 25 minutes.

flower bun 6


flower bun 4


flower bun 5

Wednesday, May 18, 2011

Satay Chicken

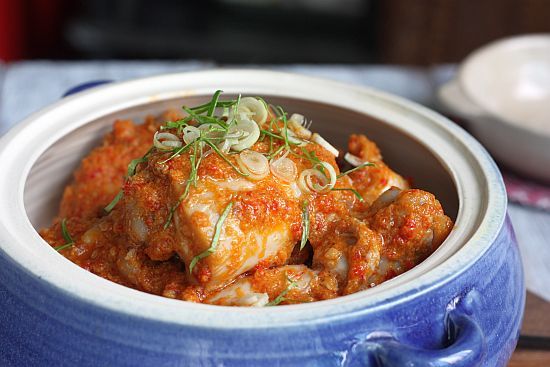
I'm not sure why this particular recipe is called Satay Chicken because it's flavours does not resemble the well known satays. Maybe it is the use of fresh grounded ingredients such as candlenut and lemongrass that gives it kinship to satay. However one thing I do know or what the recipe book tells me, is that this is a Peranakan dish.

Peranakans are the Chinese who immigrated to the Nusantara region and to assimilate themselves into the local culture they had adopted some of the Malay customs. Their food and style of cooking became a blend of Chinese and Malay and thus the birth of Peranakan. Peranakan recipes always uses fresh ingredients and some of their recipes are quite complicated.

In the olden times when the food processor or blender was a rare kitchen equipment, a pestel and motar would be used to pound all the fresh ingredients. In fact till this day, some of the older generation Peranakans would still insist on using the old fashion method to pound the ingredients. They swear that Peranakan dishes taste so much better as the pounding releases the oils and flavours slowly.

satay chix 1


satay chix 4


Satay Chicken
Recipe Adapted from "Female Cookbook Vol 12"

Ingredients:

1.6kg whole chicken, cut into 12 - 16 pieces
3 candlenut
10 dried red chillies
4 fresh red chillies
7 red shallots
1 clove garlic
1/2 tsp shrimp paste
2 stalk lemon grass, the white part only
200 ml thick coconut cream (from packet)
1/4 cup water
3 - 4 Tbsp cooking oil
Salt to taste

Method:

1) Grind the candlenut, the chillies, shallots, garlic, shrimp paste and lemongrass until fine. Keep aside.

2) Heat the oil in a wok or a large pot until hot. Add the grounded paste into the oil, turn fire to medium. Fry the paste until oil starts to seep out and it smells fragrant. This should take about 4 - 5 minutes.

3) Add in the chicken pieces and fry for another 5 minutes.

4) Add 3/4 of the coconut cream and mix it with the 1/4 water. Add to the chicken and stir. Bring to a boil and then turn the fire to low/medium. Cook until the gravy thickens and reduced.

5) Add salt to taste. Then add the remaining coconut cream and continue to cook until the sauce has reduced.

6) I prefer this dish to have very little gravy but you could have more by reducing the cooking time.

satay chix 2


satay chix 3

Saturday, May 14, 2011

Toffee Slices

We have been having scorching weather the last couple of weeks here in Singapore with temperatures in the highs of 26C - 35C. It's really not the heat that gets to you but rather the high humidity levels in it's 90s. It really wears you down and I am so glad that I can take refuge on week days in an air-conditioned office. Although it gets cooler in the evenings, it is still humid and stuffy. Some days there doesn't seem to be any breeze at all to cool things down. I hate to say it but on weekends I would now resort to turning on the air-conditioners which I don't normally do unless I have friends over.

Things are not going to get any better because it has been reported that are at least 100 over "hot spots" in Sumatra, Indonesia. "Hot spots" is vegetation fire and in Sumatra, these fires are done intentionally to clear the land so that new crops can be grown. The Indonesian farmers are mainly from poor families and therefore cannot afford machinery to clear their lands. Thus the easiest and cheapest way of clearing their fields is to set the old crops on fire. Because of the intensity of such vegetation fires, the neighbouring countries such as Singapore and Malaysia suffer from air pollution. As these fires increase, the air quality gets worst and a haze would cloud the skies. At times, you can even sniff a burning smell in the air. I certainly hope we have some intermit rains to dispel this.

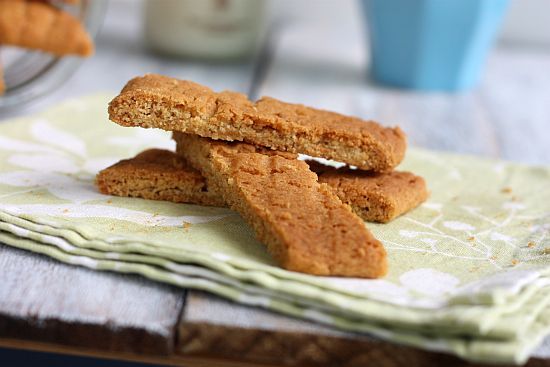
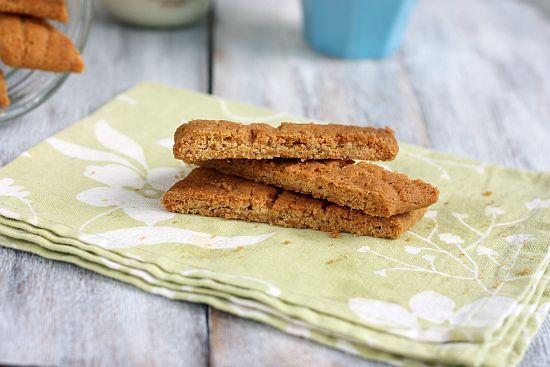
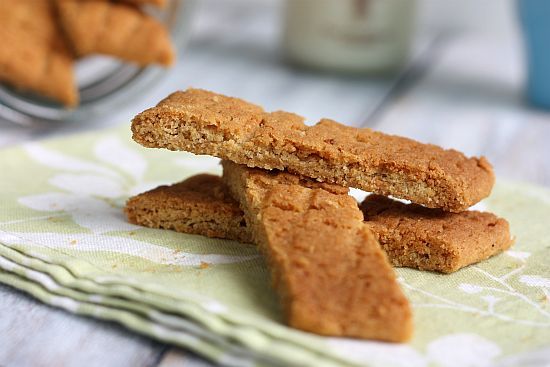
Luckily just before these "hot spots" were reported, I had a chance to play a round of golf at a local country club with a couple of girl friends. The gods must have been smiling on us that day because the weather was superb ... cool, cloudy skies and an occassional breeze. The night before my golf game I happened to bake some cookies and was asked to bring some along for sampling. These cookies are quite addictive with a toffee like flavour and a hint of heat from the ginger. I think they make great give-aways especially around the Christmas holidays.

toffee slice 3


Toffee Slices
Recipe Adapted from “A Piece of Cake” by Leila Lindholm
Makes 25 slices

Ingredients:
100g unsalted butter, softened
40g caster sugar
40g brown sugar (you can use all caster sugar if you do not have brown sugar)
2 Tbsp golden syrup
135g all purpose flour
½ tsp bicarbonate of soda
1 tsp vanilla extract
2 tsp ground ginger
¼ tsp salt

Method:

1) Preheat oven to 175C.

2) Beat butter sugar and syrup until light and creamy.

3) Sift flour, bicarbonate of soda, ginger and salt together. Then add into the butter mixture and incorporate well.

4) Refrigerate the dough for about 20 minutes so that it is easier to manage and shape. Remove and shape into two long logs, spaced fairly apart. The dough will expand whilst in the oven.

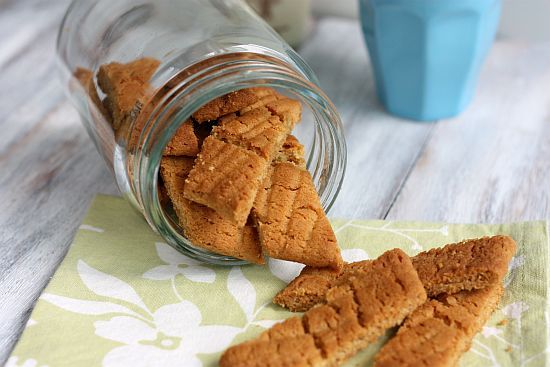
5) Put the logs on parchment line baking trays. Flatten slightly and then score each log with a fork.

6) Bake in center of oven for about 12 – 15 minutes or until golden brown.

7) Let the logs cool a bit before cutting them diagonally. Leave slices to cool completely before storing into biscuit tins.

toffee slice 2


toffee slice 1


toffee slice 4
Related Posts with Thumbnails