Thursday, April 29, 2010

Profiteroles

There is something about profiteroles that makes me want to eat more than I really should. I know I should really restrain myself because of the richness of this dessert, but who can resist.

I love the soft texture of the puffs and the cream inside - more so when it's refrigerated. I remembered when I first tried making profiteroles or cream puffs as I call them. I failed miserably. The puffs ended up being totally "poofed" flat after they had cooled down. They failed where good looks was concerned but in the taste department, they were really not bad. I'm now waiting for durian season to be in full bloom so that I can make some durian puffs ... can't wait!
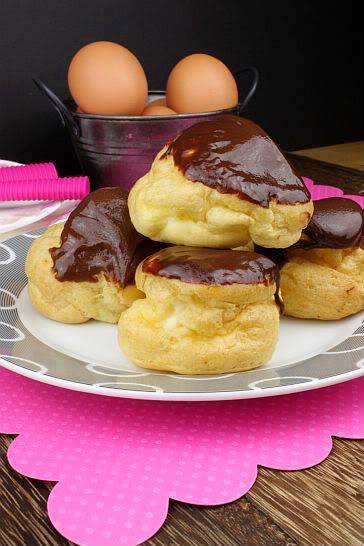
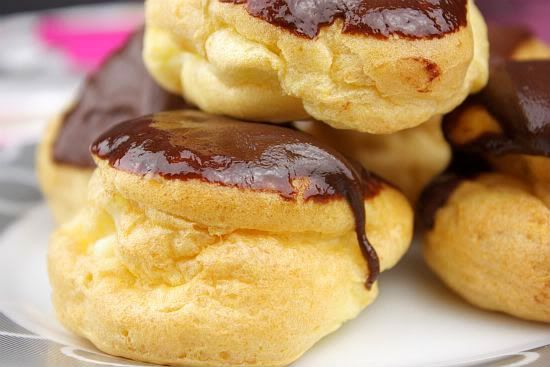
choc puff 1


choc puff 3


Profiteroles
Makes 3 dozen
Recipe Adapted from "Donna Hay’s Modern Classics Book 2"


1 cup (8 oz) water
3 1/2 oz (100g) butter, chopped
3/4 cup flour, sifted
4 eggs
pastry cream
chocolate ganache glaze

Pastry cream
Yields 2 1/2 cups
Recipe Adapted from "Tartine"
* This makes for a lighter pastry cream. If you wish to make a thicker version, just use 2 egg yolks instead of whole eggs


2 cups whole milk
1/4 tsp salt
4 to 5 Tbsp cornstarch
1/3 cup sugar
2 large eggs
4 Tbsp unsalted butter
1 tsp vanilla extract

1) Whisk together the cornstarch, sugar, salt, and eggs in a small bowl until pale (about 2 minutes). Set aside.

2) Slowly heat the milk in a saucepan with the vanilla extract over a low fire until it starts to simmer. Remove from heat.

3) Slowly pour a hot milk over the egg mixture while continuously whisking. Sieve the egg mixture and pour everything back into the saucepan and whisk constantly over medium heat until the mixture thickens, resembling soft peaked whipped cream.

4) Remove cream from heat and add in the cold butter. Stir the butter until it melts. Press a piece of plastic clingwrap directly onto the surface of the custard and let cool to room temperature before refrigerating.

Chocolate Ganache Glaze

8 oz dark chocolate, chopped
6 oz heavy cream

Heat the cream over medium-high heat until just boiling (but not boiling). Pour the hot cream over the chocolate and let sit for a minute. Stir until smooth and velvety.

To Make the Puffs:

1) Preheat oven to 400°F.

2) Place water and butter in a saucepan over low heat until the butter is melted and the liquid begins to simmer. Toss in the flour and stir vigorously with a wooden spoon until the mixture is smooth. Stir over low heat until the dough begins to pull from the sides of the pan.

3) Remove from heat and let cool for about 3 - 4 minutes. Then beat in the eggs one at a time, stirring after each addition until the egg is completely incorporated into the dough. Fill a piping bag with the dough mixture and pipe or drop approximately 3 teaspoons of the mixture onto parchment-lined baking sheets.

4) Bake for about 25 to 30 minutes or until the puffs turn golden. Remove from oven and place onto wire rack to cool. Use the end of a sharp knife to prick the sides of the puff to allow the steam to escape. Let cool completely before filing.

To Assemble:

Fill a piping bag with the pastry cream and push the pastry tip through the base or side of the profiterole. Squeeze enough filling into the pastry to fill it. Dip the top of each profiterole in the chocolate glaze and allow to set. Once assembled, they are best consumed within 3 hours.
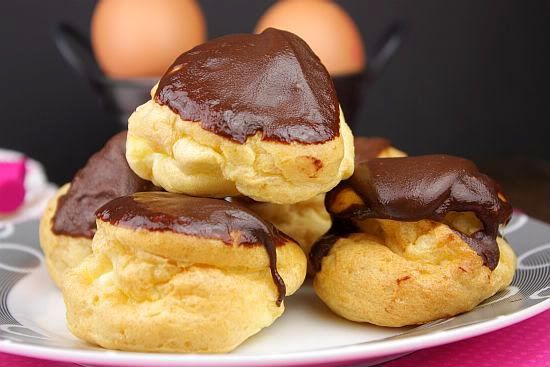
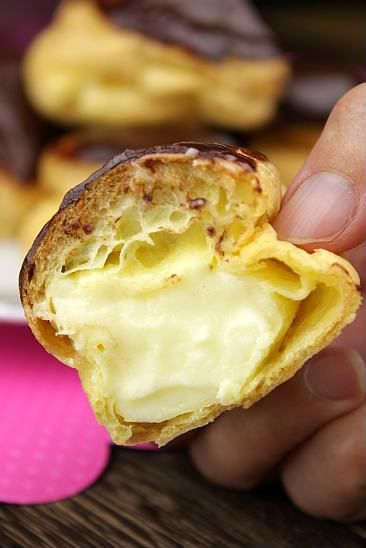
choc puff 2


choc puff 4

Saturday, April 24, 2010

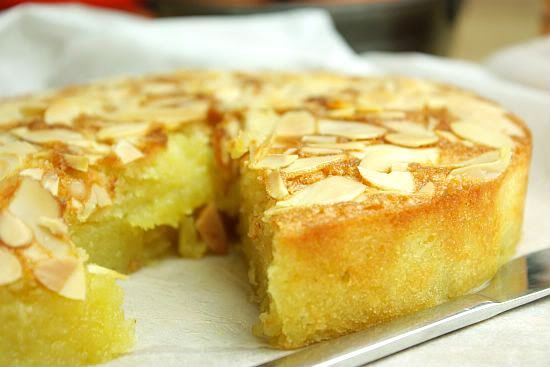
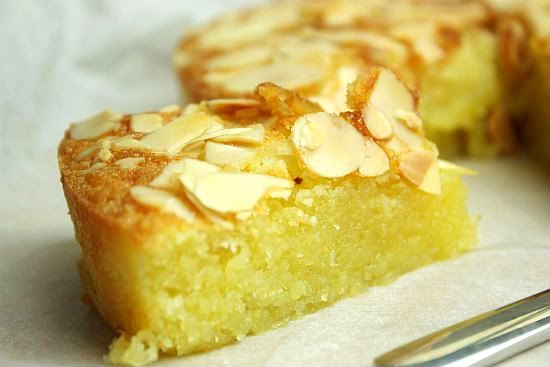
Buttery Almond and Coconut Cake

When I borrowed Mix & Bake by Belinda Jeffrey from the library a while back, I tried out a few of her recipes. I liked the book so much that I have now placed an online order through Amazon and waiting for it's arrival.

I was intrigued by this particular recipe because it is gluten free. I have made very few gluten free cakes so was interested to try it out. I loved the picture of the cake in the book and the use of almond and coconut sounded so delicious. This is one of those recipes that is so easy. No mess, no need to take out your mixer and so few utensils to wash up. I love recipes like this.

The smell of the cake being baked in the oven was heavenly. As some of you may know, my hubby who is not a "cake" person. But surprisingly he kind of like this cake and even had one whole slice to himself. Maybe because it didn't use flour at all, thus making the cake extremely moist. It's texture actually resembled Kuih Bingka (this is a local Malaysian baked dessert made of tapioca). This is definitely a keepsake recipe.


Almond co 2


Buttery Almond and Coconut Cake
Serves 8 – 10 (Gluten Free)
Recipe Adapted from “Mix & Bake by Belinda Jeffrey”


Ingredients:

180g almond meal (finely ground almond)
70g dessicated coconut
1/4 tsp salt
160g fine castor sugar
4 eggs
1 1/2 tsp vanilla extract
200g unsalted butter, melted and cooled
3 Tbsp almond flakes

Method:

1) Preheat oven to 180C. Butter a 24cm shallow cake tin and line the base and sides with buttered parchment paper. Dust the tin lightly with flour (or rice flour if avoiding wheat), shake out access and set aside.

2) Put the almond meal, desiccated coconut, salt and sugar into a medium-sized bowl and whisk together for a minute. In a separate bowl, whisk together the eggs and vanilla extract until thoroughly mixed, then add in the melted butter. Mix together until well incorporated.

3) Tip the butter mixture into the almond mixture and stir together. You will notice that the batter is quite liquid as it does not have flour in this recipe.

4) Scrape the batter into the prepared pan and spread evenly. Scatter the almond flakes over the top.

5) Bake for about 40 mins or until the top of the cake springs back slowly when you press it gently. Cool the cake in the tin on a wire rack.

6) Once the cake is cooled, take out from pan and remove the paper This cake can be kept in a tightly sealed container in room temperature for 2 days. Alternatively you can keep in fridge for 1 week or freeze for up to 3 weeks.


Almond co 1


Almond co 3

Tuesday, April 20, 2010

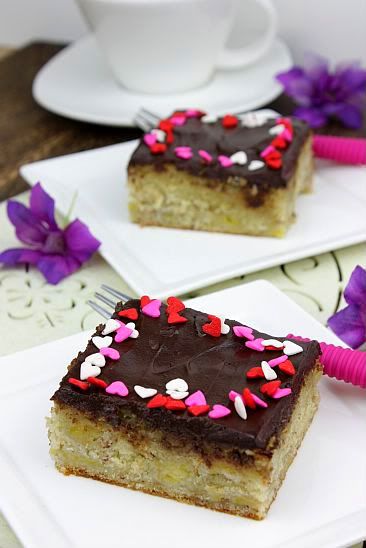
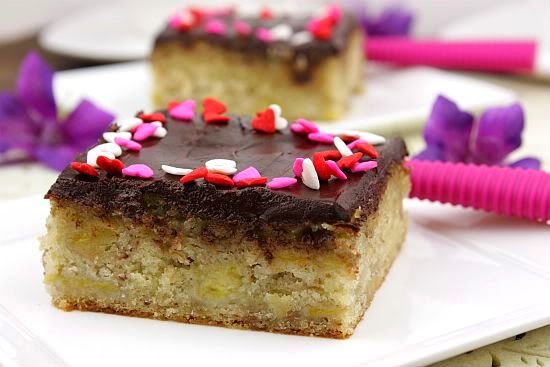
Banana Cake with Chocolate Frosting

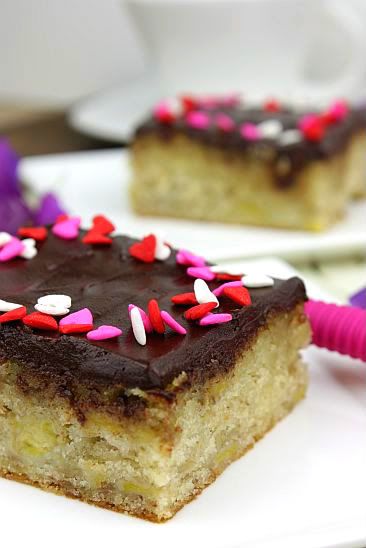
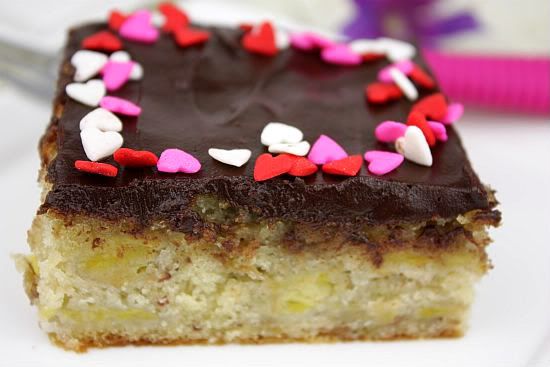
Who could say no to a banana cake with chocolate frosting? I think most of us would not pass this on and it was not surprising that it was a favourite vote for this month's baking challenge with the Cake Slice group.

For me a good banana cake uses very ripe bananas and nothing beats using the local Malaysian type which is called "pisang emas". Translated this means golden bananas. They are small and when ripe, are extremely, extremely sweet and flavourful. I had asked my hubby to buy a ripe bunch for me so that I could tackle the cake over Saturday. Unfortunately he bought one that was hardly ripe at all - it was still very green. So to ripen it, he left it hanging outside in the yard and that forced me to push my baking schedule to Sunday instead. Luckily by Sunday it was more or less ripe and I was able to use the fruit after all.

I halfed the recipe and baked it in a rectangle cake pan, thus achieving a slice cake version. In fact that had been my intention from the beginning. However I omitted using the chocolate frosting that came with the original recipe. I had some left over sour cream chocolate fudge frosting from another cake and I used the remaining of this frosting instead. Overall the cake was pretty nice and extremely soft.

Banana cake 3


Banana cake 2


Banana Cake with Chocolate Frosting
(Recipe from Southern Cakes by Nancie McDermott)

Ingredients for the Cake:

2 cups all purpose flour
1 tsp baking soda
1 tsp baking powder
¼ tsp salt
¾ cup (1½ sticks) unsalted butter, softened
1½ cups sugar
3 eggs, lightly beaten
1 tsp vanilla extract
½ cup buttermilk*
1½ cups mashed ripe banana

Chocolate Frosting

½ cup (1 stick) butter
1/3 cup cocoa powder
1/3 cup evaporated milk or half-an-half
4 cups sifted confectioners sugar
1 tsp vanilla extract

* If you don’t have buttermilk you can make your own by stirring 1½ teaspoons of vinegar or lemon juice into ½ cup of milk and leaving for 10 minutes.

Method for the Cake:

1) Heat the oven to 350F. Grease and flour two 9 inch cake pans. Combine the flour, baking soda, baking powder and salt in a medium bowl and stir with a fork to combine well.

2) In a large bowl, combine the butter and sugar and beat well, about 2 minutes. Add the eggs, one by one, and then the vanilla. Beat well for 2 to 3 minutes, scraping down the bowl occasionally until you have a smooth batter.

3) Using a large spoon, stir in half the flour just until it disappears into the batter. Stir in the buttermilk and then the remaining flour the same way. Quickly and gently fold in the mashed banana and then divide the batter between the 2 cake pans.

4) Bake at 350F for 25 to 30 minutes until the cakes are golden brown, spring back when touched lightly in the centre, and begin to pull away from the sides of the pan.

5) Cool for 10 minutes in the pans on wire racks. Then turn out onto the racks to cool completely.

6) To make the frosting, combine the butter, cocoa and evaporated milk in a medium saucepan. Place over medium heat and bring to a gentle boil. Cook, stirring often for about 5 minutes, until the cocoa dissolves into a dark shiny essence. Remove from the heat and stir in the confectioners sugar and vanilla. Beat with a mixer at low speed until you have a thick smooth frosting.

7) To complete the cake, place one layer, top side down, on a cake plate and spread about 1 cup of frosting evenly over the top. Cover with the second layer placed top side up. Spread the rest of the frosting evenly first over the sides and then covering the top of the cake.

Banana cake 1


Banana cake 4

Sunday, April 18, 2010

Kuih Pie Tee aka "Top Hats"

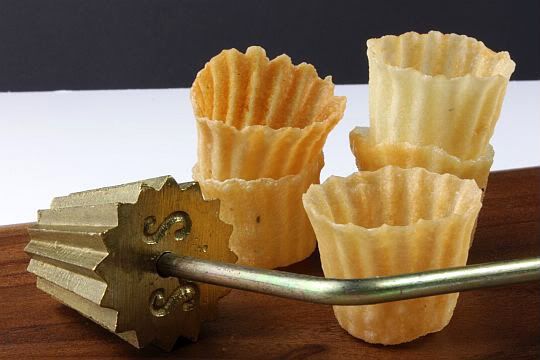
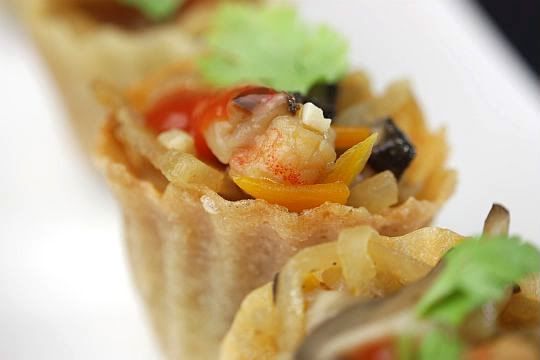
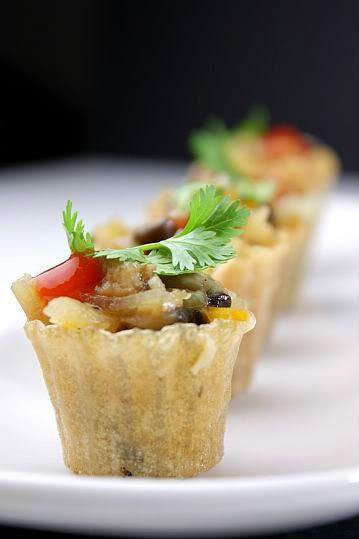
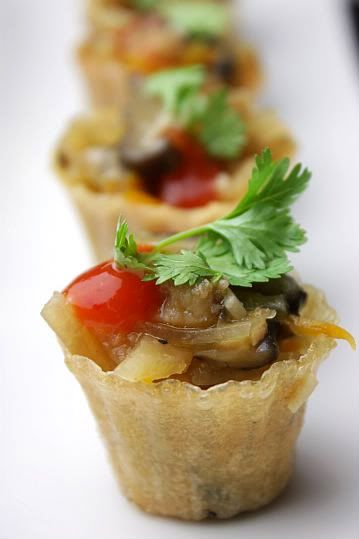
If you are not familiar with this snack, you'll probably wondering what is Kuih Pie Tee or "Top Hat". It is a very popular Malaysian Nyonya snack dish, particularly so in Malacca (a state in Malaysia which is famous for it's Nyonya cuisine). It consist of a crispy tart-like shell which has a vegetable/seafood filing. The shell itself looks like an inverted top hat, thus earning it's nickname of "Top Hat".

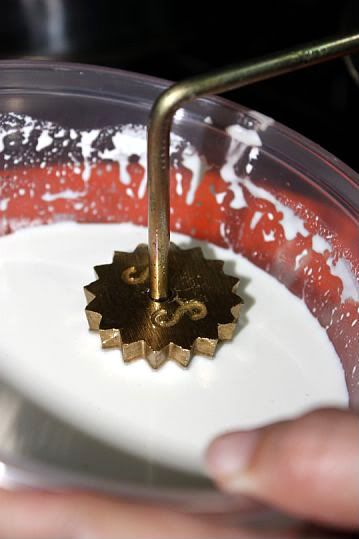
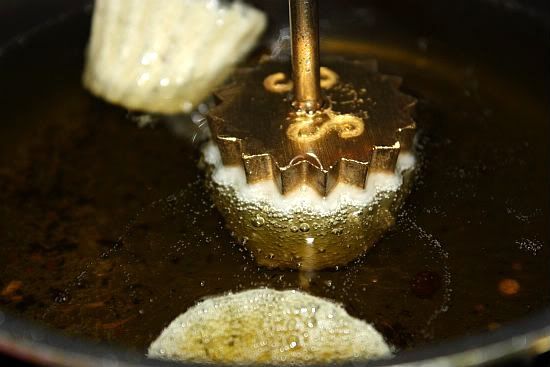
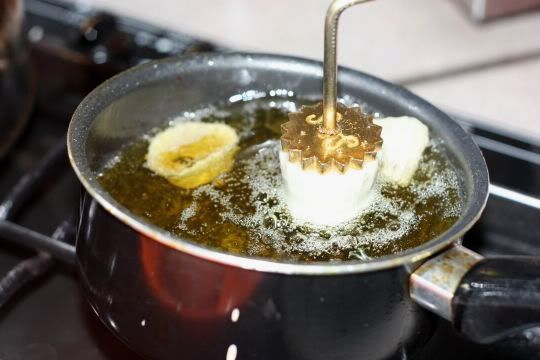
I have read from Bee of Rasa Malaysia that making this delicious snack was no easy feat. I guess I was not convinced and dived head-on into making some kuih pie tee over the weekend. I was already forwarned that frying the casings would take a long time. And after attempting this recipe, I can attest to having a sore back and tired legs. My initial frying resulted in about a dozen spoilt casings due the oil being too hot or not hot enough, I released the cases too early from its mould, the batter coating was too thin or the cases stuck completely to the mould.

Later on I sort of got a hang of things and the cases came out pretty nicely. But after about three plus hours of frying the cases, I finally threw in the towel and made do with what I already had made. The kuih pie tees were delicious though but I told my hubby that "never again will I do this". I'd rather pay for pre-made ones even though they are expensive. I guess the saying of "no pain, no gain" really rings through with this recipe.


Pie tee 4


Pie tee 1


Pie tee 2


Pie tee 3


Kuih Pie Tee aka "Top Hats"

Ingredients for the Pie Tee Cases:

180gm rice flour
50gm corn flour
50gm plain flour
1 egg
1/4 tsp baking powder
3/4 tsp salt
1 egg
400ml water

Ingredients for the Filling:

1 1/2 cup turnip or jicama (sengkuang), julienned
1/2 cup carrot, julienned
1/3 cup thinly sliced shitake mushroom
2 cloves garlic, minced
2 Tbsp dried shrimp, slightly pounded
5 medium fresh prawns, shelled, deveined and chopped
1 Tbsp of oyster sauce
Salt, light soy sauce and white pepper powder to taste

For Garnishing:

Cilantro, finely chopped (optional)
Shallot crisp (optional)
Bottled chilli garlic sauce

Method for the Cases:

1) Mix all ingredients a bowl until all flour is incorporated, whisk the batter until smooth. Sieve the batter and leave it to stand for one hour.

2) Heat oil in a wok or a small saucepan. Once the oil is hot, lower the fire.

3) Place the pie tee mould into the oil to get it hot. This is to ensure that the batter will stick to the mould easily. Do not overheat the mould.

3) Dip the oiled mould to about 90% of its height into the batter. Ensure that it is evenly coated. Shake the mould slightly to drip off excess batter.

4) Place the mould with batter into the oil and hold on to it for a few seconds. Make sure that the oil does not sizzle or your batter will puff up.

5) Once the batter is semi set release the case from the mould by jiggling the mould up and down or use a fork to loosen the edges. Hold on the casing with the mould for a while to make sure that the casing hardens up enough to retain its shape. If you release it too early from the mould, the case will collapse and flatten out.

6) Once released, allow the case to deep fry until golden brown. Remove from oil and allow to cool completely. Store in air-tight container. The cases should be consumed within a day or two. If the casing has soften slight, you can pop them into the oven to crisp them up.

7) Dip the empty mould back into the oil to heat up again before starting on the next casing.

8) Fry as many cases as you want. The balance batter can be refrigerated (store in air-tight container) and used the next day.


Pie tee 5


Pie tee 8


Method for the Filing:

1) Add some oil into a wok and fry the dried shrimp until fragrant. Careful not to burn it. Remove from wok.

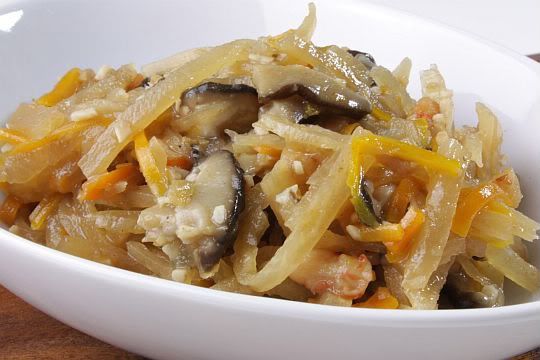
2) Add a bit more oil and fry the chopped garlic until light brown. Add in the vegetables, the fried dried shrimp and fresh chopped shrimp. Add in the oyster sauce and 1/4 cup of water to the vegetables and cook until soften. Season to taste.

3) To serve, fill the cases with the filling, top with garnishing and serve with chili sauce.


Pie tee 7


Pie tee 6

Wednesday, April 14, 2010

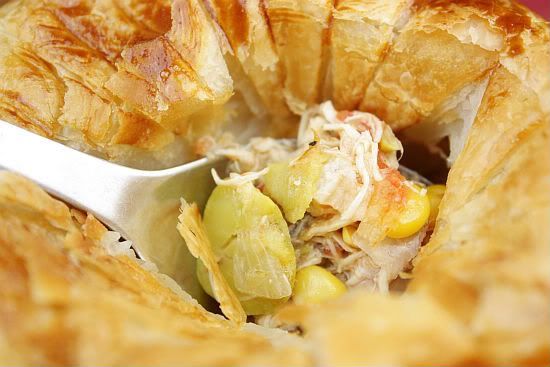
Brunswick Stew - A Southern Classic Presented by Daring Cooks

The 2010 April Daring Cooks challenge was hosted by Wolf of Wolf's Den . She chose to challenge Daring Cooks to make Brunswick Stew. Wolf chose recipes for her challenge from The Lee Bros. Southern Cookbook by Matt Lee and Ted Lee, and from the Callaway, Virginia Ruritan Club.

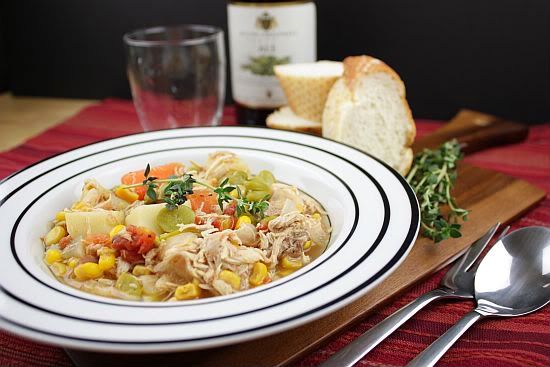
Now what is a Brunswick Stew (that's me asking myself)? According to Wikipedia, Brunswick Stew essentially resembles a very thick vegetable soup with meat. The key distinguishing factor between soup and Brunswick stew is the consistency. Brunswick stew must be thick; otherwise, it would be vegetable soup with meat added. Most variations have more meat and vegetables than liquid. It further adds that recipes for Brunswick stew vary greatly but it is usually a tomato-based stew containing various types of lima beans/butter beans, corn, okra, and other vegetables, and one or more types of meat. The authentic Brunswick Stew uses squirrel or rabbit meat, but in today's terms chicken, pork, and beef are probably the most common types of meats used.

According to one story, Brunswick stew was named for Brunswick County, Virginia. Apparently, in 1828, Dr. Creed Haskins of the Virginia state legislature asked for a special squirrel stew from "Uncle Jimmy" Matthews to feed people attending a political rally. Brunswick, Georgia residents claim their stew is the original. It's just as likely the stew -- or at least a very similar version -- was created much earlier. With the original ingredients of game (usually squirrel) and corn, and long simmering over an open fire, it's typical of early native dishes.

I can honestly say I had no clue what to expect from this recipe at all. I've had stews before but one such as this, NO! From what I had read in the Daring Cooks forum, the stew should be so thick that a wooden spoon could stick up straight if it was stuck in the middle of the pot. The stew was very flavourful and robust. In fact it tasted even better the next day but I think I'll be sticking with stews I'm more familiar with.


brunswick 1


brunswick 3


brunswick 4


Brunswick Stew
Serves 5 - 6
Recipe Adapted from "The Williamsburg Cookbook"


Ingredients:

1 medium sized chicken (about 1.5kg or slightly more)
2 medium onions, chopped
2 tbsp bacon bits (fried until crispy, keep 2 Tbsp of the oil)
1 can of stewed tomatoes
1 medium tomato, remove the seeds/pulp and cut into 1" cubes
1 cup broad beans (I couldn't find lima beans)
2 medium potatoes, diced into 1" cubes
1 can corn kennels
1/2 cup baby carrots, cut into 1" length
1 Tbsp Worcestershire sauce
2 dried bay leaves
2 tsp fresh taraggon
Salt and black pepper to taste

Method:

1) Cut chicken into pieces, remove the skin. Blanch the chicken pieces in a pot of boiling water for about 2 minutes to remove some of the scum.

2)Throw away the water and rinse the chicken quickly. Add 2 quarts of water into the pot. Throw in the bay leaves. Simmer the chicken until the meat can be easily removed from the bones - this should take about 1 1/2 hours (or slightly less).

3) Once chicken is soft, take out from the pot and debone it. Shred the chicken meat and set aside.

4) Add all the raw vegetables to broth and simmer, uncovered, until vegetables are cooked.

5) Finally add in the shredded chicken, taraggon, seasoning and bacon oil. Simmer for about 2 minutes and your stew is done.


brunswick 2


brunswick 5

Sunday, April 11, 2010

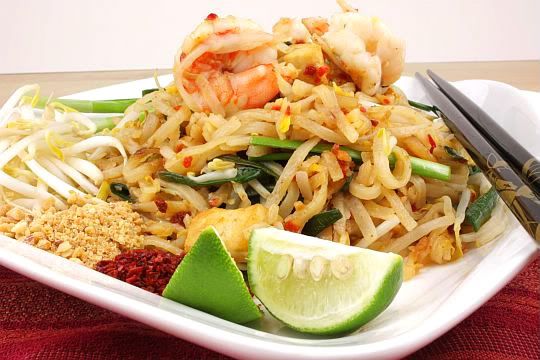
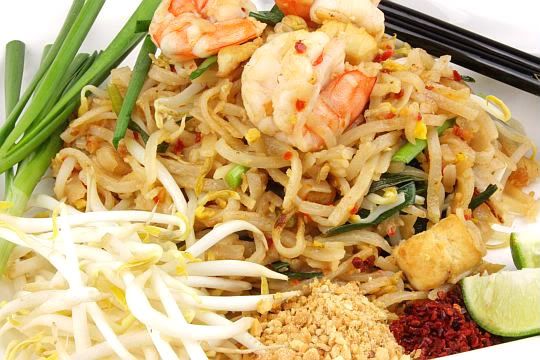
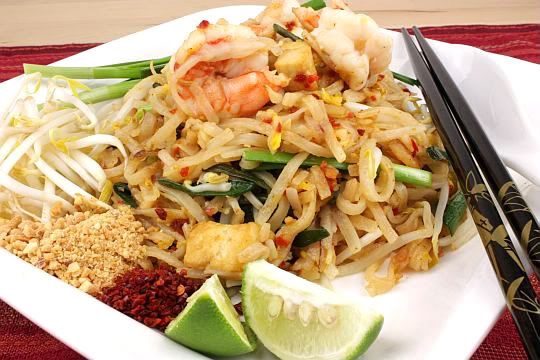
Pad Thai Goong

When it comes to cooking Thai food at home, I guess my repetoire is kind of limited. So far it's been tomyam and green or red curries. So it must have been coincidence when we had Thai food for dinner a couple of weeks back that I decided I would try my hand at making pad thai. I've seen on cooking programs how easy it is to make this dish and the important ingredient is the tamarind sauce. A few helpful hints I had discovered is never to cook large batches of this noodle. Also do not cook the noodles for too long otherwise it becomes soggy. And make sure that your heat is on medium high. If it's your first time making pad thai, a good source for reference would be Chez Pim's "Pad Thai for Beginners .

Pad thai 3


Phad Thai Goong
Recipe Adapted from "Lemongrass and Sweet Basil" by Khamtane Signavong
Serves 4


Ingredients:

200g medium rice stick noodles
2 Tbsp vegetable oil
3 tsp dried shrimps
12 medium-sized prawns
3 eggs, lightly beaten
4 Tbsp cubed firm tofu (beancurd)
4 Tbsp pickled radish
80g beansprout, extra 20g for garnishing
12 chinese chives, chopped into 3" lengths
2 Tbsp ground roasted peanuts (extra for garnish)
1 large lime, quartered, for garnishing

For the Tamarind Sauce:

4 Tbsp palm sugar
4 Tbsp fish sauce
4 Tbsp tamarind juice
2 tsp chilli powder, or to taste

Mix all ingredients in a bowl. Microwave for about 1 to 2 min to dissolve the palm sugar.

Method:

1) Soak the rice noodles in warm water for 15 mins, then remove and drain.

2) Half all the ingredients to cook the noodles in 2 batches.

3) Heat the oil in a work, add the dried shrimps and cook until golden brown. Add the king prawns and stir until cooked, about 1 1/2 mins.

3) Then add the tofu, pickled radish and tamarind sauce. Push the noodles to one side and pour in the egg. Once the egg is half cooked, break it up and add it to the noodles. Add in the beansprout and stir well until the noodles are almost cooked.

4) Add in the chives and stir quickly. Dish out the noodles on a plate. Garnish with raw beansprout, ground toasted peanuts, a tsp of chilli powder, a tsp of sugar and a quarter lime.

Pad thai 2


Pad thai 1

Thursday, April 8, 2010

Strawberry Custard Shortbread Tart

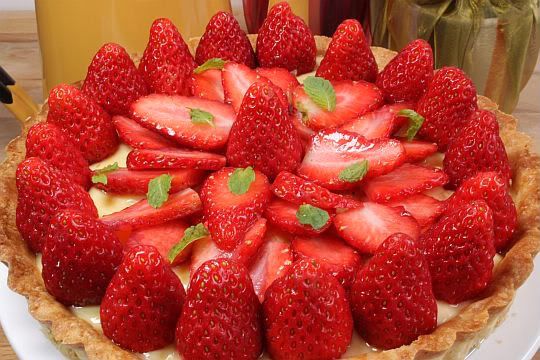
I really could not help myself and I do apologize for posting yet another strawberry tart recipe in less than a month. But who can say no to such juicy, red strawberries which were on sale. I bought two punnets over the weekend, without much thought on what I would do with them first.

Conveniently though I already had a frozen, unbaked tart shell in the freezer (which I think had been there for quite a while now). I decided I would do something simple, so simple that I resorted to using instant custard filing for the tart filing. Usually I would make my own pastry cream, but heh if "short-cuts" taste equally as good and really saves you a heck of a time, I say why not!

Strawberry2 1


Strawberry2 3


Strawberry Custard Shortbread Tart

For the Shortbread Pastry
Makes enough for three 9" tart

Ingredients:

300g unsalted butter, softened
60g granulated sugar
125g confectioners' or icing sugar
1 tsp salt
2 eggs
560g cake flour
** Make the tart shell a day ahead

Method:

1) Preheat oven to 325F or 160C.

2) In the mixing bowl of a food processor, cream the butter. Mix in the granulated sugar, the confectioners' sugar and salt.

3) Add the eggs, one by one. Pour in the flour and mix thoroughly. Form the dough into a ball, cover with plastic wrap and refrigerate for about an hour.

4) Roll out the dough into a round shape, about 1/4" thick. Line the baking pan with the shortbread pastry and blind-bake for 25 mins. Remove the parchment and bake the tart for another 5 - 8 mins until it is golden brown.

5) Remove from oven and let it cool completely before adding in the filing.

To Assemble the Tart:

1) Using 1 packet of instant custard mix, prepare as per instruction. The cooked custard should be about 600ml, sufficient to fill a 9" tart pan. Sieve the cooked custard into a bowl and place a clingfilm directly onto the surface of the custard. This will prevent a skin from forming. Leave to cool slightly before pouring it into the baked tart shell.

2) Place the filled custard tart into the refrigerator and let it set for about 2 hours.
2) Use about 2 punnets of ripe strawberries for decoration. Just before serving, decorate surface of tart with either whole or sliced strawberries. For added colour, sprinkle tart with some fresh mint leaves.

Strawberry2 2


Strawberry2 4

Saturday, April 3, 2010

Hippo in a Spa

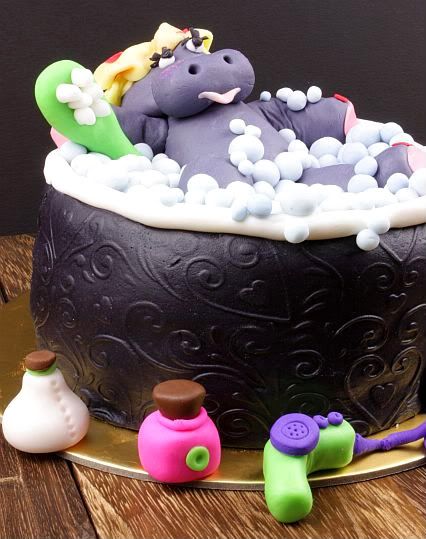
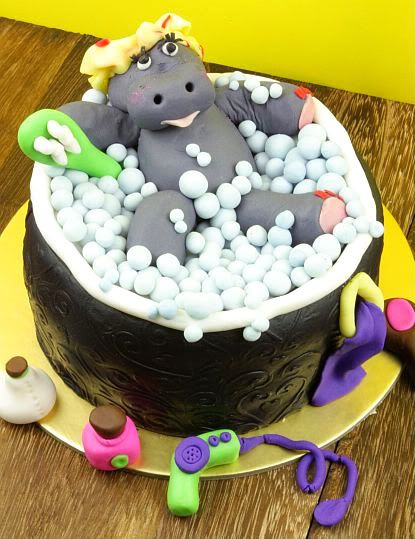
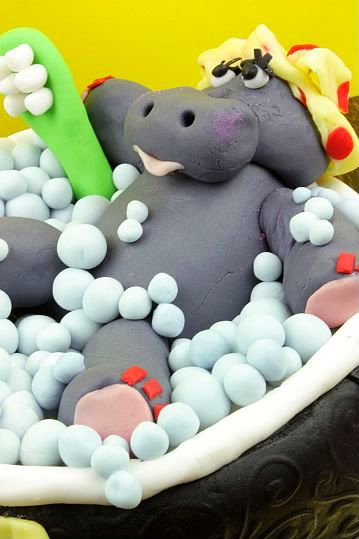
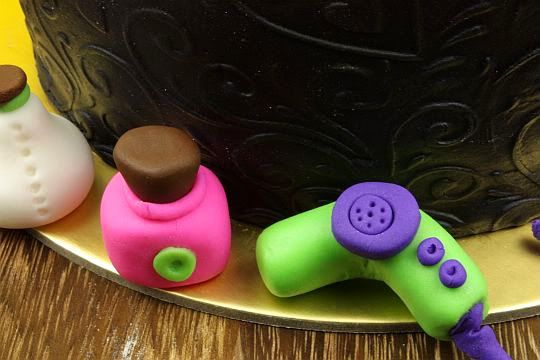
It has been a while since I have made a fondant cake. I guess it's purely due to lack of time over the weekends. Any way I told myself that over last weekend I would get down to doing one. This particular fondant design comes directly from Fun & Original Character Cakes by Maisie Parrish . I loved the design and thought it was so totally fun to make this cake.

The cake itself which consisted of a three layer 6" fudgy chocolate cake was baked last Thursday night. Also I made some home-made marshmallow fondant on Friday night and stored it in an airtight container. My other half had to work on Saturday (he usually doesn't have to) so it was good that I had the whole apartment to myself to tackle this project. I decided to set up my work-bench in the living cum dining room, putting out my the tools and other items I would have needed - the reason for this is because my kitchen is really small and does not have enough counter-top space. In situations like this I would usually try not to make too much of a mess when working with fondant and icing sugar otherwise the pesky ants will be swarming over everything in the apartment. The weather last Saturday was kinda humid too and I thus ended up turning on the air-conditioner (hmm .... a little bit of luxury once in a while) whilst working. In total this project took me about 5 hours to complete. And this included trimming and crumb coating the cake with white chocolate buttercream. You can image how excited I was when the whole cake came together. I was thoroughly, thoroughly pleased with the end result.

Anyway it's a long weekend here in Singapore and probably in your own country as well. So I wish you and your family a great weekend, Happy Easter and a good week ahead.


Fudgy Chocolate Cake
Recipe Adapted from "Quick Mix Cakes"

Ingredients:

185g unsalted butter, chopped at room temperature
280g castor sugar (reduced from original recipe)
3 eggs
225g self-raising flour
60g cocoa powder
1 Tbsp of instant coffee powder dissolved in 250ml hot water. Leave aside to cool completely

Method:

1) Grease a deep 23cm round cake pan, line base and side with baking paper

2) Combine all ingredients in a mixer bowl. Beat on low speed until ingredients are combined. Then beat on medium speed until mixture is smooth and changed in colour (about 3 - 4 minutes).

3) Spread mixture into prepared pan and bake in 180C for about 45 - 50 minutes. Check and if still moist in the center,bake for another 5 - 10 minutes.

4) Stand for 5 minutes before turning onto wire rack to cool.

5) Frost with your favourite frosting once cake is totally cool.


Thursday, April 1, 2010

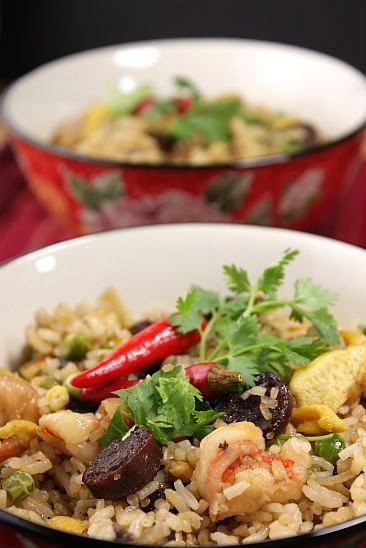
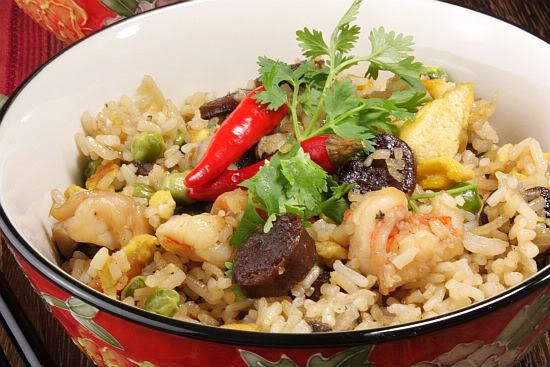
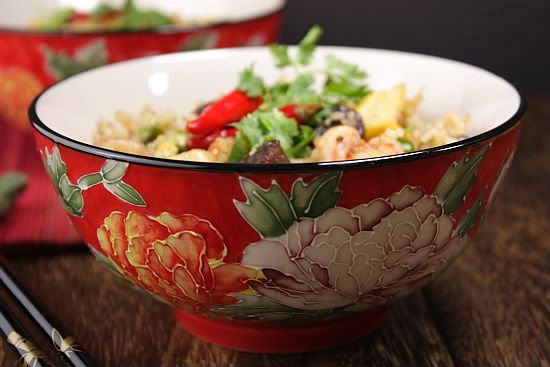
Lap Cheong (Chinese Sausage) Fried Rice

Chinese fried rice has to be everyone's favourite and it certainly is on our menu. I made sure I cooked extra white rice the night before and kept the left over in the fridge. That's because I already had the intention of making fried rice for our Sunday dinner. I would usually cook fried rice a few hours before actual dinner time and then warm it up in the microwave. That way I'm done with most of the washing up and have a more relaxed Sunday evening.

There are so many versions of fried rice and I think every country in Asia probably has it's own local version. Thailand has it's pineapple fried rice, Hong Kong has the salted fish fried rice and of course Indonesia has it's "Indonesian nasi goreng". I'm not sure what version this particular one is but I usually add whatever I have handy into my fried rice. This time round I used some lap cheong which I had in my freezer. Gosh I do believe they have been inside there for at least 4 months now. Quick tip, it's always best to use overnight rice when making fried rice.

LC rice 1


Lap Cheong (Chinese Sausage) Fried Rice
(Serves 3 - 4)

Ingredients:

4 cups overnight rice
1 1/2 Tbsp soya sauce
1/2 tsp salt
1 tsp sesame oil
1 tsp white pepper powder
3 pieces of lap cheong, sliced thinly
10 medium size prawns, shelled, deveined and sliced in half, lengthwise
1 cup frozen peas
8 shitake mushroom, diced into cubes
4 Tbsp cooking oil
1 medium onion (diced)
3 eggs, lightly beaten, season with a dash of soya sauce and white pepper
Chinese cilantro for garnish

Method:

1) Heat up a wok (or a deep frying pan) with 2 Tbsp oil. Add the egg all at once and swirl it around. Leave to set around the edges and then break it up into pieces. Cook until lightly brown and set aside.

2) Add the remaining 2 Tbsp of oil to the wok. Add the lap cheong and fry on medium fire until fragrant and some oil comes out from the sausages. Then add in the diced onion and fry about 2 minutes.

3) Add the prawns, peas and mushroom and fry until about 80% cooked.

4) Then add in all the rice. Add in the seasoning and fry the rice for another 2 minutes. Finally add in the cooked egg and fry for another minute. Taste and add more seasoning if required.

5) Serve the fried rice warm with some chopped chinese coriander and fried shallots.

LC rice 3


LC rice 2
Related Posts with Thumbnails