Saturday, October 31, 2009

Chilli Crabs (Malaysian Style)

I've only ever cooked crabs many years ago and have not made a crab dish ever since. In Singapore crabs are usually bought live as it would be at its freshest just prior to cooking. The first time I bought the crabs, I really had no idea on how to kill them. It seemed quite gruesome to kill something that is still alive. So what I did was to stick them in the freezer. To me it seemed to be a much more humane method.

The supermarket near my apartment has recently started to sell live seafood. So when we were there buying some fresh produce we asked one of the staff whether they could kill live crabs for us. And the answer was yes. So the week after we purchased one large size mud crab and had it killed. I then placed the crab pieces into the fridge when I got home to be cooked later in the evening for our dinner. Did you know that several versions of Chilli crab recipes exist in Asia? I guess the most popular one would be the Singapore Chillie Crab which has now become an icon to the country. Every single tourist visiting Singapore will definitely not miss out on tasting this national dish. However this version which I had chanced upon happened to be a version from my own country - Malaysia. It is slightly different from the chillie crabs that I have eaten in Singapore but this particular version had a distinct flavour on its own. Well for one, my hubby really enjoyed it! It says quite a bit already as he is not one who likes "fighting with his food" - that's how he terms eating crabs with fingers, that is.


Chillie Crab (Malaysian Style)
Recipe Adapted from Rasa Malaysia

Ingredients:

1 Dungeness or Mud Crab (about 1 kg in weight)
1 sprig of coriander (chopped for garnishing only)
1 tablespoon of sugar (more if required)
2 tablespoons of tamarind juice
Salt to taste
2 tablespoons of cooking oil
1/4 cup of water

Spice Paste:

5 dried red chilies (soaked in hot water and deseeded)
2 fresh red chillies (cut into 1" slices)
1 tablespoon of taucheo (fermented yellow bean sauce)
2 small shallots
3 cloves of garlic
1 inch of fresh ginger
2 inches of lemon grass (the white part only)

Tamarind Juice:
5 seeds of tamarind, add 2 tablespoon water and squeeze out the juice

Method:

1) Clean the crab and chop it into pieces.

2) Grind the spice paste in a blender or food processor until it is finely blended.

3) Soak the tamarind seeds in some warm water for 15 minutes. Extract the juice and discard the seeds.

4) Heat up deep frying pan or chinese wok and add cooking oil.

5) Stir fry the spice paste until fragant and spicy.

6) Add the crab and 1/4 cup of water and do a quick stir. Cover the pan and cook for about 3 minutes.

8) Add in sugar, tamarind juice, a little salt to taste and continue stirring for about 2 minutes or until all crab pieces turned red.

9) Dish up, garnish with chopped scallions and serve hot.

Notes:

1) If you are not sure how to clean the crab, ask if your local market can do this for you.

2) Make sure you crack the shells of the crab (especially the claws) before cooking. (I used a small hammer to do this)


Tuesday, October 27, 2009

How about some French Macarons?

The 2009 October Daring Bakers’ challenge was brought to us by Ami S. She chose macarons from Claudia Fleming’s The Last Course: The Desserts of Gramercy Tavern as the challenge recipe.

Oh wow! Macarons! For the life of me, I did not expect this. To be frank I'm really not that much into macarons (I think they are a bit too sweet) which is probably why you only see them making a rare appearance in this blog. I remembered the very first time I made macarons. Of course prior to actually venturing into it, I did a whole lot of research and finally picked a recipe posted by none other than the Queen of Macarons - Helen of Tartelette. I used the Italian method which is suppose to give a more stable macaron. Not sure what I did wrong but every single one cracked, even though the tops were shiny! It took a long while before I dared to try again! The next time round I used David Lebowitz's recipe and I didn't even age the egg whites, which is suppose to be a "no-no". Lo and behold, my macarons developed feet and they didn't crack. I was so excited. I remember running out from the kitchen, exclaiming, feet - feet! Any one other than my hubby would have certainly thought that a mad woman had ascended upon them. I guess only bakers can appreciate the excitment of seeing "feet". Would you believe me if I told you I still get this excitment plus the fact that I will stare ardently into my oven for the first 10 minutes just to see the macarons rise up.


For this particular challenge, I made two different batches over separate weekends. The first was a Hazelnut Espresso Chocolate Macaron sandwiched with a bittersweet chocolate ganache which had been flavoured with orange liquor. I sprinkled the top of each macaron with cocoa nibs. Huh - talk about chocolate overdose and it does sounds delish right?? Well they were! The espresso and bitterness of the chocolate counter-balanced the sugar just nicely! Pair these with a cup of espresso coffee and you'll be in 7th heaven!

The next batch was Almond Lemon-Mint Macaron sandwiched with chai flavoured chocolate ganache. I coloured the macarons in baby blue and even did some swirls on some of them, just for the sake of experimenting. These were delicious as well and the lemon-mint paired quite well with the chai flavour. I wasn't sure at first!

In all, this month's challenge has been another fun adventure. To check out other beautiful creations, go visit my fellow bakers at Daring Bakers .


Equipment required:

• Electric mixer, preferably a stand mixer with a whisk attachment
• Rubber spatula
• Baking sheets
• Parchment paper or nonstick liners
• Pastry bag (can be disposable)
• Plain half-inch pastry bag tip
• Sifter or sieve
• If you don’t have a pastry bag and/or tips, you can use a Ziploc bag with the corner snipped off
• Oven
• Cooling rack
• Thin-bladed spatula for removing the macaroons from the baking sheets
• Food processor or nut grinder, if grinding your own nuts


French Macarons

Ingredients

Confectioners’ (Icing) sugar: 2 ¼ cups (225 g, 8 oz.)
Almond flour: 2 cups (190 g, 6.7 oz.)
Granulated sugar: 2 tablespoons (25 g , .88 oz.)
Egg whites: 5 (Have at room temperature)


Directions:

1) Preheat the oven to 200°F (93°C). Combine the confectioners’ sugar and almond flour in a medium bowl. If grinding your own nuts, combine nuts and a cup of confectioners’ sugar in the bowl of a food processor and grind until nuts are very fine and powdery.

2) Beat the egg whites in the clean dry bowl of a stand mixer until they hold soft peaks. Slowly add the granulated sugar and beat until the mixture holds stiff peaks.

3) Sift a third of the almond flour mixture into the meringue and fold gently to combine. If you are planning on adding zest or other flavorings to the batter, now is the time. Sift in the remaining almond flour in two batches. Be gentle! Don’t overfold, but fully incorporate your ingredients.

4) Spoon the mixture into a pastry bag fitted with a plain half-inch tip (Ateco #806). You can also use a Ziploc bag with a corner cut off. It’s easiest to fill your bag if you stand it up in a tall glass and fold the top down before spooning in the batter.

5) Pipe one-inch-sized (2.5 cm) mounds of batter onto baking sheets lined with nonstick liners (or parchment paper).

6) Bake the macaroon for 5 minutes. Remove the pan from the oven and raise the temperature to 375°F (190°C). Once the oven is up to temperature, put the pans back in the oven and bake for an additional 7 to 8 minutes, or lightly colored.

7) Cool on a rack before filling.

Yield: About two dozen filled macarons


Tuesday, October 20, 2009

Cinnamon Pecan Coffee Cake

Today, our baking group, Cake Slice Bakers, will embark on a new chapter. After a year of baking recipes from "Sky High: Irresistible Triple-Layer Cakes by Alisa Huntsman", we have now picked a new book to challenge ourselves. Our choice (by democratic voting) happens to be "Southern Cakes: Sweet and Irresistible Recipes for Everyday Celebrations by Nancie McDermott".

Unlike "Sky High" which basically concentrated on triple layer cakes "Southern Cakes" will feature 65 delicious recipes from Southern Heritage. Recipes will include jam cakes and jelly rolls, humble pear bread and peanut cake. It will also contain whole chapters on both moist chocolate and coconut cakes.


The first cake to make its debut from this book is a Cinnamon Pecan Coffee Cake! A light butter sheet cake with a sprinkled middle layer of cinnamon, brown sugar, pecans and raisins – strudel style. The cake is then topped with more of the yummy sprinkles and baked until sweet, sticky and golden. It’s served warm in slices straight from the pan. Sounds delicious doesn't it! And it sure was. I loved the crispy streusel topping. In fact my hubby practically scrapped off all the topping from the cake! Instead of using raisins I decided to finish using the half opened packet of dried cranberries which I had used for baking some cookies. I really left this challenge to the last moment - completed it on Sunday afternoon. I wasn't too worried as this particular cake did not require frosting, decoration, etc - unlike Sky High". By the way, I've placed an order of this book from Amazon and waiting for delivery of it in November. Can't wait to see what other recipes this book will reveal.

Also go check out my fellow bakers at Cake Slice Bakers for more beautiful creations.


Cinnamon Pecan Coffee Cake
Recipe from Southern Cakes by Nancie McDermott
Makes a 13 x 9 inch sheet cake

Print Recipe

For the Cake

3 cups all purpose flour
1 tbsp baking powder
1 tsp salt
1 tsp vanilla extract
1 cup milk
1 cup (2 sticks or 226g) butter, softened
1 cup sugar
2 eggs

For the Cinnamon Raisin Filling

1½ cups light brown sugar
3 tbsp all purpose flour
3 tbsp cinnamon
1½ cups raisins (I used dried cranberries)
1½ cups coarsely chopped pecans
¾ cup (1½ sticks or 170g) butter, melted

Method:

1) Heat the oven to 350 degrees F. Grease and flour a 13 by 9 inch pan.

2) To make the filling, combine the light brown sugar, flour and cinnamon in a bowl and stir with a fork to mix everything well. Combine the raisins and pecans in another bowl and toss to mix them. Place the cinnamon mixture, nut mixture and melted butter by the baking pan to use later.

3) To make the cake batter, combine the flour, baking powder and salt in a bowl. Stir the vanilla into the milk. In a large bowl combine the butter and sugar and beat with a mixer on high speed until pale yellow and evenly mixed, about 2 minutes. Scrape down the bowl to ensure a good mix. Add the eggs and beat for another 2 minutes, scraping down the bowl now and then, until the mixture is smooth and light.

4) Use a large spoon or spatula to add about a third of the flour mixture to the butter mixture and stir only until the flour disappears. Add a third of the milk and mix in. Repeat twice more until all the flour and milk mixtures have been incorporated. Stir just enough to keep the batter smooth.

5) Spread half the batter evenly into the prepared pan. Sprinkle half the cinnamon mixture over the batter followed by half the melted butter. Scatter half the raisins and nuts over the top. Spread the remaining batter carefully over the filling, using a spatula to smooth the batter all the way to the edges of the pan. Top with the leftover cinnamon, butter and nut mixture, covering the cake evenly.

6) Bake for 45 to 50 minutes, until the cake is golden brown, fragrant and beginning to pull away from the edges of the pan. Place the pan on a wire rack and allow to cool in the pan for 5 to 10 minutes before serving in squares right from the pan.

7) The cake is delicious hot, warm or at room temperature.


Sunday, October 18, 2009

Pizza Revisited

Ever since I first learnt how to make pizza through a Daring Bakers challenge, I have not ordered a "home delivery" pizza since! Ok I confess I have on a couple of occassions bought frozen pizza from the supermarket. And that's purely because our favourite brand was on sale. Does this count?

I used a thin crust recipe which I had tried previously with much success. Only half the dough was used,which was sufficient to come up with two round 15" pizzas, and the remaining dough went into the freezer for another pizza treat.

For the first pizza I added sliced fresh button mushrooms, salami, tomatoes and topped it off with grated mozzarella and parmesan.


The second pizza was a hawaiian pizza and I used sliced honey baked ham and chunks of canned pineapple topped with mozarrella and parmesan. Both pizzas were extremely crispy and delicious - nothing smells better than a fresh pizza in the oven. I'm now thinking of getting a pizza stone!


Thursday, October 15, 2009

My Hanoi Trip (Part 2)

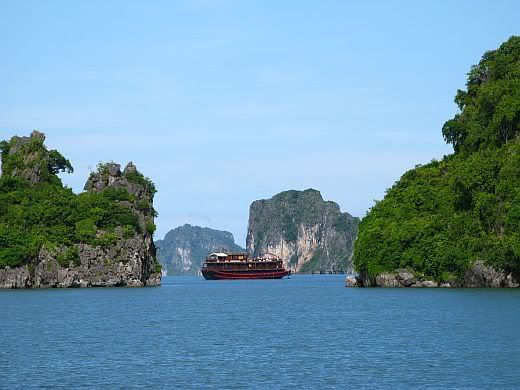
If ever you are in Hanoi, one of the "must" places in your agenda should be Halong Bay. Halong Bay is a top tourist attraction in Vietnam and has been listed amongst the World Heritage Sites by UNESCO. Located in the Gulf of Tonkin, it forms an amazing seascape of limestone pillars along with more than 1,600 islands and islets. “Halong” literally means “Bay of Descending Dragons”. A local legend says that a family of dragons was sent to defend the land a long time ago when the Vietnamese were fighting the Chinese invaders. These dragons had descended upon what is now known as Halong Bay.

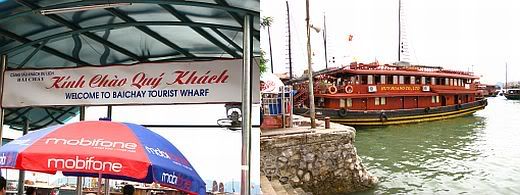
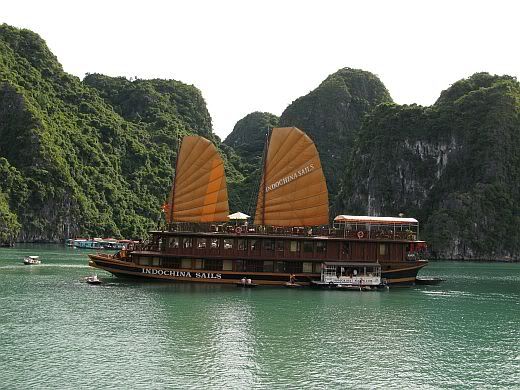
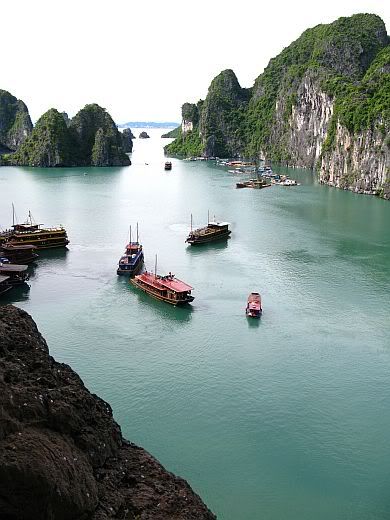
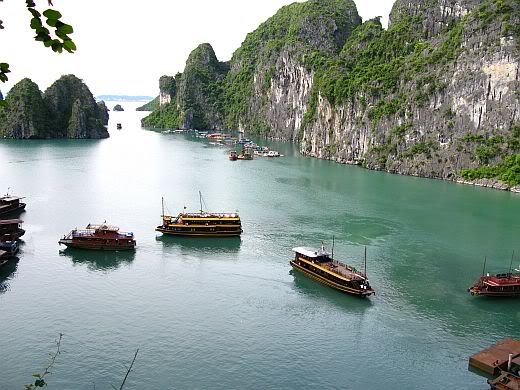
Preferably you should spend a night in a junk on the bay - that's provided you have the time. However we didn't, so we opted for a day trip instead. The mini bus picked us up from the hotel together with the rest of the tour group. The road trip itself would take 3 1/2 hours up north on a 165km journey. It was raining slightly in the morning and we kept our fingers crossed that it was just a passing cloud. By the time we reached the harbour, it was almost noon time. There were hundreds of tourists alighting from tour coaches and waiting to board their respective junks. There were many junks docked at the harbour and in and around the harbour as well. Besides cruising Halong Bay, our itinerary also included a tour of one of the many caves found in the bay, a bit of kayaking and a visit to a local fish farm. The rain had stopped by then but the sky was still a bit gloomy. However it got better as the day progressed and we were graced by sunshine.


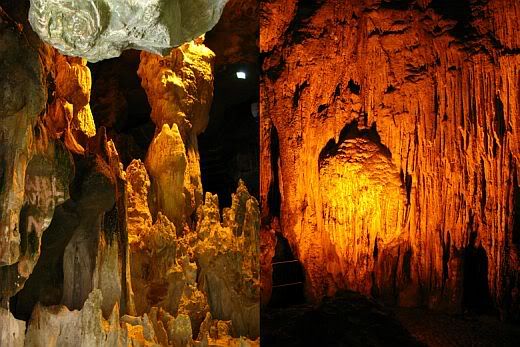
The cave which we explored is called Hung Sung Sot Cave. To get to the cave we had to walk up a steep path lined with shady trees. There are two chambers in the cave with a square shaped outer chamber and a ceiling of about 30 meters height. The inner chamber formations look like sentries conversing with one another, animals (including one which looked like a tortoise) and a formation resembling a general surveying his troops in the middle of the chamber. The light reflected from the water outside seems to bring these formations to life.


We thoroughly enjoyed our day trip at Halong and by the time we arrived back to the hotel it was just past 8.30pm.

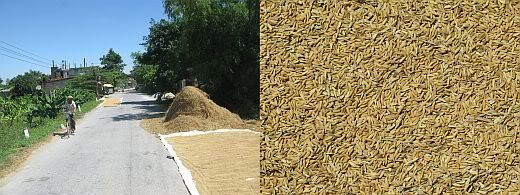
Another day trip which we did whilst in Hanoi was to visit the Perfume Pagoda. It's a full day trip out to the countryside. The road trip would take about 2 hours covering 70km. Along the way we passed rice fields and the local farmers were harvesting their crops.


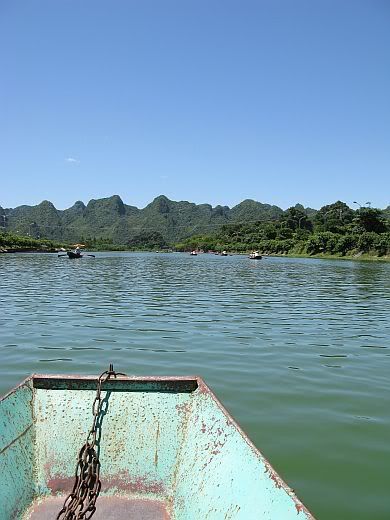
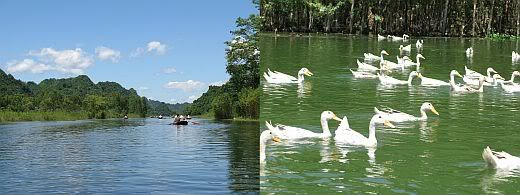
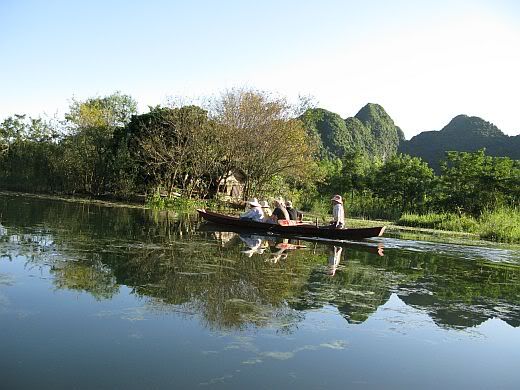
The Perfume Pagoda (or Chua Huong) is considered as one of the most important religious sites of Buddhism in Vietnam. It is not one temple but a cluster of temples and shrines located in the vicity. Perfume Pagoda is famous for the annual pilgrimage of Buddhists. Every year, between February and March, the Chua Huong festival draws hundreds of thousands of people from all over the country. Our journey would include a 60 minute boat ride along a scenic river. Unfortunately the day that we choose to do this trip was extremely hot and humid. The river itself is open and not shaded, so you really do not have any protection against the hot afternoon sun. Even with hats and sun-glasses it did not help much but luckily for me, I brought along a folded umbrella. It was more for the rain than sun, but it helped to provide us some shade.


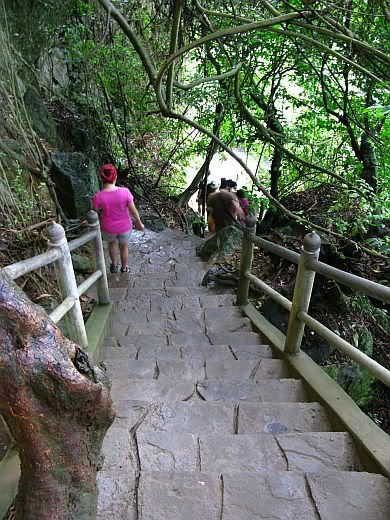
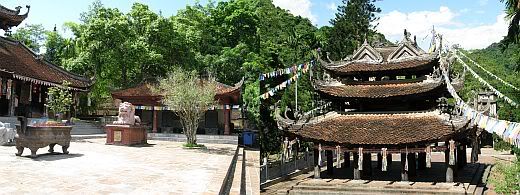
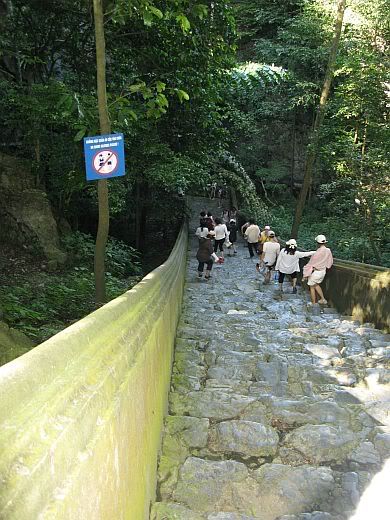
When we reached the other end of the river, it was time for a local Vietnamese lunch. There are two ways to get to the Perfume Pagoda which is located on top of a hill - either by cable car or a 4km up-hill trek lasting about an hour. Of all days the cable car had to be under maintenance! So trek it was along a crudely fashioned road made of uneven stone steps and paths. I think I must have lost about a kilo of prespiration by the end of the trek. Luckily the cable car was working on the return journey. Along the way to the summit, we passed a few temples and shrines, including the Thien Tru temple (or the Outer Temple).


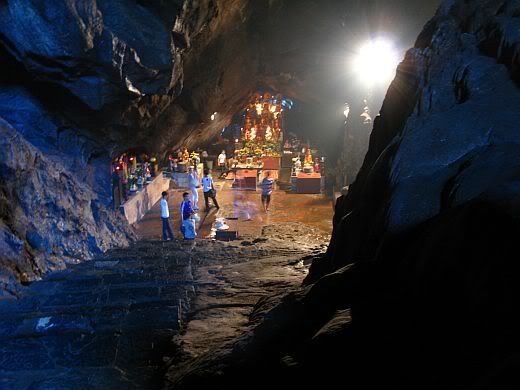
The main attraction at the summit is a visit to the Huong Tich Grotto (or Inner Temple). The path to Huong Tich grotto is forged by nature through thousands of years of changes. Today, the path leading to Chua Trong is a series of smooth granite slabs stacking on one another creating a series of switch backs leading to the temple. A total of 120 steps descends downwards as the temple lies deep within the grotto. At the entrance to the grotto, there is "heaven's gate" (path to heaven) and "hell's gate" (descend to hell). As story goes, in the 18th century, Lord Trinh Sam had 5 words, "Nam Thien De Nhat Dong" meaning, "the most beautiful grotto under southern sky", carved onto the granite slab at the entrance to Huong Tich grotto. According to legend, the cave was discovered two thousand years ago. However, local people only began to place a shrine there in 1575, and later a larger temple was built. There are many colorful stalagmites and stalactites within the cave. Each is given a name for their distinctive features. It is believed that couples who wish for children often pay homage to Huong Tich grotto and to especially visit Nui Co and Nui Cau to pray for their first born.


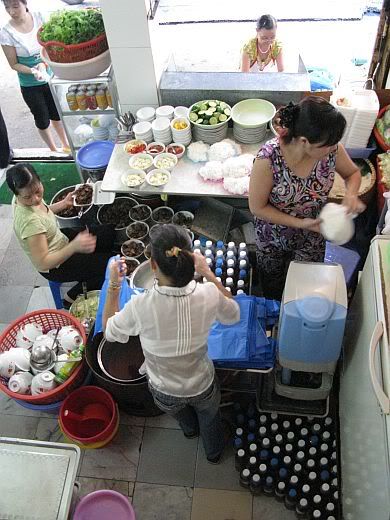
Whilst we were in Hanoi we also managed to sample some of their local street food. Surprisingly eating at restaurants or even having a latte in cafe bars is not really cheap. We happened to lug our mini notebook along with us on this trip - the hotel provides free wifi. So in the evenings, I would surf various websites, especially travel logs checking out the best street food in town.

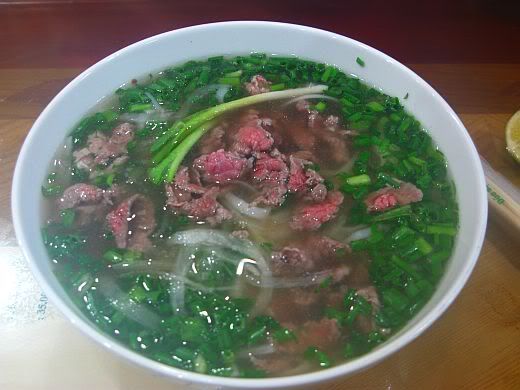
Obviously when you mention Vietnam, the first thing that comes to mind would be the "infamous" pho. Pho (pronounced as "fef") is a Vietnamese beef and rice noodle soup from North Vietnam. The traditional pho is served with thin cuts of beef (steak, fatty flank, lean flank, brisket). This is called pho bo. It can also be served with sliced chicken meat and this is called pho ga. Although pho can be found in Southern part of Vietnam as well, I have been told that the pho served is different. The pho we are used to in Singapore is served with thinly sliced onions, fresh basil and beansprouts, which also happens to be the version found in the south. The broth is slightly darker as well. In Hanoi, the broth is very clear and is just served with slices of beef and spring onions. Average cost per bowl is VDN35,000 (Vietnamese Dong).


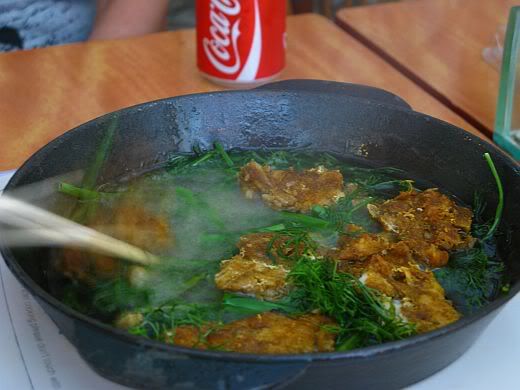
We also tried the famous Hanoi fried fish with fresh dill. This particular place we went to is the original birth place of this dish and it's the only dish that is served. Local name for this dish is Cha Ca La Vong and how appropriate for the restaurant to be located at 14 Cha Ca Street. When this local dish gained popularity, other shops started to spring up around Hanoi. However most tourist will tell you to go back to the original shop. I was skeptical about trying it out at first but believe me once you have, you want more. This dish can't be any simplier. It is made with chunks of freshwater fish seasoned with galanga and garlic, colored with turmeric to a warm golden hue, and grilled over charcoal for a smoky note. Then it is fried up with handfuls of fresh dill on a tabletop stove and served over thin rice noodles, shredded lettuce, chopped peanuts, and nuoc cham (dipping sauce). Cost per person excluding drink is VDN100,000. If you do not have a huge appetite, one portion is sufficient to be shared between 2 persons.


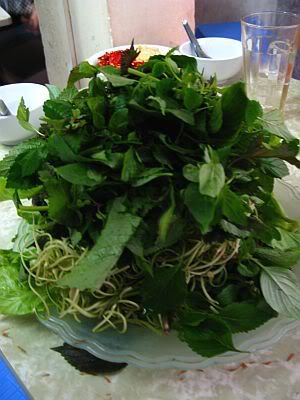
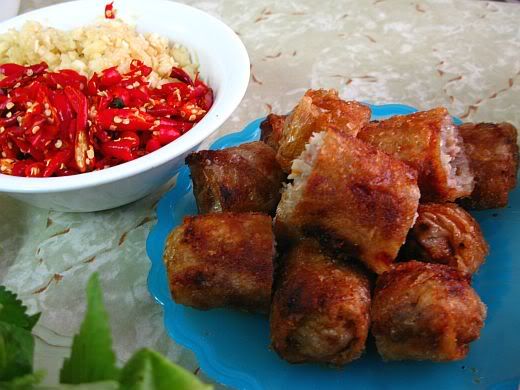
Another very popular dish in Hanoi and a must try would be Bun Cha. Bun cha is a lunch time meal. It consist of BBQ minced pork rolls teamed with charred slices of pork belly in a thin fish sauce, vinegar and sugar stock with sides of rice noodles and assorted greens and fresh herbs. Depending on season, either slices of green papaya or chayote (choko) are set afloat upon the stock. Simple, yes! But, miss this dish and you miss out - big time. I actually caught sight of this particular shop selling bun cha whilst exploring the streets of Hanoi. On our last day, we decided to have an early lunch there. We arrived at 10.30am but was told it would only open at 11am. We decided to walk a bit first and then go back again once they open. We were guided up the narrow stairwell to the 2nd floor. I believe this shop has 4 levels altogether. We ordered 2 portions and were served bun cha and a side dish of Nem Cua Bể(Fried Crab and Pork Spring Rolls). Lucky for me I had already seen a video on youtube as to how to eat this dish. Put a portion of rice noodles in your bowl, add some vegetables and herbs, and then scope some of the vinegar sauce into the bowl. Then add freshly chopped garlic and chillies and mix it all around. Eat the noodles together with the pork rolls. This shop is called Bun Cha Dac Kim and is located at No. 1 Hang Manh St., Hanoi. Total cost including one can drink was VDN130,000.


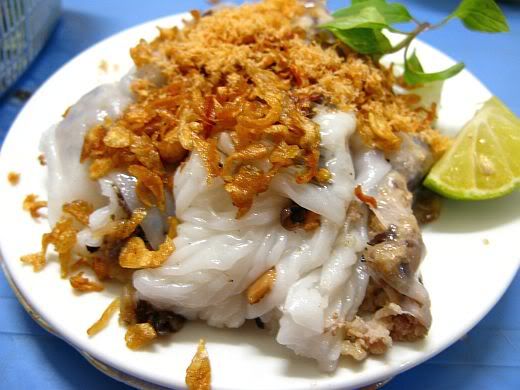
Another street food which can be found in Hanoi is Banh Cuon and is found in Northen Vietnam. Banh Cuon hails from Thanh Tri district just outside Hanoi. It is basically a freshly made steamed thin rice roll (similar to Hong Kong steamed rice rolls) and filled with mashed up minced pork, mushrooms and prawns. It comes served with sliced cucumber, cha lua (mortadella), beansprouts, sprinkled with deep-fried shallots and chopped mint with a nuoc mam (fish sauce) dip.


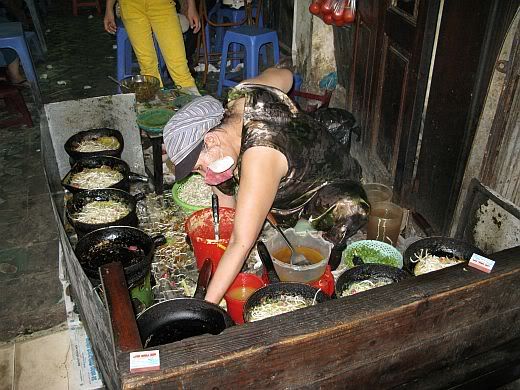
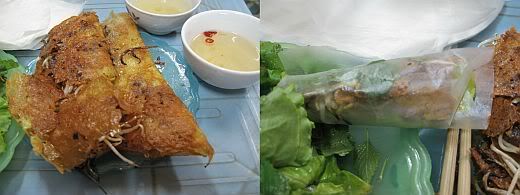
Banh xeo is Vietnamese style crepe with whole shrimp, thinly sliced pork and bean sprouts. The crepe is cooked in a special pan over high heat. It is so thin that the end result is a crispy rice pancake. This dish is a "do-it-yourself dish" that involves the messy but delicious process of wrapping the crepe with lettuce, cilantro, mint and basil into a thin crisp rice paper roll. The roll is then dipped into vinagrette that has sliced chillies and minced fresh garlic. This particular shop is found on No. 22, Hang Bo Street. The cost of 2 crepes was less than VDN15,000.


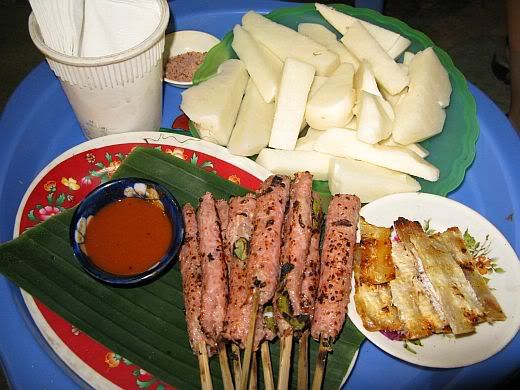
We also tried out some grilled pork satays which was found at the back alley to our hotel. Included with the platter was fresh sliced turnip and grilled dried cuttlefish slices which you would dip into a bowl of chillie sauce. The street vendor would give you a little stool to sit on whilst having your meal. Lots of locals were seated in the alley, munching on these grilled feasts and chatting the night away.


In all we really enjoyed our trip. Unfortunately there are lots of other local street food which we did not have a chance to try out.... maybe another trip!

Sunday, October 11, 2009

Jelly Donuts

Call us donut freaks but we love eating these little yeasted bakes - with or without the holes! We take them anyhow it comes. I for one prefer the old fashion donut, no frills whatsoever and simply sprinkled with caster sugar or better still cinnamon sugar. Yum and with a cup of freshly brewed coffee, it's complete heaven to me. My hubby goes for the fancy types ... jam filled or those glazed with more sugary stuff, not forgetting chocolate of course! I personally think it's a whole lot of sugar load in one-go.

With a free afternoon and the house all to myself ... oops not exactly! I forgot my two fur doggie boys! I decided to try my hand at some jelly donuts (small version ones). I've been putting off making donuts for a long time as the idea of frying had not really appealed to me at all. In fact I was chatting over yahoo chat with my sister who is currently residing in Melbourne about donuts. She too was keen to try out the recipe and like me, frying was the deterent! She asked for a baked version instead. Anyway these jelly donuts lived up to expectations but you really have to eat it fresh. I had a few left over for the next day but the donuts tasted a bit heavier .... definitely not so nice once stale!


Jelly Donuts
Adapted from Martha Stewart's recipe
Makes 20


Ingredients:

2 tablespoons active dry yeast
1/2 cup warm water, (100 degrees to 110 degrees)
2 1/2 cups all-purpose flour, plus more for dusting
1/4 cup castor sugar
2 large eggs
1 teaspoon orange extract
2 tablespoons unsalted butter, room temperature
1/2 teaspoon freshly grated nutmeg
1/2 teaspoon cinnamon
2 teaspoons salt
3 cups vegetable oil, plus more for bowl
1 cup seedless blueberry jam
Icing sugar for dusting

Method:

1) In a small bowl, combine yeast, warm water, and 1 teaspoon sugar. Set aside until foamy, about 10 minutes.

2) Into your mixer bowl, add the flour, eggs, yeast mixture, orange extract, sugar, butter, nutmeg, cinnamon and salt. Attach your dough hook and turn to low to mix the ingredients for about a minute. Then turn your mixer one speed higher and continue to mix for about 8 minutes. Add a little more flour if necessary. By the end of the 8 minutes your dough should be smooth, soft and bounces back when poked with a finger (it should not be sticking to the sides of your bowl).

3) Roll the dough into a ball. Place in an oiled bowl; cover with plastic wrap. Set in a warm place to rise until doubled, about 1 to 1 1/2 hours.

4) On a lightly floured work surface, roll dough to 1/4-inch thickness. Using a 2 1/2" cutter and cut out about 20 rounds. If you don't have a round cutter, use any other utensils that will give you a similar shape. Cover with clingwrap and set aside to rise for another 15 mins. (Do not be alarmed if the rounds do not seem to rise much. Once you fry them in the hot oil, they will puff up nicely.)

5) In medium saucepan or pot over medium heat, heat oil until a deep-frying thermometer registers 370F. Carefully slip 4 rounds into oil (do not over crowd). Fry until golden brown, about 40 seconds. Turn doughnuts over; fry until golden on other side, another 40 seconds.

6) Transfer to a paper-towel-lined baking sheet. Continue frying the remaining dough.

7) Fill a pastry bag fitted with a #4 tip with jam. Using a wooden skewer or the end of a chopstick, make a hole in the side of each doughnut. Fit the pastry tip into a hole, pipe about 2 teaspoons jam into doughnut. Repeat with remaining doughnuts.

8) Dust the donuts with icing sugar and serve whilst still warm.


Related Posts with Thumbnails