Wednesday, March 28, 2012

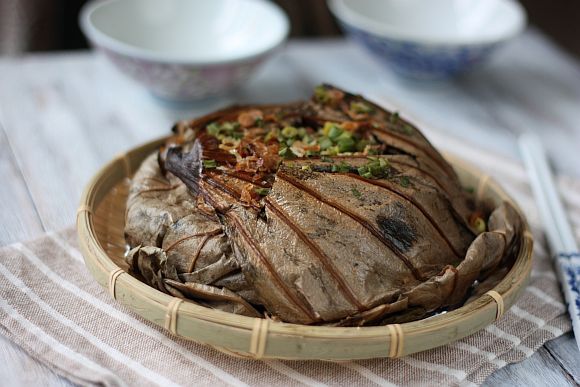
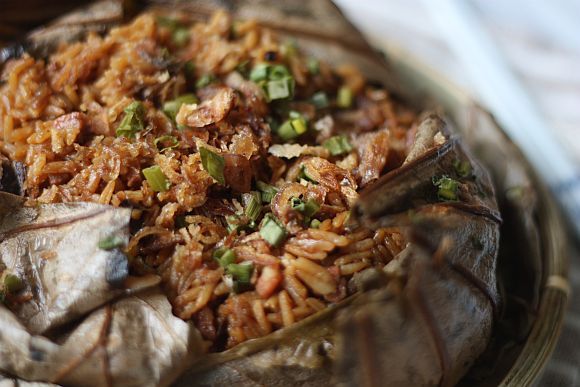
Savoury Lotus Leaf Steamed Rice

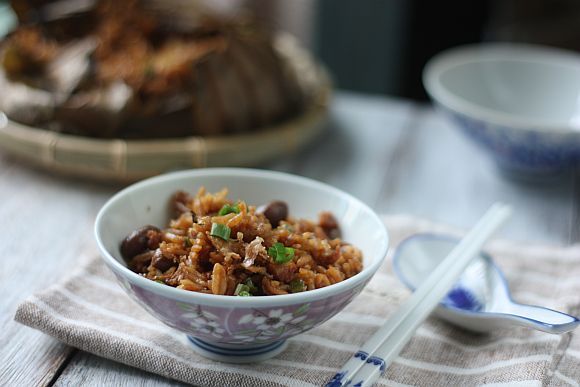
You may probably be more familiar with the version of this dish made with glutinuous rice in dim sum restaurants. It is presented in small little packets wrapped in lotus leaf and served pipping hot at your table. Well this particularly recipe is not that far off. I was not too keen on using glutinuous rice as it was way too filing (heavy to the stomach) so I opted on using jasmine white rice instead.

lotus rice 1


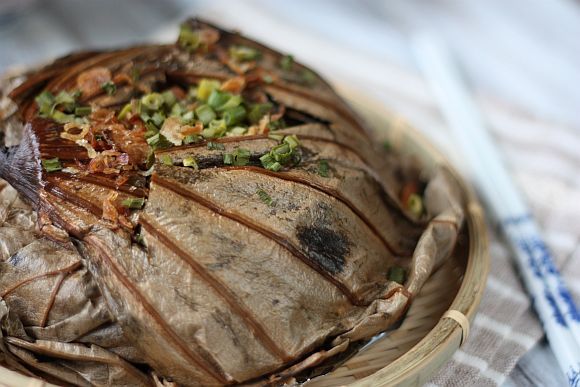
Lotus leaf used in steaming food gives out a fantastic dark tea-alike aroma and colour to the grains. In the old days, people would stuff all sorts of ingredients into the lotus steam rice as this dish would constitute an entire meal by itself. The dish is now much simple in comparison, with fewer ingredients and the recipe being less complicated. You can of course use the same recipe and substitute it with glutinuous rice instead.

lotus rice 2


lotus rice 5


Savoury Lotus Leaf Steamed Rice
Serves 4 to 5

Ingredients:

1/4 cup dried shrimp
5 dried black chinese mushrooms (soak in warm water until soften)
2 large dried lotus leaves
1 Tbsp vegetable oil
2 shallots, minced
1 clove garlic, minced
1/2 tsp finely minced fresh ginger
2 Chinese sausages, cut diagonally into 1/8-inch-thick slices
1 small can of braised peanuts, drained
1/2 cup of diced chinese roast pork or char siew
1/4 cup diced chinese celery
1 teaspoon chopped cilantro (Chinese parsley)
2 Tbsp light soy sauce (add more if required)
1 Tbsp dark soy sauce
1 tsp oyster sauce
1 Tbsp sesame oil
1/2 tsp white pepper
4 cups cooked medium-grain rice (cooled)

For Garnishing: Sliced fresh red chillies, fried shallots and chopped cilantro

Method:

1) Cut the stems off the mushrooms and thinly slice caps. Set aside.

2) Bring some water to a boil in a large pan. Then plunge the lotus leaves into boiling water and cook for 2 minutes or until softenen. Drain well and set aside.

3) Place a wok or large frying pan over high heat until hot. Add the vegetable oil, swirling to coat sides. Then add the shallots, garlic, ginger, sausage, roast pork and shrimp and stir-fry for about 2 minutes.

4) Then add the celery, cilantro, peanuts and mushrooms and stir-fry for another 1 minute.

5) Add in all the seasonsing and then stir in the cooked rice. Separate the grains with the back of a spoon and mix well. Remove from heat.

6) Spread one lotus leaf on work surface. Cover with second leaf. Then place the rice mixture in center of lotus leaves. Fold edges of leaves over rice so rice is completely covered.

7) Place steaming rack in a wok or a steamer pot. Pour water to just below level of rack and bring to a boil.

8) Once the water is boiling, place lotus leaf packet on a heatproof dish and set dish on rack. Cover and steam, adding additional water if neccessary, for 30 minutes. Garnish and serve immediately.

Note: If you are using glutinuous rice, soak the glutinous rice in water overnight. Drain away the water. Then fry it with the ingredients and seasoning. Steam for 45 minutes or longer until cook.
lotus rice 4


lotus rice 3


lotus rice 6

Friday, March 23, 2012

Prune Kueh Lapis Spekkoek (Indonesian Prune Layer Cake)

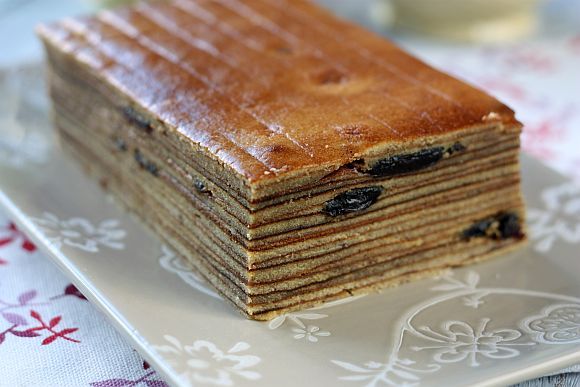
In early January this year I attended a Chinese New Year baking class at Shermay's Cooking School. One of the goodies taught by Valerie Kong was the famous Kueh Lapis Spekkoek (Indonesian Layer Cake). I had tried making this layered cake last year but somehow it did not turn out well at all.

So when this class came up, I decided to sign up for it to see how it was actually made.

lapis 4


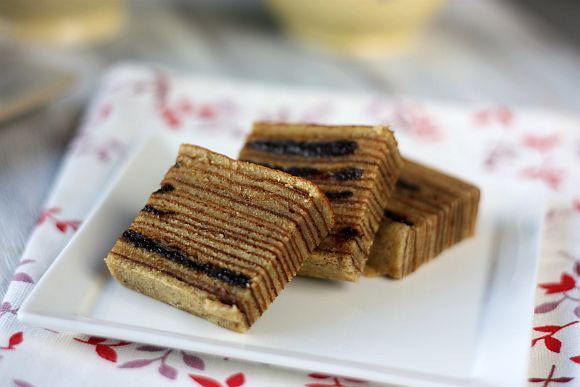
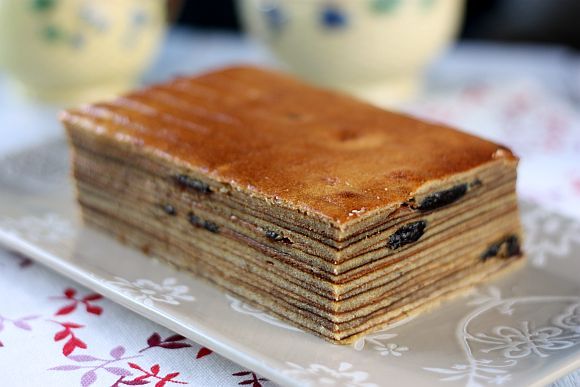
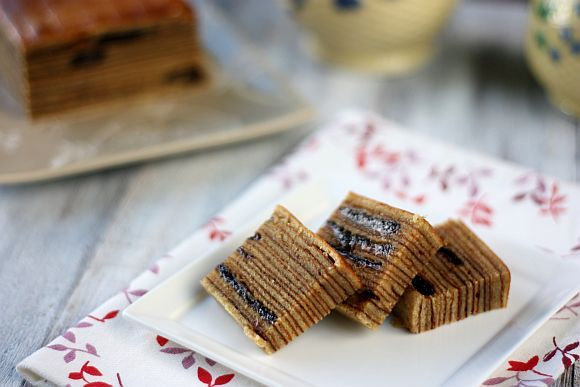
Kuih Lapis Spekkoek or more popularly called Lapis Legit in Indonesia is a Dutch-Indonesian layered cake. In Indonesian lapis legit literally means (very) rich layer-cake. And you better believe that it is rich! Look at the number of egg yolks, sugar and butter used in the recipe. This cake is made up of very thin layers of cake that are piled on the top of each other. A good lapis legit usually has more than 18 layers. (Mine actually had about 21 layers as I used a slightly smaller baking pan.) This makes the baking of spekkoek a very labour-intensive process. Because of this this cake is rather expensive to buy. Not many people would actually make this at home because of the time required to be set aside in baking one.

The recipe I have posted her does not belong to Valerie Kong as it would not be right to publish it. However I managed to find one that is quite close to hers.

lapis 5


lapis 1


Prune Kueh Lapis Spekkoek (Indonesian Prune Layer Cake)
Recipe from Mad Baker (http://www.madbaker.net/)

Ingredients:

20 egg yolks
4 egg whites
500g salted butter
3 tbsp condensed milk
340g sugar
200g plain flour
2 tsp ground mixed spices
2 tsp vanilla essence
3 tbsp rum or brandy
90g pitted prunes, sliced into thin strips (optional)

Method:

1) Butter the base of an 8″ X 8″ X 2.5″ pan and line with baking parchment.

2) Pre-heat your oven, selecting the grill function.

3) Sift the plain flour and mixed spices together.

4) Beat the egg yolks and sugar together until pale yellow, thick and creamy.

5) Cream the butter and condensed milk together until soft and fluffy. Add the creamed butter to the egg yolk mixture and mix until combined.

6) Beat the egg whites until medium firm peaks.

7) Fold in the egg whites, followed by the flour mixture into the rest of the batter.

8) Stir in the vanilla essence and rum until well-combined.

9) Spread a thin layer of batter onto the parchment paper.

10) Grill for 7 - 8 mins on the lowest rack in your oven or until lightly golden brown.

11) Remove cake pan from oven and press the baked layer down lightly with a metal fondant smoother. Prick all over the layer of cake with a toothpick.

12) Repeat steps 9 to 11 for each layer. (Optional: Add prunes on every second or third layer).

13) For the last layer, turn the oven down to 180 degrees C and bake on middle rung for 15 minutes or until golden brown.

14) Remove from oven and run a paring knife along the edges of the cake pan.

15) Turn the kueh lapis out of the pan and remove the baking parchment.

16) Flip cake back upright and let cool.

lapis 3


lapis 2

Sunday, March 18, 2012

Wild Mushroom Tartlets

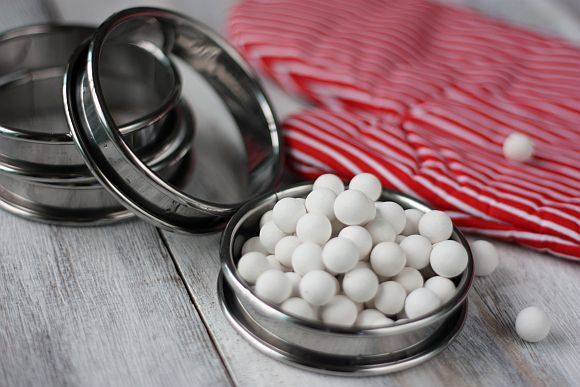
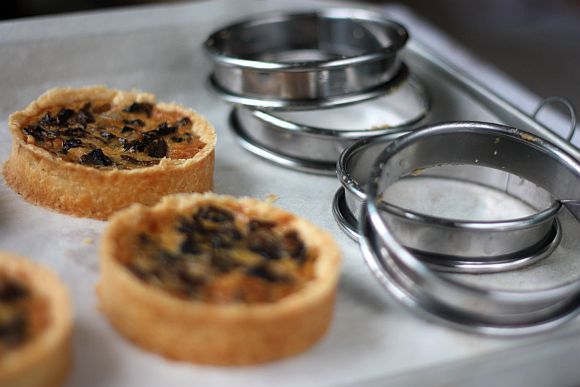
I have finally found bottomless tart rings in Singapore! I have been looking for these for a long while now and had even contemplated purchasing them from overseas and having it shipped to Singapore. However the shipping cost which was even more than the tart rings itself had detered me from doing so. If I really had bought them I would have had to kick myself really hard in the butt because the rings sold here in Singapore are much cheaper.

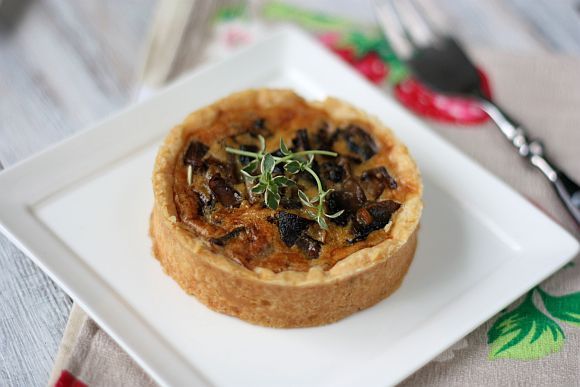
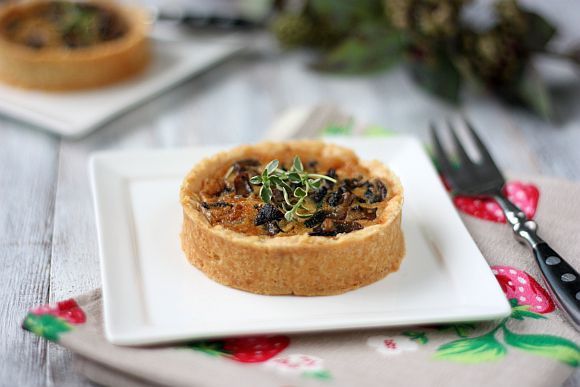
I made some wild mushroom tartlets as opening ceremony for the rings. I usually tend to make the tart shells over a weekday and freeze them until weekend when I have more time to bake. So it is quite often that I do have a spare unbaked tart shell lying in a corner of my freezer. Really handy too whenever I feel like having a tart for dinner.

Mushroom tart 1


Mushroom tart 4


Wild Mushroom Tartlets
Makes a 9" tart or Four 4" tartlets

For the Pate Brisee:

250g all purpose flour
150g cold unsalted butter, cut into small pieces
1 tsp fine salt
1 medium egg
1 Tbsp cold milk

Method for the Pate Brisee:

1) Sift flour and salt into a bowl.

2) Add in the butter.

3) Using a pastry cutter, cut the butter into the flour until it resembles rough breadcrumbs.

4) In a separate bowl, lightly beat the egg with the milk and drizzle it onto the flour mixture.

5) Using your hands, blend the mixture together and lighly knead to bring together. Try not to handle the dough too much.

6) Roll the dough into a ball, wrap in plastic wrap, flatten it into a disk and chill for about 45 minutes to an hour.

8) To line your tart tray, I find it easier to roll the dough between two pieces of clingwrap plastic. Roll to about 3" wider than the base of your tray. Remove the top wrap.

9) Lift the dough using the clingwrap plastic and gently flip it into your tart tray. Press the dough onto the tray and trim off the excess.

10) Dock the base of the tart shell with a fork and then place it into the fridge for another hour.

11) Preheat oven to 190C. Bake the shell blind, for about 15 minutes. Then remove the parchment paper and bake for another 5 minutes. Remove from oven and let it cool before pouring in the filing.

Cook's Note:

You can also use your food processor. Just whisk the dry ingredients first. Then drop in the cubed cold butter into the processor. Pulse until the mixture resembles rough breadcrumbs. Then slowly add in the egg and pulse until the dough comes together - do not overdo this otherwise your dough will be very hard.


Mushroom tart 2


Ingredients for the Filing:
Recipe Adapted from Taste.com.au

50g unsalted butter butter, chopped
1 small onion, finely diced
3 garlic cloves, thinly sliced
400g mixed wild mushrooms, roughly chopped
2 eggs
1 cup thickened cream
80g grated mixed cheddar
1/2 tsp mixed dried herbs
Salt and pepper to taste

Method:

1) Melt butter in a large frying pan over medium-high heat. Add onions and garlic. Cook, stirring often, for 5 minutes or until soft.

2) Add the mushrooms and dried herbs, and cook for 4 minutes or until just tender. Set aside for 10 minutes to cool.

3) Whisk eggs, cream and salt and pepper in a jug. Spoon mushroom mixture into pastry case. Pour over egg mixture. Top with cheese. Place on hot tray. Bake tart for 40 minutes or until centre is set and top is light golden. Serve whilst still warm.

Mushroom tart 3


Photobucket

Monday, March 12, 2012

Banana Chocolate Cupcakes with Swiss Meringue Buttercream

I bake on most weekends. It's just me and if I don't something is definitely not right! A few weekends ago I had the urge to make something with left over bananas that had been in my fridge for more than three weeks. Yes, you heard me ... three weeks! Surprisingly they weren't mushy at all, just slightly darkened.

To be frank I didn't have much time that week as I was baking a cake for a friend's grandfather's 100th birthday. So I wanted to do a quick cupcake recipe and came across this one from Joy of Baking's website. I have tried numerous recipes from here and every one turned out wonderfully. Even though I was really tired from putting the birthday cake together, I still wanted to do something to take to office the next day. The other incentive was that I had quite a bit of Swiss Meringue Buttercream left over which would do nicely on the cupcakes. If you are looking for a light and delicious buttercream recipe, I highly recommended a Swiss Meringue Buttercream. It is absolutely gorgous and smooth.

choc banana 1


choc banana 4


Banana Chocolate Cupcakes with Swiss Meringue Buttercream
Recipe Adapted from "Joy of Baking"
Makes 12 regular or 15 medium cupcakes

Ingredients:

3/4 cup caster sugar (reduced from original recipe)
1 cup all-purpose flour
1/3 cup unsweetened cocoa powder
3/4 teaspoons baking powder
3/4 teaspoon baking soda
1/4 teaspoon salt
1 large egg
1/2 cup mashed ripe bananas (I used "pisang emas", 4 pieces)
1/2 cup warm water
1/4 cup low-fat milk
1/4 cup canola, corn, or vegetable oil
3/4 teaspoon pure vanilla extract

Method:

1) Preheat oven to 180C or 165C for fan-oven. Line 12 regular-sized muffin cups with paper liner.

2) In a large bowl whisk together the sugar, flour, cocoa powder, baking powder, baking soda, and salt.

3) In another large bowl, whisk together the egg, mashed banana, water, milk, oil, and vanilla extract. Add the wet ingredients to the dry ingredients and stir until combined. (The batter is quite thin.)

4) Pour or scoop the batter into the muffin cups, about 3/4 full, and bake for about 20 minutes or until a toothpick inserted in the center of a cupcake comes out clean. (I found it easier to pour the batter into a jug and then transfer it to each cupcake liner)

5) Frost with your favourite frosting or with Italian Meringue Buttercream.
Makes about 9 cups, enough for about 28 cupcakes

choc banana 2


Swiss Meringue Buttercream
Recipe Adapted from Martha Stewart
Makes about 4 1/2 cups

Ingredients:

1 cup sugar
5 large egg whites
4 sticks cold slightly soften unsalted butter, cut into pieces
1 teaspoon pure vanilla extract

Method:

1) Place sugar and egg whites in the heat-proof bowl. Set bowl over a pan of gently simmering water, and whisk continuously until sugar has dissolved and egg whites are hot to the touch, about 3 minutes. Test by rubbing the mixture between your fingers; it should feel completely smooth.

2) Transfer bowl to a stand-mixer bowl. Using the whisk attachment, beat on high speed until mixture has cooled completely and formed stiff and glossy peaks, about 10 minutes.

3) Add the butter, one piece at a time, and beat until incorporated after each addition. Don't worry if the buttercream appears curdled. It will come together after a while. Continue beating until smooth and fluffy. Add vanilla, and beat just until combined.

4) Switch to the paddle attachment, and beat on the lowest speed to eliminate any air pockets, about 5 minutes. If using buttercream within several hours, cover bowl with plastic wrap, and set aside at room temperature in a cool environment. Or transfer to an airtight container, and store in the refrigerator, up to 3 days. Before using, bring buttercream to room temperature, and beat on the lowest speed with the paddle attachment until smooth, about 5 minutes

choc banana 3


choc banana 5

Sunday, March 4, 2012

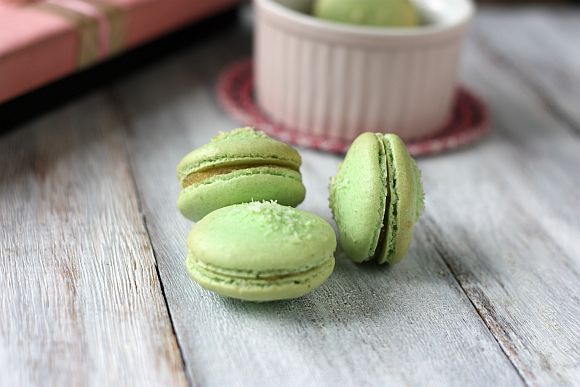
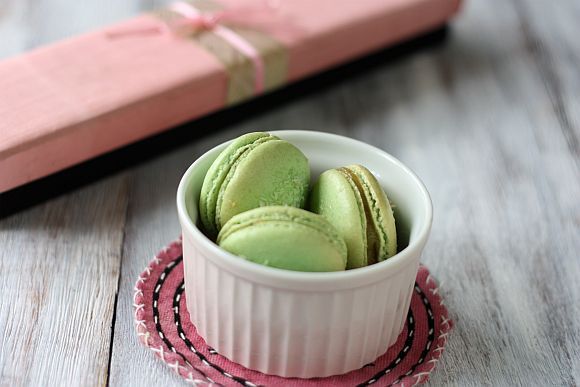
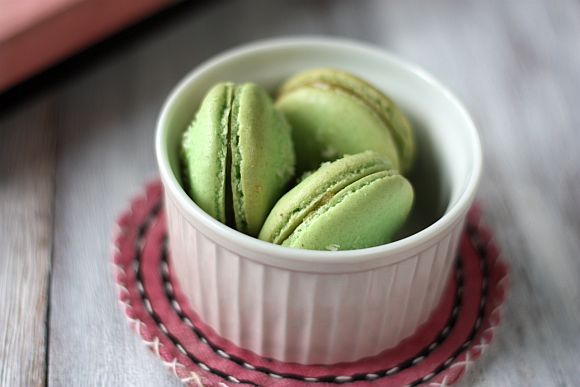
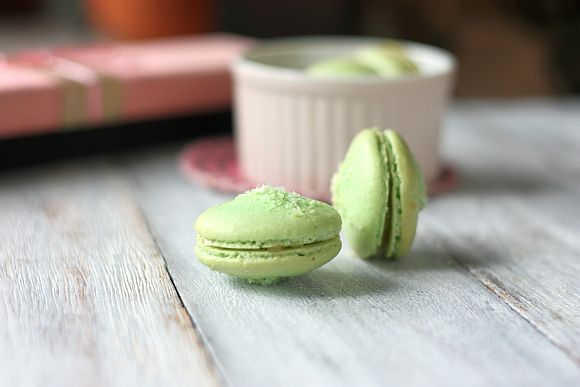
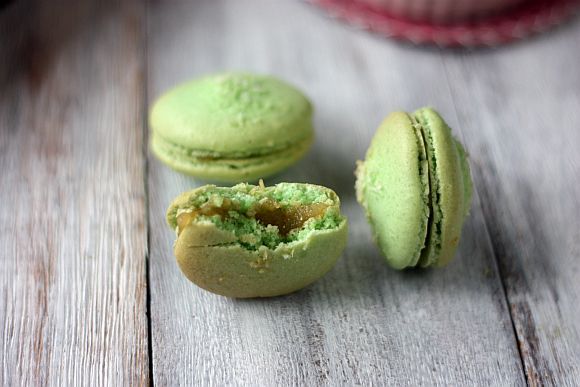
Pandan Flavoured Macarons with Coconut Jam (Kaya)

Macarons are still a mystery to me because I am never consistent whenever I make these french cookies. I could have a good batch one time and a total disaster another time.

I don't purposely plan to make macarons but this particular time I had quite a lot of left over egg whites. So I kept them in a plastic container in the fridge for close to a week before using them. Pandan flavoured macarons had been on my mind when deciding on the flavour. For the filing it was simple - what goes with pandan was so obvious, kaya or coconut jam. It was a breeze where this recipe was concerned as I used bottled jam which is so easily available - buy the best flavoured one in this case! And I was glad that this time round it was not a disaster!

pandan mac 4


pandan mac 1


Pandan Flavoured Macarons with Coconut Jam (Kaya)
Adapted from "Ottolenghi - The Cookbook"

Ingredients:

110g icing sugar
60g almondmeal
60g egg whites, (about 2 eggs) aged 3 days in the fridge, then for about 3 hours at room temperature. You can also use 24 hour aged egg whites left open and unrefrigerated.
30g castor sugar (this is reduced from the original recipe)
1 tsp pandan extract or pandan essence
Wilton green colour gel (optional if you want more colour)
Dessicated coconut for sprinkling on top of shells
Store bought coconut jam (kaya) for filing

Method for the Macaron Shells:

1) Line two baking trays with parchment paper.

2) In a large mixing bowl mix the egg whites with an electric hand beater (alternatively you can use a stand mixer with the whisk attachment) until it is frothy. Gradually add the granulated sugar, whisking all the while, until the mixture turns into a thick glossy meringue (soft peak). Then add in the pandan extract and mix until stiff peaks.

3) Sift the almond meal in a clean bowl and measure out the correct weight. Then sift the icing sugar into another bowl and measure out the correct weight. Mix both almong meal and icing sugar together and whisk until mix properly. There should be no lumps

4) Add 1/3 of the dry ingredients into the meringue. Give the mixture a quick fold to ensure that everything is combined. Add the remaining 2/3 dry ingredients and gently fold the mixture (about 50 folds altogether). Fold a few times to break the air. Continue until you get a smooth and supple mixture, thick in consistency so that when you lift the spatula it flows back in thick ribbons. Test a small amount on a plate – should the tops fall back and flatten by themselves then it is ready, if not give it a few more folds.

5) Fill a large piping bag with a plain tip with the batter and pipe small rounds (2 cm in diameter) on your prepared baking paper. Sprinkle the top of each macaron with the dessicated coconut. Leave the macarons to rest and dry for 45 minutes.

6) Preheat the oven to 160C. When the macarons are ready, bake the shells for about 15 minutes. Remove from the oven and allow to cool. Use a flat offset spatula to gently remove the shells from the baking paper and allow to cool further on a rack.

pandan mac 2


To Assemble:

Using a spoon place a small dollop of the coconut jam on one of the shells and gently cover with another shell. Do not press. Continue to do this with the rest of the shells.

Storing Macarons:

If you are not going to be eating them right away you can store the shells in an airtight container at room temperature for 2-3 days. Fill the macarons a few hours before consuming.

They freeze well too but it is recommended to freeze them unfilled. To fill them take the shells out of the freezer 48 hours prior to serving and without defrosting fill them. This way the flavors will be allowed to blend as they thaw.

pandan mac 3


pandan mac 5
Related Posts with Thumbnails