Showing posts with label Christmas. Show all posts

Sunday, December 18, 2011

Christmas Sandies

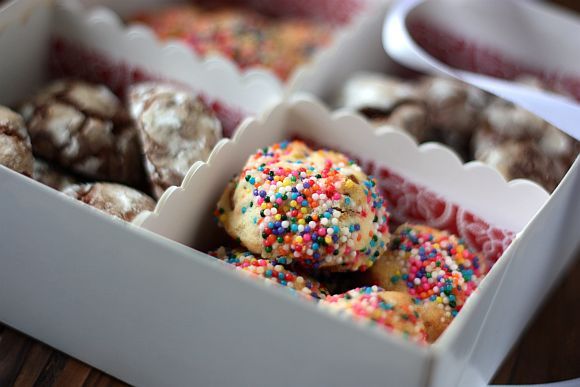
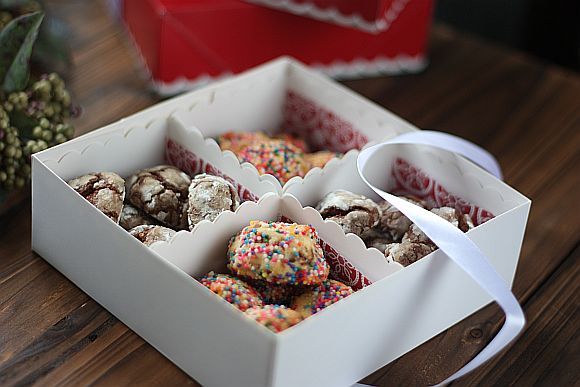
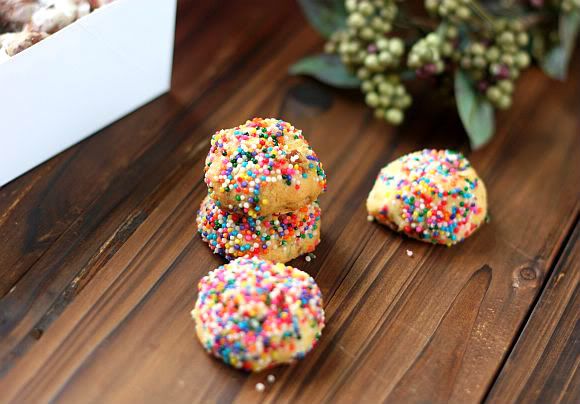
These cookies were on the cover of this month's "Desserts" and the entire magazine featured Christmas cookies. Such a timely publication as well. There was even a section covering popular Christmas cookies from around the world. The issue came out at the right moment as I was having difficulty picking a cookie recipe to bake from. In the end I decided on the Christmas Sandies and Crackle Cookie

xmas sandie 1


For the last three Christmas holidays, I would bake rather than buy gifts. I think a baked gift is so much more personal than a store-bought gift. I guess if you simply cannot bake or cook, you would have no choice but to go shopping. I too used to buy my gifts. The problem I faced each year is planning what to buy. On top of that I also need to remember what I have given in the past so as not to repeat them again. I think when you buy gifts from friends, the rule of thumb is probably buy something that you would use as well.

If you are like me, I am sure you have at one point of time received a gift that was totally useless. Interestingly I had read in the past that the top ten most useless gifts that someone would give includes toiletries, photo frames, towels, mugs, key chains and stuffed toys.

Photobucket


Christmas Sandies
Recipe Adapted from "Desserts Magazine #24)
Makes 36 1-inch cookies
Print Recipe

Ingredients:

226g unsalted butter
1/3 cup icing sugar
1 tsp vanilla extract
2 cups all purpose flour
1 cup finely chopped dried cranberries
2 tsp finely chopped mixed orange/lemon peel
Coloured nonpareils

Method:

1) Preheat oven to 180C. Line cookie baking trays with parchment paper.

2) Cream butter and icing sugar until combined and soft. Add in vanilla and beat for another 30 seconds.

3) Add in flour in 2 separate additions until combined. Add in dried fruits.

4) Shape into 1" size balls and drop each ball into the coloured nonpareils until well coated.

5) Arrange balls 1" apart in the prepared trays. Bake for about 14 - 15 minutes. Transfer to wire racks and let it cool. Store in room temperature for up to 3 days or freeze for up to 3 months.

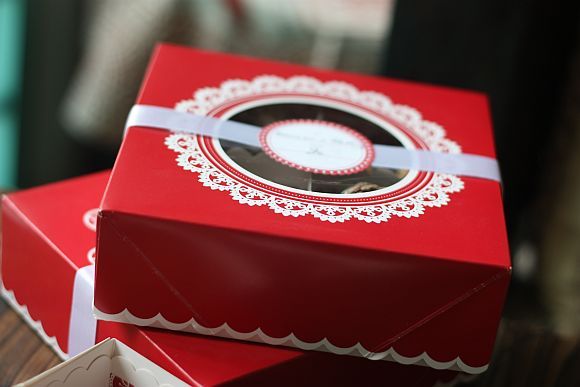
# The cookie boxes are from Martha Stewart's store.

xmas sandie 2


xmas sandie 4

Saturday, December 26, 2009

A Gingerbread House to Celebrate the Holidays

The December 2009 Daring Bakers’ challenge was brought to you by Anna of Very Small Anna and Y of Lemonpi. They chose to challenge Daring Bakers’ everywhere to bake and assemble a gingerbread house from scratch. They chose recipes from Good Housekeeping and from The Great Scandinavian Baking Book as the challenge recipes.

I was extremely keen to participate in this month's challenge especially as we were asked to do a gingerbread house. I've never done anything like this before so it would be really something as far as I was concerned. Both Anna and Y had posted their own gingerbread dough recipe. However we were also allowed to use any other recipe of our own choosing. I randomly picked a recipe from BBC Good Food and also used their gingerbread house template.

I really had great fun putting the entire house together. The house templates were baked and kept in the fridge a week ago. During the mid week, I scouted around for different candies, cookies, etc that would be used to decorate the house. My niece and nephew who happened to be in town this week helped out by putting up the wood pile and fence around the gingerbread house. They in turn had their own pieces of gingerbread cookie to decorate whilst I was assembling mine. I think for every piece of candy that went onto their cookie, one piece would be popped into the mouth .... that's kids for you!

Anyway I also wish everyone of you a happy New Year and hope you have a great kick start to usher in 2010.


Gingerbread House

For the Gingerbread Dough

Ingredients:

250g unsalted butter
200g dark muscovado sugar
7 tbsp golden syrup
600g plain flour
2 tsp bicarbonate of soda
4 tsp ground ginger

Method:

1) Heat oven to 200C/fan 180C/gas 6. Melt the butter, sugar and syrup in a pan. Mix the flour, bicarbonate of soda and ground ginger into a large bowl, then stir in the butter mixture to make a stiff dough. If it won't quite come together, add a tiny splash of water.

2) Cut out the template. Put a sheet of baking paper on your work surface and roll about one quarter of the dough to the thickness of 1/4". Cut out one of the sections, then slide the gingerbread, still on its baking paper, onto a baking sheet. Repeat with remaining dough, re-rolling the trimmings, until you have two side walls, a front and back wall and two roof panels. Any leftover dough can be cut into Christmas trees, if you like.

3) Bake all the sections for 12 mins or until firm and just a little darker at the edges. Leave to cool for a few mins to firm up, then trim around the templates again to give clean, sharp edges. Leave to cool completely.

4) Put the egg whites in a large bowl, sift in the icing sugar, then stir to make a thick, smooth icing. Spoon into a piping bag with a medium nozzle. Pipe generous snakes of icing along the wall edges, one by one, to join the walls together. Use a small bowl to support the walls from the inside, then allow to dry, ideally for a few hours.

5) Once dry, remove the supports and fix the roof panels on. The angle is steep so you may need to hold these on firmly for a few mins until the icing starts to dry. Dry completely, ideally overnight.

6) Decorate the gingerbread house with a variety of candies, sweets and chocolates. For the roof, I used oat bran crackers for a more realistic effect.


Sunday, December 20, 2009

White Chocolate Layer Cake

I guess the season to be jolly has come around again and it has been a breezing fast one in my opinion. I am still reeling as to where the last 12 months have gone to? Amongst many things that I do know is that I have diligently blog posted in 2009, baked and baked some more, tried out new recipes which I have never done in my entire life and met many, many good virtual friends through my blog and gotten to know them better through their own blogs. Thus, I would like to wish each and everyone of you happy holidays and good tidings.

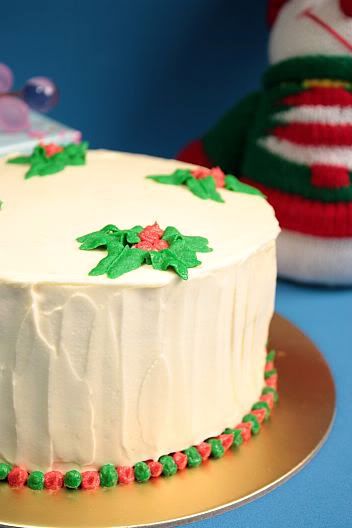
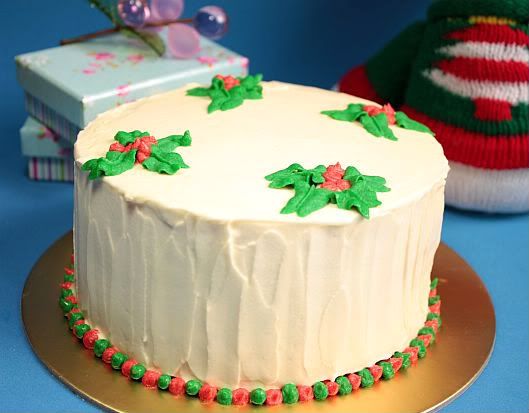
So in this month of festivities, the Cake Slice Bakers have selected a very appropriate cake to finish off the year with. It is a White Chocolate Layer Cake and we were encouraged to decorate it with a Christmas theme. I decided to keep this simple, yet elegant, so fancy santa clauses or christmas trees, etc are OUT!

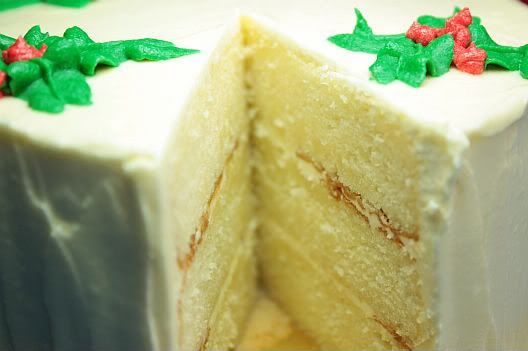
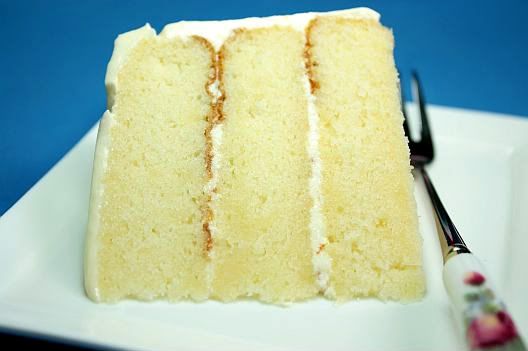
I just piped my version of holly leaves on the top and decorated the bottom edges with alternating red and green balls. Unfortunately the red Wilton colour that I had used didn't exactly turn out Christmas red - it sort of came out reddish pink. I also substituted the original frosting in below recipe with a white chocolate buttercream frosting. I took a slice to taste (official tester that is me!) and didn't think too much of the entire ensemble. But the next day, wow .... it was a different thing altogether. In fact I think this cake tasted so much, much better a day or 2 after sitting in the fridge. It defiitely got the thumbs up from everyone! This is one recipe that I would do again. I would truly recommend that you use a very good white chocolate (like valhora) if you are planning to bake this cake.


Cake: White Chocolate Layer Cake
(Recipe from Southern Cakes by Nancie McDermott)
Makes an 8" triple layer cake
(Halfing the recipe will give you 6" triple layer cake - which is what I did)


For the White Chocolate Cake:

2 ½ cups sifted cake flour
1 tsp baking soda
½ tsp salt
4 ounces white chocolate, finely chopped
½ cup boiling water
1 cup (2 sticks) butter, softened
2 cups sugar
4 eggs, separated
1 tsp vanilla extract
1 cup buttermilk (see note below)

For the White Chocolate Frosting:

6 ounces white chocolate, finely chopped
12 ounces (1 ½ cups) cream cheese, softened
3 tbsp butter, softened
¾ tsp vanilla extract
3 cups confectioners sugar

Method for the Cake:

1) Heat the oven to 350F and grease three 8 inch round cake pans. Line the bottom of each pan with a circle of waxed paper or kitchen parchment and flour the pan.

2) Combine the flour, baking soda and salt in a medium bowl, and stir with a fork to mix them well.

3) Bring 3 inches of water to an active simmer in the bottom of a double boiler or a saucepan that will accommodate a medium heat proof bowl so that it sits snugly over the water. Melt the white chocolate in the top of the double boiler or in the bowl over the simmering water. Stir often, and then pour in the ½ cup of boiling water and stir to mix well. Remove from the heat.

4) In a medium bowl, combine the butter and the sugar and beat with a mixed at medium speed to mix them together well. Add the egg yolks, one by one, beating each time to keep the mixture smooth. Add the white chocolate and the vanilla, and stir well to mix.

5) Add about a third of the flour mixture, and then about half of the buttermilk, beating with a mixer at low speed just long enough after each addition to make the flour or buttermilk disappear. Mix in another third of the flour, remaining buttermilk and then the last of the flour.

6) In a medium bowl, beat the egg whites at medium speed until they are foamy and opaque. Continue beating at high speed until they swell into thick, pillowy mounds and hold peaks that are stiff, but not fry. Add one third of the egg white mixture to the bowl of batter, and fold it in gently using a spatula. Add the remaining egg whites and continue to fold with a light touch, until the egg whites are blended in well, with only a few streaks showing.

7) Transfer the batter to the prepared pans and bake at 350F for 25-30 minutes until the cakes are golden brown, spring back when touched gently in the centre and are beginning to pull away from the sides of the pans.

8) Cool the cakes in the pans on wire racks or folded kitchen towels for about 30 minutes. Turn them out onto the racks and peel off the paper and turn them back the right way up to cool completely.


Method for the White Chocolate Frosting

1) In the top of a double boiler or a heatproof bowl, melt the white chocolate over hot, not simmering, water, stirring often. Remove from the heat once melted and let cool to lukewarm. Transfer the melted white chocolate to a large bowl, and add the cream cheese, butter and vanilla. Beat together at medium speed until you have a smooth sauce. Add the confectioners sugar and beat until smooth.

To Assemble:

Place one layer, top side down on a cake stand or serving plate and spread it with about a fourth of the icing. Continue stacking and frosting each cake layer in the same way. Cover the sides of the cake with any remaining frosting.

Cover the cake and refrigerate for at least 1 hour. Set the cake out about 30 minutes before you want to serve it.

NOTE: If you can’t find buttermilk, stir 1 tbsp lemon juice into 1 cup of milk and leave to stand for 10 minutes before using.


Thursday, January 1, 2009

Chocolate Gingerbread Cupcakes

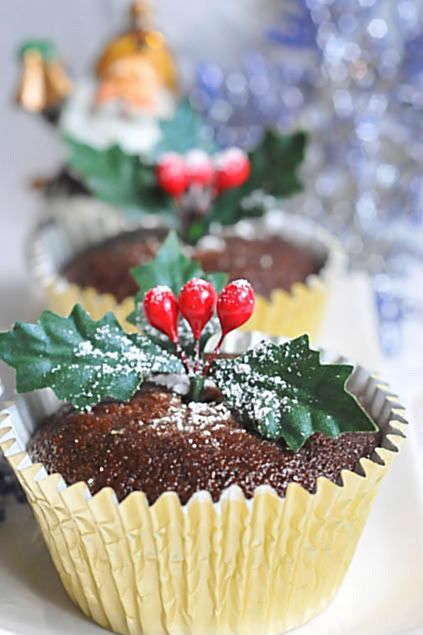
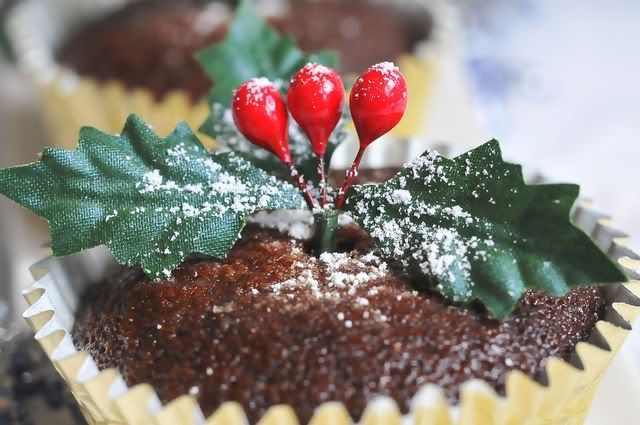
I do believe there is an affinity between ginger and Christmas. And everyone seems to be baking cookies, cakes and cupcakes with ginger and spices. I guess you can say I'm no different as well as I not only made these gingerbread cupcakes, I baked gingerbread cookies as well. This is originally a cake version but I adapted it for cupcakes as I think it's easier to serve it this way. I also baked these gingerbread cupcakes as Christmas presents for friends in addition to the apricot and ginger chutney I had made earlier (recipe in previous post).


Chocolate Gingerbread Cupcakes
(Recipe adapted from Dorrie Greenspan's Baking from My Home to Yours)

Ingredients:

1 1/2 Tbsp ground ginger
1 tablespoon sugar
2 cups plain flour
1 tsp baking soda
1 tsp ground cinnamon
1/4 tsp ground cloves
1/4 tsp nutmeg
1/2 tsp salt
1 stick plus 3 tablespoons unsalted butter, at room temperature
3/4 cup packed, light brown sugar
3 large eggs
1/2 cup molasses (I used bear rabbit brand)
6 oz bittersweet chocolate chips or finely choped chocolate
1 cup buttermilk

For the icing (optional):

3 ounces bittersweet chocolate, chopped
1 Tbsp strong coffee
3 Tbsp unsalted butter, at room temperature
3 Tbsp shifted icing sugar

Method:

1) Oven preheated to 180C, rack in center

2) Whisk flour, baking soda and spices and set aside. If you're using a stand mixer, fit it with the paddle attachment, set on medium, and cream the butter and brown sugar together until smooth, about 3 minutes. Add the eggs in one at a time, beating for 1 minute after each addition. The mixture will look curdled at this stage, but don't worry - it's suppose to look like this.

3) Add the molasses and continue beating until the mixture is smooth.

4) Reduce speed to low. Add the dry ingredients in three stages, alternating with the buttermilk. Begin and end with the dry ingredients. Do not over mix the batter. Fold in the chopped chocolate and pour the batter into your 9-in square baking pan. (I made this version as cupcakes - you should get about 12 - 14 cupcakes depending on the size of your cupcake liners)

5) For cake, bake for 40 minutes until the sides start to pull away from the pan. If you are making a cupcake version, bake between 17 - 20 minutes. Check to ensure that your cake is cooked by inserting a skewer into the center. If it comes out clean, it is ready.

6) Cool in the pan on a rack for 10 minutes, then take it out of the pan and cool to room temperature before icing.

For the Icing (optional):

1) Melt the chocolate together with the coffee in a double boiler. Once the chocolate is melted, remove it from the heat and stir in the butter one tablespoon at a time. Sift the confectioner's sugar over the mixture and stir it in. Transfer the mixture to a bowl and let it set for 10 minutes.

2) Pour the icing over the center of the cake and spread it to the sides. Let the iced cake sit for 30 minutes before cutting into 9 pieces.


Sunday, December 28, 2008

It's Christmas with a Daring Baker's French Yule Log

It's Christmas time and to usher in the spirit of yuletide, this month's Daring Baker's challenge is a French Yule Log.

You'll probably thinking huh .. yule log! Isn't it something that most families would have for Christmas, so where's the challenge! Well, that's where you are wrong! This log being called a "French Yule Log" must come from France. This is correct! In France you can buy two kinds of Yule log, either the Genoise and Buttercream type, or what is more commonly purchased, a frozen Yule Log which is very reminiscent of an ice cream cake, only often it’s not made of ice cream but rather frozen mousse of some sort. In French this is called an entremets which is sometimes loosely translated in English simply as a cream dessert. This recipe comes from Flore of Florilège Gourmand (by the way, the website is totally in French). Our darling hostesses for this month's challenge, which also happens to the last challenge to close off 2008 calendar, are Hilda of Saffron and Blueberry and Marion of Il en Faut Peu Pour Etre Heureux.

This challenge is really going to challenge us all - would you believe that it comes in 6 parts. The instructions itself when posted up was more than 15 pages long! You can say it freaked me out! I read, and re-read and re-read the recipe over the next 2 days before it finally sank in. Talk about a challenge, this certainly takes the cake - it was that daunting! However I did realize that a number of variations (which added to the somewhat lengthy instructions) had been provided by Hilda and Marion so as not to make the majority of us swim in quicksand.

I for one have never made any one of the 6 elements required for this log before, let alone eaten a French Yule Log is (unless you can count an ice-cream cake as a close semblance). The more well known type of yule logs that we get here are the genoise or swiss roll types.

The recipe below is based on the flavours I had chosen for this challenge. I also did not have a half pipe mould and thus made mine using two 4" cake pans. I've also posted the elements based on the order I had tackled the 6 elements (you can opt to make the elements over a 2-day period instead of doing everything in a day.) I made all first five elements over the Sunday and did the final icing on Monday.


FRENCH YULE LOG OR ENTREMETS
(Recipe by Flore of Florilège Gourmand)
(makes one 8" cake pan dessert or a 9" x 4" loaf pan dessert)

Element #1 Dacquoise Biscuit (Almond Cake)
Preparation time: 10 mn + 15 mn for baking

Ingredients:

80g almond meal (you can use hazelnut meal as substitute)
50g icing sugar
2 Tbsp (15g) all-purpose flour
3 medium egg whites (about 100g)
4 Tbsp (50g) granulated sugar

Method:

1) Finely mix the almond meal and the caster sugar. (If you have a mixer, you can use it by pulsing the ingredients together for no longer than 30 seconds).

2) Sift the flour into the mix.

3) Beat the eggs whites, gradually adding the granulated sugar until stiff.

4) Pour the almond meal mixture into the egg whites and blend delicately with a spatula.

5) Grease a piece of parchment paper and line your baking pan with it.

6) Spread the batter on a piece of parchment paper to an area slightly larger than your desired shape (circle, long strip etc...) and to a height of 1/3 inches (8mm).

7) Bake at 350°F (180°C)for approximately 15 minutes (depends on your oven), until golden.

8) Let cool and cut to the desired shape.

Element #2 Chocolate Creme Brulée Insert
Preparation time: 15mn + 1h infusing + 1h baking

Ingredients:

1/2 cup + 1 2/3 Tbsp (140g) whole milk
2/3 cup + 1tsp (140g) heavy or thickened cream
1/3 cup (25g) unsweetened cocoa powder
4 medium-sized (72g) egg yolks
3 Tbsp (40g) granulated sugar

Method:

1) Heat the milk and cream to just boiling. Add the cocoa powder.

2) Whisk together the sugar and egg yolks (but do not beat until white).

3) Pour the cocoa milk over the sugar/yolk mixture. Mix well.

4. Wipe with a very wet cloth and then cover your baking mold (whatever shape is going to fit on the inside of your Yule log/cake) with parchment paper. Pour the cream into the mold and bake at 210°F (100°C) for about 1 hour or until firm on the edges and slightly wobbly in the center.

5) Let cool and put in the freezer for at least 1 hour to firm up and facilitate the final assembly.

Element #3 Coconut Crisp
Preparation time: 10 mn

Ingredients:

3.5 oz (100g) white chocolate
1 oz (1/3 cup/25g) dessicated coconut
1 2/3 Tbsp (25g) unsalted butter
2.1 oz (60g) rice krispies (you can use cornflakes instead)

Method:

1) Spread the coconut on a baking tray and bake for 5-10 minutes at 375°F (190°C) to toast (a different temperature might work better for you with your own oven).

2) Melt the white chocolate and butter in a double boiler. Stir until smooth and add the toasted coconut.

3) Add the coarsely crushed lace crepes. Mix quickly to thoroughly coat with the chocolate. Spread between two sheets of wax paper to a size slightly larger than your desired shape. Refrigerate until hard.


Element #4 Mango Mousse
Preparation time: 20mn

Ingredients:

2 medium-sized egg yolks
2 Tbsp (17g) cornstarch
1/3 cup (80g) whipping cream
7 oz (200g) mango puree
1/2 cup (100g) granulated sugar
36g water
5g (2 1/4 tsp) powdered gelatin
100g (about 3 medium eggs) egg whites

Method:

1) Beat the egg yolks with the cornstarch until thick, white and fluffy.

2) Heat the cream in a medium saucepan and once hot, pour a small amount over the egg yolks while whisking vigorously.

3) Pour the egg yolk mixture back into the rest of the cream in the saucepan, add the mango puree and cook, stirring constantly, until it thickens considerably, at least 3-5 mn. Let cool to lukewarm temperature.

4) Make an Italian Meringue: Cook the sugar and water on medium heat until temperature reaches 244°F (118°C) when measured with a candy thermometer. If you don’t have a candy thermometer, test the temperature by dipping the tip of a knife into the syrup then into a bowl of ice water. If it forms a soft ball, you’ve reached the proper temperature.

5) Beat the egg whites until foamy. Pour the sugar syrup into the whites in a thin stream while continuing to whisk vigorously (preferably with a mixer for sufficient speed). Whisk/beat until cool (approximately 5 minutes). The meringue should be thick and glossy.

6) Soften the gelatin in cold water and let sit for about 3 minutes. Then zap the gelatin mixture in the microwave for 1 or 2 seconds.

7) Put the melted gelatin in a mixing bowl and, while whisking vigorously, pour the lukewarm mango cream over the gelatin.

8)Carefully blend the Italian meringue into the mango mixture. Cool the mousse and put it into the fridge.

Element #5 Dark Chocolate Ganache Insert
Preparation time: 10mn

Note: Because the ganache hardens as it cools, you should make it right before you intend to use it to facilitate piping it onto the log during assembly. Please be careful when caramelizing the sugar and then adding the cream. It may splatter and boil.

Ingredients:

4 Tbsp (50g) granulated sugar
2/3 cups less 1 Tbsp (135g) heavy or thickened cream
135g dark chocolate, finely chopped
45g unsalted butter softened

Method:

1) Make a caramel: Using the dry method, melt the sugar by spreading it in an even layer in a small saucepan with high sides. Heat over medium-high heat, watching it carefully as the sugar begins to melt. Never stir the mixture. As the sugar starts to melt, swirl the pan occasionally to allow the sugar to melt evenly. Cook to dark amber color (for most of you that means darker than last month’s challenge).

2) While the sugar is melting, heat the cream until boiling. Pour cream into the caramel and stir thoroughly. Be very careful as it may splatter and boil.

3) Pour the hot caramel-milk mixture over the dark chocolate. Wait 30 seconds and stir until smooth.

4) Add the softened butter and whip hard and fast (if you have a plunging mixer use it). The chocolate should be smooth and shiny.


Element #6 Dark Chocolate Icing
Preparation time: 25 minutes

Note: Because the icing gelifies quickly, you should make it at the last minute.
For other gelatin equivalencies or gelatin to agar-agar equivalencies, look at the notes for the mousse component.

Ingredients:

1/2 Tbsp (4g) powdered gelatin
1/4 cup (60g) heavy or thickened cream
5 Tbsp (60g) granulated sugar
1/4 cup (50g) water
1/3 cup (30g) unsweetened cocoa powder

Method:

1) Soften the gelatin in cold water for 15 minutes.

2) Boil the rest of the ingredients and cook an additional 3 minutes after boiling.

3) Add to the chocolate mixture. Mix well.

4) Let cool while checking the texture regularly. As soon as the mixture is smooth and coats a spoon well (it is starting to gelify), use immediately.

How to Assemble the Log:

Depending on whether your mold is going to hold the assembly upside down until you unmold it or right side up, this order will be different.

Your assemble of the log will depend on the mould you are using. As I was using a cake pan, my assemble would be in the below order:

1) Cut the Dacquoise into a shape fitting your mold and set it in there. If you are using an actual Yule mold which is in the shape of a half-pipe, you want the Dacquoise to cover the entire half-pipe portion of the mold.

2)Pipe one third of the Mousse component on the Dacquoise.

3) Take the Creme Brulee Insert out of the freezer at the last minute and set on top of the mousse. Press down gently to slightly ensconce it in the mousse.

4) Pipe second third of the Mousse component around and on top of the Creme Brulee Insert.

5) Cut the Crisp Insert to a size slightly smaller than your mold so that it can be surrounded by mousse. Lay it on top of the mousse you just piped into the mold.

6) Pipe the last third of the Mousse component on top of the Crisp Insert.

7) Freeze for a few hours to set. Take out of the freezer.

8) Pipe the Ganache Insert onto the frozen mousse leaving a slight eidge so that ganache doesn’t seep out when you set the Dacquoise on top.

9) Close with the last strip of Dacquoise (you can omit the dacquoise on the top if you wish).

10) Freeze until the next day.

If you are doing the assembly UPSIDE DOWN (eg using a loaf pan or a half pipe tube, your assembly would be in the below order:

1) Mousse
2) Creme Brulee Insert
3) Mousse
4) Praline/Crisp Insert
5) Mousse
6) Ganache Insert
7) Dacquoise
8) Freeze the assembled log over night before applying the icing.

THE NEXT DAY...

1) Unmold the cake (or log) and set on a wire rack over a shallow pan. Cover the cake with the icing. Let set. Then return to the freezer for a couple of hours.

2) Decorate your cake however you wish. The decorations can be set in the icing after it sets but before you return the cake to the freezer or you may attach them on top using extra ganache or leftover mousse, etc...

3) Transfer to the refrigerator no longer than ½ hour before serving as it may start to melt quickly depending on the elements you chose.


Tuesday, December 23, 2008

Gingerbread Cookies

I made these cookies a week ago and kept them in the refrigerator without icing them first. I iced them this afternoon as I was intending to give them tomorrow to friends as part of my Christmas baked give-aways. I must admit that I wasn't too thrill when they were first baked but the taste of the spices developed in the next few days and the cookies were really delicious and soft.

This is my first attempt at icing cookies so it was somewhat amatuerish. I also used two of the Christmas cookie cutters that I had bought recently just for Christmas, a snowflake and Christmas tree cutter.


Gingerbread Cookies
(Makes 24 large cookies)

Ingredients:

5 cups all-purpose flour
5 tsp ground ginger
1 Tbsp ground cinnamon
1 tsp freshly grated nutmeg (I used ground nutmeg instead)
1/2 tsp ground cloves
1 tsp salt
1/2 tsp baking soda
226g unsalted butter
2/3 cup firmly packed dark brown sugar
2 large (60g) eggs
2/3 cup molasses

Royal Icing:
Makes 6 cups
(Recipe from Martha Stewart)

450g icing sugar
5 Tbsp meringue powder or 1/4 cup pasteurized egg whites
2 Tbsp water
Food coloring

Combine icing sugar and meringue powder (or egg whites) in a mixing bowl and beat on low speed. Add water drop by drop. The amount depends on whether you used the powder or the egg whites, and on the temperature and humidity in your kitchen. Add the water slowly and do not let the mixture get runny - you will probably not use all of it. Beat until the mixture holds a trail on the surface for five seconds when you raise the mixer from the bowl. If you like, you can tint the icing with a few drops of food coloring.

Method:

1) In a large bowl, sift and combine the flour, spices, salt and baking soda. Stir well to mix.

2) Place the butter and brown sugar in the bowl of a standing electric mixer fitted with the paddle attachment and beat on medium speed until well mixed, about 1 minute.

3) Beat in the eggs, one at a time, beating smooth after each addition. Scrape down bowl and beater.

4) Lower speed and beat in about half the flour mixture. Beat in all the molasses then scrape bowl and beater. Add the remaining flour mixture, about 1 cup at a time, and beat after each addition until it has been absorbed.

5) Remove the bowl from the mixer and give the dough a final mixing with a large rubber spatula. Scrape half the dough onto a large piece of plastic wrap and press it to about a 1/2" thickness. Wrap the dough securely and repeat with the remaining dough. Chill the dough for at least 2 hours or for up to 3 days. (If you are rush for time, do like what I did, stick the dough in the freezer for about 20 - 30 minutes)

6) When you are ready to bake the cookies, set racks in the upper and lower thirds of the oven and preheat to 176C (350F).

7) Unwrap one of the pieces of dough and cut it in half. Rewrap one of the halves and return it to the refrigerator.

8) On a floured surface, roll the dough until it is about 1/4" thick. Use a floured cookie cutter to cut the cookies. As they are cut, place the cut cookies on the prepared pan lined with parchment paper with about 1" between them on all sides. Repeat with the remaining dough. Save, press together, and reroll the scraps (they don't need to be chilled agian before rerolling).

9) Bake cookies for about 11 minutes or until edges of cookies are lightly browned. Remove from pan and cool completely on wire racks.


Saturday, December 20, 2008

Chocolate Hazelnut Nutcraker Cake to usher in the Holiday Spirit!


I've always loved the month of December. I guess it's to do with the festivities, get-togethers with family and friends, "pigging out", delicious baking and Christmas lights and decorations. It also signifies that a year would be coming to an end, a time to reminence on what's been achieved and what is still outstanding, a year to reflect what could have been done differently ... it's all this and more!

As with most other bloggers busy baking for Christmas, I too have my fair share of baking to do this month. So too is the Cake Slice Bakers group! Our cake for this month of festivities is called a Chocolate Hazelnut Nutcraker Cake ... I know the title of the cake is already quite a mouthful.

This cake is delicious any time of year but it was specially designed for the Christmas holidays – The Nutcracker is a play on the hazelnuts which are a key ingredient and a play on the popular ballet associated with this season. The layers can be baked in advance but the cake is best served the day it is assembled, allow it is best to leave it 6-8 hours before serving to allow the flavours to meld together and the crème to set up. I made a few changes at my end when doing this challenge. Instead of baking this cake as a 9" triple layer as in the original recipe, I two thirds the ingredients to come up with a 6" tripler layer cake. I also omitted the rum syrup and replaced it with an orange citrus syrup using orange juice, orange zest and orange extract.


Chocolate Hazelnut Nutcracker Cake
Makes one 9" triple layer cake

Ingredients:

1 cup skinned hazelnuts (113g)
10 whole graham crackers (156g), broken into pieces
1 1/4 cups sugar
57g unsweetened chocolate, finely grated
10 eggs, separated
1/4 cup vegetable oil
1 tsp vanilla extract
1/2 cup all purpose flour
1 1/2 tsp pumpkin pie spice (I didn't have this so I substituted with all spice)
1 tsp baking powder
Dark chocolate curls for decoration

Method:

1) Preheat the oven to 180C. Butter the bottom and sides of three 9" cake tins. Line the base with parchment paper and dust the sides with flour, tap out any excess.

2) Spread the nuts onto a baking tray and toast for 10-12 minutes until lightly browned. Leave to cool completely. Increase the oven temperature to 180C.

3)In a food processor, grind the graham crackers to crumbs. Transfer to a bowl and set aside. Add the toasted nuts to the processor (no need to wash) and add1/4 cup of sugar. Pulse until the nuts are finely ground, but do not blitz too much or else it will form a paste. Add the nuts, graham cracker crumbs and grated chocolate together in the bowl and mix.

4) In a large bowl, whisk the egg yolks and 1/2 cup of sugar using an electric mixer until well blended. Add the oil and vanilla slowly, beating until ribbons begin to form on the surface of the mixture. Then, fold in the chocolate nut crumbs.

5) Place the egg whites in a clean bowl and beat until thick and foamy. Gradually add the remaining 1/2 cup of sugar, continuing to beat until the whites form stiff peaks. Fold a third of the egg whites into the yolk mixture and mix well to slacken the mix. Sift over the flour, spice and baking powder and fold in. Gently fold in the rest of the egg whites until no streaks remain but do not over mix.

6) Divide the batter between the three pans and bake for 25-30 minutes until a toothpick comes out clean. Let the layers cool in the pans for 10 minutes before turning out onto a wire wrack to cool completely.

Rum Syrup:

1/4 cup sugar
1/4 water
1/4 cup dark rum

Combine the sugar and water in a small saucepan. Place over a medium heat, stirring until the sugar dissolves. Remove from the heat and add the rum. Allow to cool before using.

Crème Chantilly:

2 cups heavy cream
3 Tbsp icing sugar
1 1/2 tsp vanilla extract

Combine the cream, sugar and vanilla in a chilled bowl and whip until the cream is stiff but not too thick or buttery.

To Assemble the Cake:

1) Place a layer on a cake stand, flat side up. Sprinkle it with a third of the rum syrup and let it all soak in for 1-2 minutes. Using a star tip, pipe individual stars by using 1/3 cup of the crème Chantilly over the top, working from the outer ring to the centre of the cake. Repeat with the remaining layers, letting the syrup soak in before adding the crème.

2) Use silver balls on the tip of the stars, only for the top layer of the cake. Finish off with some Feraro chocolates as final decorations.

Note: This cake can be stored in the fridge for 3 days.


Wednesday, December 17, 2008

Apricot and Ginger Chutney

I decided this year that I would not buy presents for friends and that I'll give home made goodies instead. It would be so much more of a personal touch. I don't know about you but sometimes I find it very difficult to come up with a gift for some one and have to think "did I give them this 2 years ago?" Well, this change will certainly solve all this.

One of the goodies I decided to try my hand at this year is a chutney. Sounds wonderful doesn't it. I think these are such nice presents especially if they are packed away into pretty jars with ribbons and gift tags. I picked this particular chutney recipe because I had a couple of unopened packets of dried apricot sitting in my kitchen cupboard. I think I bought these a while back with the intention of making some apricot brioche ... hmm never got to it. No worries cause they would now come in real handy.

This is a chutney with a bit of zing, perfect with cold meats and cheese. It'll go well with a sandwich as well. I'm thinking that you could even add a dollop on top of an Italian salad dressing. It's so good that you likely finish all of this in one sitting!


Apricot and Ginger Chutney
(Recipe modified from Good Food)

Ingredients:

1 onion, finely chopped
1 garlic clove, crushed
175g dried apricots, finely chopped
60g sultanas
1 Tbsp of freshly grated young ginger
150ml orange juice
1 Tbsp of olive oil
1 Tbsp cider vinegar
2 Tbsp light brown sugar
1 tsp of cinnamon powder
1 star anise, optional
1 small stick of cinnamon, optional

Method:

1) Heat the oil in a small non-stick pan, then cook the onion and garlic for 5 minutes until soft. Add in the star anise and cinnamon stick and cook for another minute.

2) Stir in the apricots, sultanas, ginger, orange juice and vinegar, then bubble gently for about 15 - 20 minutes until the apricots become pulpy and most of the liquid has been absorbed.

3) Stir in the sugar and cook for another 2 - 3 minutes until the chutney is sticky. Then season and cool.

4) Fill sterilized bottles (should be sufficient to fill about 2 small jars) and place them into the fridge. This chutney will keep for a week. Can be served either cold or bring to room temperature.


Related Posts with Thumbnails