Showing posts with label Yeast. Show all posts

Sunday, June 16, 2013

Homemade Thin Crust Pizza

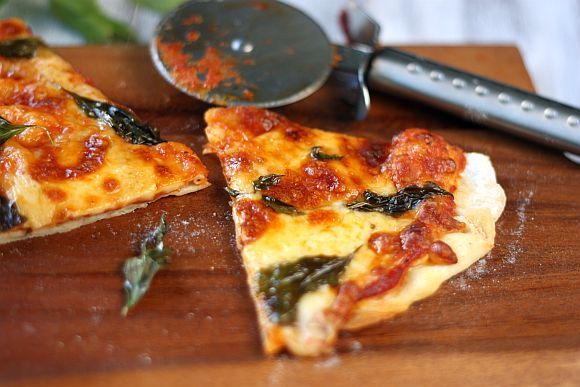
This is another great pizza recipe to put together especially if you are planning a pizza party.  It's quick and easy and any left over dough can be stored in the fridge for up to 3 days.  Just imagine a pizza party where your guest can put together their own designer pizza ...

pizza1-1 photo pizza1-1.jpg

pizza4-1 photo pizza4-1.jpg

Homemade Thin Crust Pizza
Makes Two 10" Pizzas

For the dough:

3/4 cups lukewarm water
1 teaspoon active-dry or instant yeast
2 cups unbleached all-purpose flour
1 1/2 teaspoons salt

Method:

1)  Preheat the oven to 450°F or as hot as it will go and let it heat for about 20 mins before making the pizza. If you have a pizza stone, put it in the lower-middle part of the oven now.  If you don't use use a baking sheet pan, turned upside down and place into the oven.

2)  Combine the water and yeast in a mixing bowl, and stir to dissolve the yeast. The mixture should look like thin miso soup. Add the flour and salt to the bowl and mix until you've formed a sticky.

3) Turn the dough out onto a clean work surface along with any loose flour still in the bowl.  until all the flour is incorporated, and the dough is smooth and elastic, about 5 minutes. The dough should still feel moist and slightly tacky. If it's sticking to your hands and counter-top like bubble gum, work in more flour one tablespoon at a time until it is smooth.

4)  Leave the dough to rise until doubled in bulk (about an hour or so). After rising, you can use the dough or refrigerate it for up to three days.

5) Cover the dough with the upside-down mixing bowl or a clean kitchen towel while you prepare the pizza toppings.

6) When ready to make the pizza, tear off two pieces of parchment paper roughly 12-inches wide. Divide the dough in two with a bench scraper. Working with one piece of the dough at a time, form it into a large disk with your hands and lay it on the parchment paper.

7) Work from the middle of the dough outwards, using the heel of your hand to gently press and stretch the dough until it's about 1/4 of an inch thick or less. For an extra-thin crust, roll it with a rolling pin. If the dough starts to shrink back, let it rest for five minutes and then continue rolling.

8) The dough will stick to the parchment paper, making it easier for you to roll out, and the pizza is baked while still on the parchment. As it cooks, the dough will release from the parchment, and you can slide the paper out midway through cooking.

9)  Spoon a few tablespoons of sauce into the center of the pizza and use the back of a spoon to spread it out to the edges. Pile on all of your toppings.

10) Using a bread peel or the bottom of a large removable cake tin, slide your pizza (still on the parchment) onto the baking stone in the oven or onto the pre-heated baking sheet pan.

11) Bake for about 5 minutes and then rotate the pizza, removing the parchment from under the pizza as you do so. Bake for another 3 to 5 minutes until the crust is golden-brown and the cheese looks toasty.

12) Remove the pizza from oven and let it cool on a wire rack. Repeat with shaping, topping, and baking second pizza.

13) Let both pizzas cool for about five minutes before slicing and serving.

pizza2-1 photo pizza2-1.jpg

pizza3-1 photo pizza3-1.jpg

Wednesday, December 19, 2012

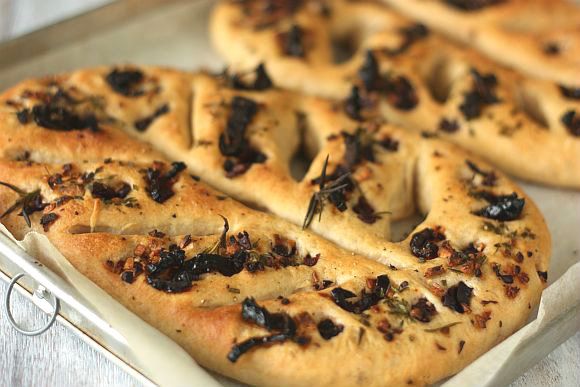
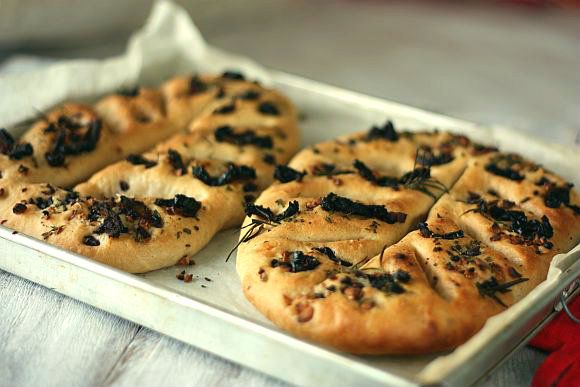
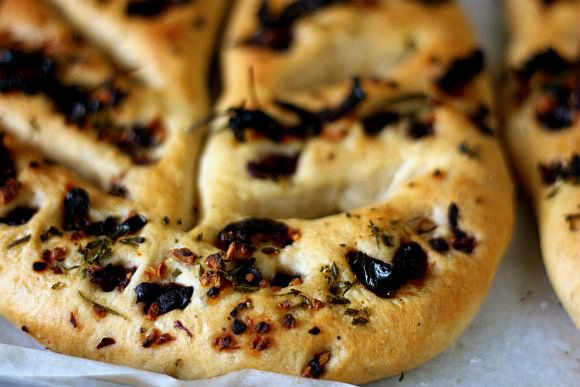
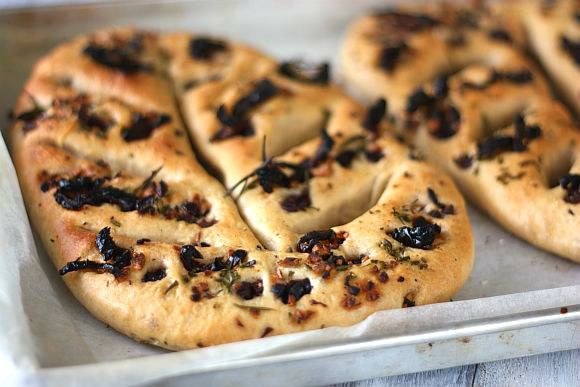
Fougasse (French flat bread)

I recently tried my hand at making a starter dough as well as a traditional French flat bread called Fougasse - pronounced as "foogass".

One of the distinguishing characteristics of fougasse is that it is often baked into a shape that is somewhat like a tree, with one end resembling the trunk and the wider opposite end being more or less round in structure. Fougasse can be used as a tasty accompaniment to both hot and cold soups, as well as create sandwich like snacks for the family. For mains, it goes very well with most pasta dishes as well as creamy casseroles or stews - great to mop up all the tasty gravy too! Fougasse (French flat bread)

fougasse2

fougasse1


Fougasse (French flat bread)
Adapted from From “Raymond Blanc's Kitchen Secrets”
Makes 2.1kg loaves of bread

For the dough starter: (this needs to be prepared a day before)

5g fresh yeast
135ml cold water
100g strong white bread flour, preferably organic
100g rye flour

For the dough:

680ml tap water
940g traditional white bread flour, preferably organic, plus extra for dusting
130g rye flour
15g fine sea salt (do not reduce your salt, otherwise the bread is quite bland)
22g fresh or 11g dried yeast

For the fougasse topping:

2 Tbsp extra virgin olive oil
1 tsp fresh rosemary, finely chopped
1 tsp fresh thyme leaves, finely chopped
1 tsp finely minced garlic
3 tsp finely chopped black olives
3 tsp of thinly sliced sundried tomatoes in oil
-3 grindings black pepper
Sprinkle of sea salt for topping

Method:

1) .For the dough starter, whisk the yeast into the water until dissolved.

2) Mix the white and rye flours in a separate bowl until well combined.

3) Pour the yeast mixture over the flours, whisking well to form a thick paste. Cover the bowl with a damp tea towel and set aside to ferment for at least 6 hours and up to 18 hours at room temperature. You can use dried yeast but you will only need half the quantity. Yeast is dormant at 4C, active between 20-40C and destroyed at 45-50 C. Using a dough starter in bread making gives a greater complexity of flavour; as the yeast activates and feeds on the natural sugars present in the flour, over time it produces a distinctively tangy or sour taste.

4) For the dough, line 2 large baking trays with greaseproof paper.

5) Add the water to the fermented dough starter and mix well to combine.

6) Place the white and rye flours into a food processor, set with the dough hook. Add the salt to one side of the bowl of the food processor, then add the yeast to the other side, being careful not to let the salt and yeast touch at this stage. as the salt will attack the yeast and damage its ability to ferment.

7) Add the starter dough mixture to the food processor and mix on a low speed for 5 minutes. The slow mixing process will give the flour the opportunity to fully absorb the water. (I used my KitchenAid for the kneading process – use the dough hook)

8) Scrape the dough from the sides of the bowl of the food processor and from the dough hook, then continue to mix on a medium speed for a further 5-7 minutes, or until the dough is smooth and elastic. The faster speed will warm the gluten in the flour making the dough elastic and creating the right environment for the fermentation to happen.

9) Scrape the dough into a neat ball and cover the bowl with cling film. Set aside to prove at room temperature for 1 hour, or until it has doubled in size.

10) When the dough has proved, turn the dough out onto a lightly floured work surface using a scraper if necessary. Cut the dough into four equal pieces.

11) The dough can be shaped in any way you choose. For a fougasse-style loaf, line four baking trays with baking parchment.

12) Roll each piece of dough into a triangle shape and place one onto each baking tray. Make a cut all the way down the centre of each dough triangle, without completely cutting through the dough. Make 3 deep slashes on either side of the central cut, cutting all the way down to the baking tray, then pull the dough apart slightly to create holes.

13) Brush the fougasses all over with olive oil, then randomly scatter and gently push the remaining fougasse topping ingredients evenly over the dough. This is to ensure that the topping sticks to the dough whilst it is proofing. Set aside to prove for 30-40 minutes.
14) Meanwhile, preheat the oven to 250C/475F/Gas 9 or to its maximum setting (this is critical as the temperature will decrease significantly when you open the door) and place a baking tray in the middle of the oven and a roasting tin on the bottom.

15) Slide the loaves onto the preheated baking tray in the middle of the oven, using the greaseproof paper to transfer them and pour 50ml/2fl oz of water into the roasting tin on the bottom. This will generate steam within the oven creating a good crust on the bread.

16) Bake the fougasse in the oven for 18-20 minutes, or until golden-brown and cooked through. (The loaves are cooked through when they make a hollow sound when tapped on the undersides.) Remove from the oven and set aside to cool.

17) Extra fougasse can be frozen for about one month. Thaw and reheat in oven to serve.

fougasse3

fougasse4

Friday, December 2, 2011

Red Bean Paste Pau (Azuki Bean Steamed Buns)

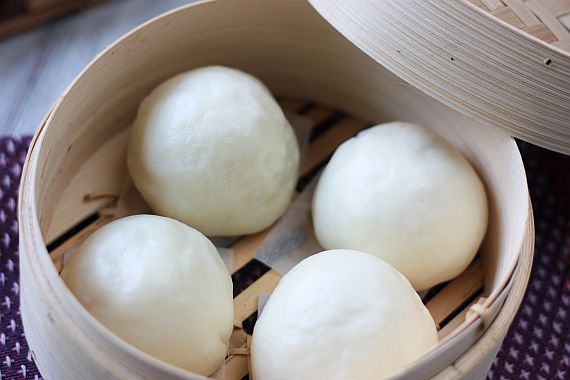
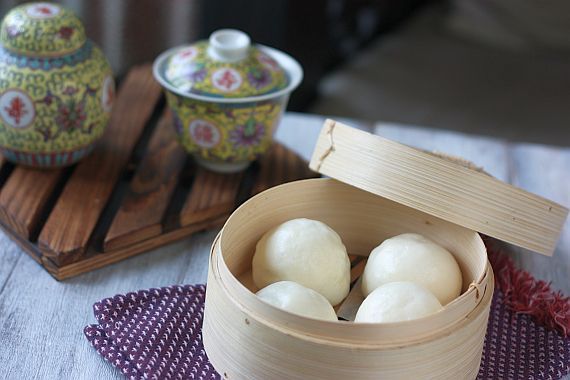
I was blog hopping a while back and came across a Pau recipe from my blogger friend, Shirley of Kokken69 . Timing was right as I was trying to find a simple and easy recipe for steamed buns. I guess what caught my eye too was the perfectly shaped bite-size morsels as well as the pretty "stamped" seal on top of each steamed bun.

pau 3


I thought to myself that this recipe would be the one to try out. I must confess that I did not make the red bean filling from scratch as I had left-overs from my Mooncake baking spree sitting in my refrigerator. The filling would be just sufficient for the amount of dough this recipe will create. The steamed buns turned out nicely but as with all steamed goodies, they are best consumed whilst hot. Once the buns turn cold, they turn a bit hard and dry. So always steam any remaining buns prior to consumption. My next project would be to try to nail down a recipe for fluffy steamed BBQ pork buns - like the ones served in Dim Sum Restaurants.

pau 1


Red Bean Paste Pau (Azuki Bean Steamed Buns)
Dough Recipe Adapted from "Dim Sum in Hong Kong"

Ingredients:

150g Hong Kong (or Pau) flour
2g dry yeast
2g baking powder
20g caster sugar
75g low fat milk
2g vegetable shortening

Method:

1) Place all ingredients into a mixer and blend until smooth at low speed.

2) Ferment for 10 mins at room temperature. Then blend in mixer again for 5 mins.

3) Divide the dough into pieces of 20g each. Roll out to form a round wrapping of about 2 inches in diameter. Try to make the edges a bit thinner than the center of the wrap.

4) Place filling (I used about 35g. Roll the filling to a tight ball before wrapping) in the center of the wrap and pull down the edges gently. Seal the edges tightly, tucking in so that the bun has a nice round top.

5) Proof Pau at room temperature for 45 mins.

6) Steam Pau over boiling water for 15 mins. Serve whilst still warm. Left overs can be refrigerated in a tightly sealed container. To consume, steam for about 5 mins.

pau 2


pau 4

Monday, November 14, 2011

Mini Panettone

I can't believe that it is just under six weeks to Christmas. I already see some shops in Singapore displaying their Christmas decorations. Time surely flies and before you know it, Christmas baking will be around the corner. I have not exactly planned what to do yet this year as gifts. I have decided that giving baked goodies are so much easier and very much a personal touch. I find it extremely difficult to shop for friends and family members as I have to keep track of not repeating a gift. Way too hard and furthermore my memory gets foggier each year. Guess it's due to age!

panettone 1


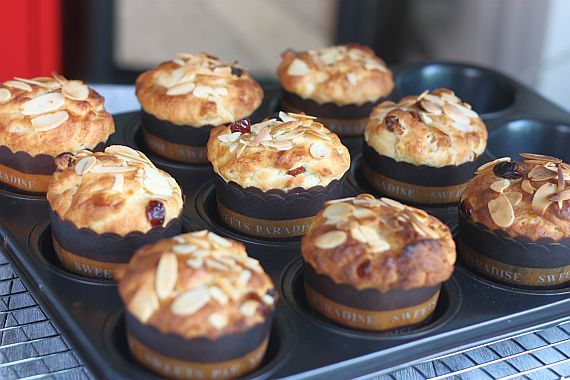
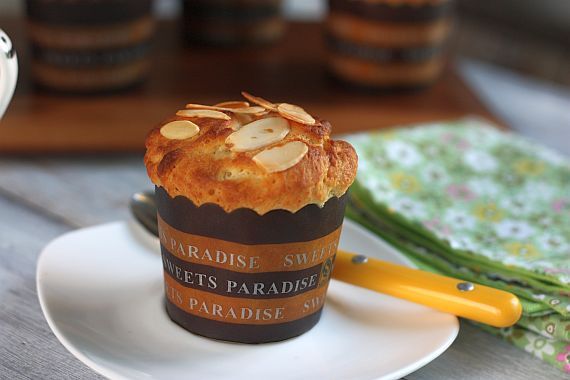
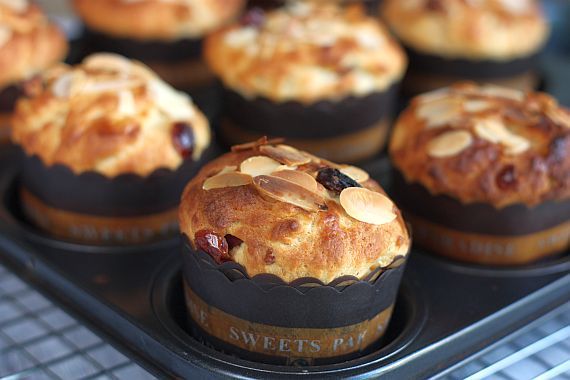
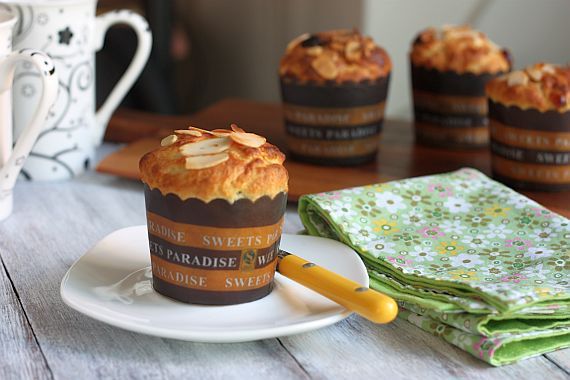
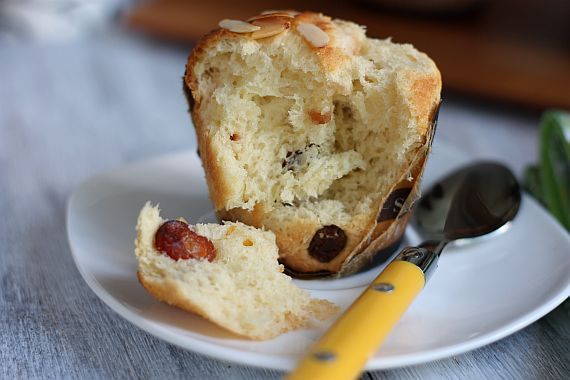
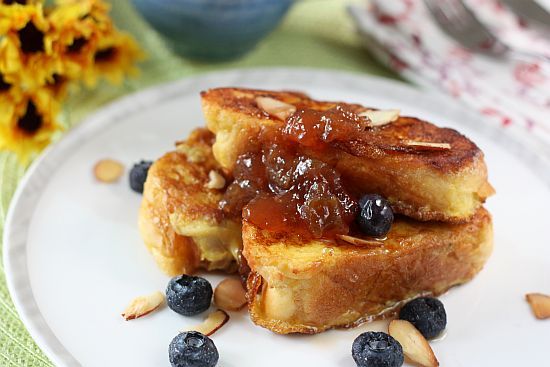
I made these Mini Panettone way back in August and this is an extremely late posting. But then again maybe not! I have never made Panettone before and when I chanced upon mini ones, I could not resist. Think of them as mini fruit loaves and so easy to serve as well.

panettone 3


Mini Panettone
Makes 10 large muffin size

Ingredients:

2 eggs + 1 yolk
1 tsp vanilla extract
500g all purpose flour
14g dried yeast
80g castor sugar
200g unsalted butter, softened
1/2 tsp salt
200ml warm milk (whole or low fat)
140g mixed raisins, sultana and cranberries
100g mixed candied orange and lemon peel
Extra milk for brushing
2 Tbsp flaked almonds

Method:

1) Beat the eggs and yolk with the vanilla.

2) In a large bowl, mix the flour, yeast, sugar and salt. Add the warm milk and egg mixture. Using a wooden spoon beat the mixture to a soft, sticky dough. Cover with cling film and leave in a warm place until the dough has doubled in size (about 45 mins in warm climate).

3) Line a large muffin tray with 10 muffin liners and set aside.

4) Once the dough has risen, blend the butter, fruit and peel into the risen dough, preferably with your hands. Cut into 10 equal sizes and drop a piece into each muffin liner. Cover with clingwrap and leave for the dough to rise to double its size.

5) Preheat oven to 190C. Brush the risen dough with the extra milk and scatter some almond flakes on the top. Bake for about 25 - 30 minutes until golden. Best eaten within 3 days or freeze for up to 6 weeks.

panettone 4


panettone 2


panettone 6

Tuesday, October 25, 2011

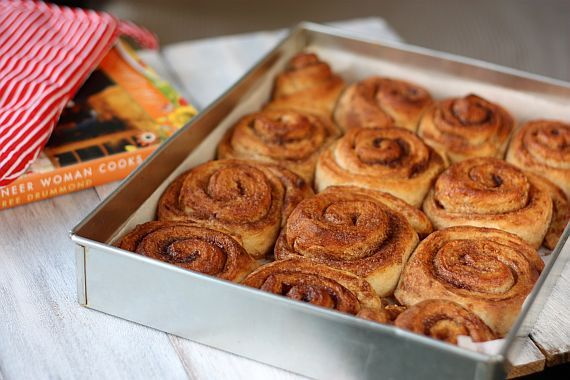
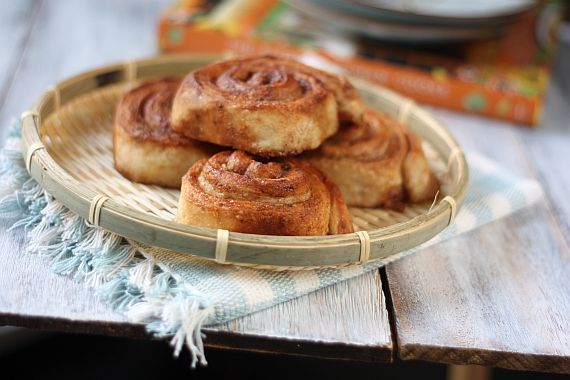
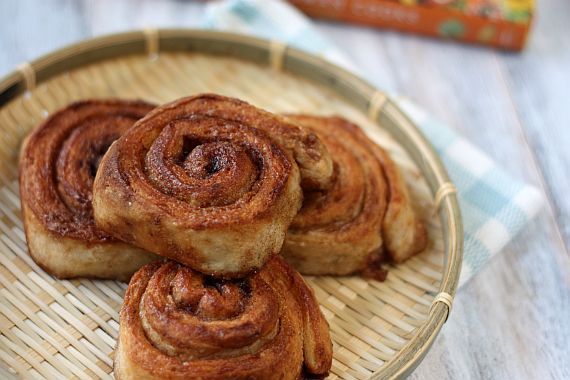
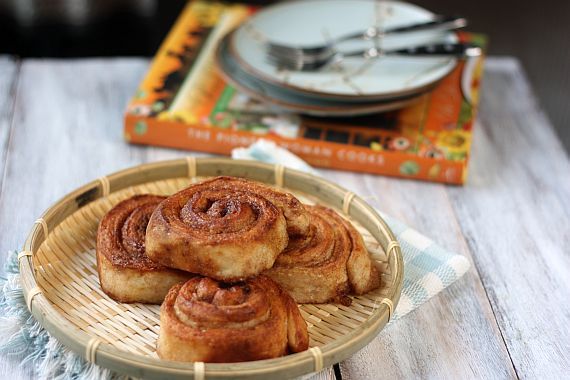
Cinnamon Rolls

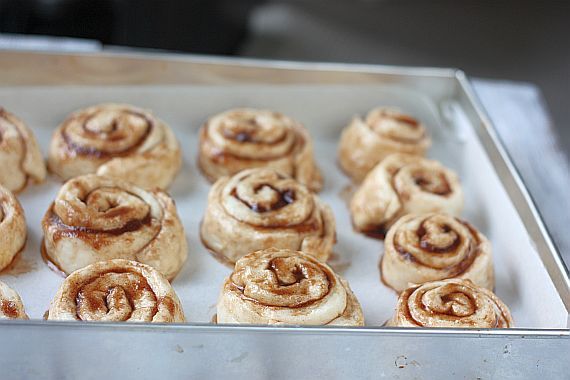
I absolutely love, love cinnamon rolls! I remember the first cinnamon store that opened in Singapore about 18 or so years ago and there were long queques lining up the store front just to grab the rolls. I believe the store's name was Saint Cinnamon and it was located at Wisma Atria. As I am a born sucker for cinnamon rolls (and still am), I too joined the long queques. I would usually take away about 3 to 4 rolls to munch on during tea break or breakfast. Gosh the smell of freshly baking cinnamon rolls could entice any hungry soul that's for sure.

cinn roll 1


You could say that I have tried a few Cinnamon Roll recipes in my brief baking history. You will find one such posted recipe in this blog as well from my early blogging days.

cinn roll 2


However I can swear that this particular recipe from The Pioneer Woman beats everything else hands-down. I love this recipe! So much so that this is my fourth time making these rolls. This is definitely a recipe for "keeps" in my book.

cinn roll 3


Cinnamon Rolls
Makes 15 rolls
Recipe Adapted from "The Pioneer Woman Cooks"

Ingredients for the Dough:

1 1/3 cup milk (I used low-fat milk)
1/3 cup vegetable oil (do not use olive oil)
1/3 cup caster sugar
1 1/2 tsp dry yeast
2 2/3 cups plain flour (plus additional 1/3 cup)
1/2 tsp baking powder
1/3 tsp baking soda
1 tsp salt

Ingredients for Sprinkling:

100g unsalted butter - melted
1/2 cup brown sugar + 2 Tbsp extra
3 1/2 Tbsp cinnamon powder
1/2 tsp nutmeg powder
1/2 tsp cloves powder
1/2 tsp mixed spice

Method:

1) Mix the milk, vegetable oil and sugar in a pan.

2) Scald the mixture (heat until just before the boiling point). Turn off heat and leave to cool for about 30 mins.

3) When the mixture is lukewarm to warm, but NOT hot, sprinkle in dry yeast. Let this sit for a minute.

4) Add 2 2/3 cups of flour into the milk mixture. Stir mixture together with a wooden spoon. Cover and let rise for at least an hour. The dough will still be very sticky to touch (but some of the gluten would have developed by then)

5) Add in 1/3 cup of flour, baking powder, baking soda and salt. Stir mixture together. (At this point the dough will still be sticky, you could cover the dough and put it in the fridge for about 30 minutes to firm slightly so that it'll be easier to handle. Alternatively you can leave it overnight or even a day or two in the fridge. This will give you a firmer dough. Just keep your eye on it and if it starts to overflow out of the pan, just punch it down).

6) When ready to prepare rolls, mix the sugar, cinnamon, nutmeg, mixed spice and clove in a bowl. Stir well to mix everything together.

7) Then sprinkle rolling surface generously with flour. Form a rough rectangle with the dough. Then roll the dough thin, maintaining a general rectangular shape about the size of a jelly pan. Drizzle melted butter over the dough. Next sprinkle the sugar mixture over the butter. (I find that in humid weather, it is easier to dot the dough with soften butter cubes rather than melted butter to prevent the butter from oozing out as you start to roll the dough)

8) Now starting at the opposite end, begin rolling the dough in a neat line toward you. Keep the roll relatively tight as you go. Next, pinch the seam of the roll to seal it.

9) Cut the roll to approximately 1 inch thick and lay them in a greased baking tray. Leave a little space in between the rolls for them to rise.
Let the rolls rise for 30 - 40 mins. Then bake at a 180℃ pre-heated oven until light golden brown, about 20-25 mins. Serve warm.


cinn roll 5


cinn roll 4

Monday, September 5, 2011

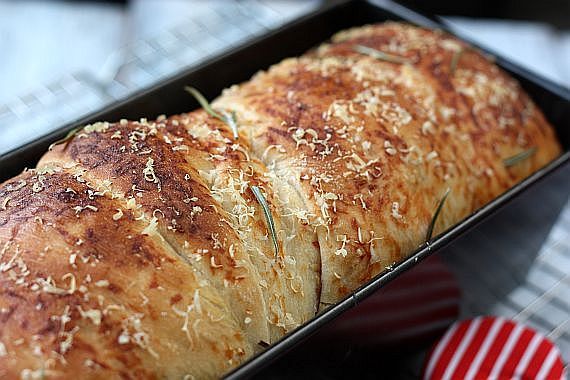
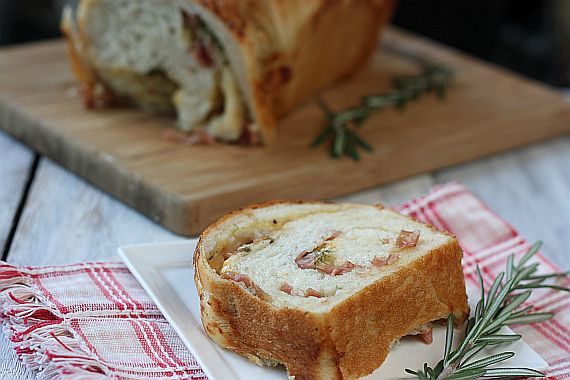
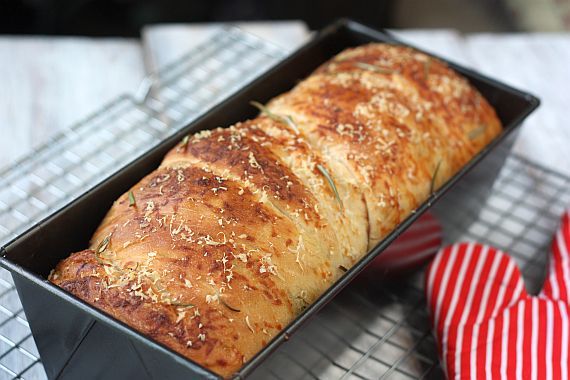
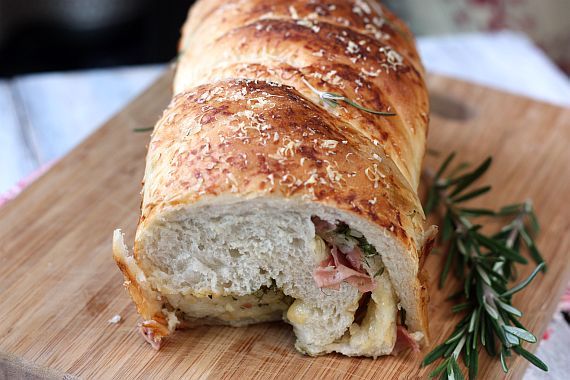
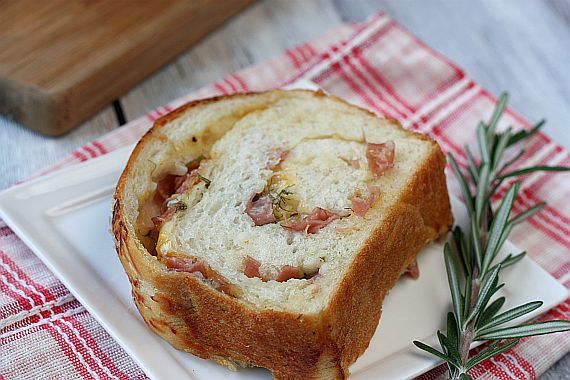
Bacon and Cheese Bread

Ever so often I would have an urge to bake bread. However as there is only myself at home, I would usually make a small loaf or at most two loaves and distribute one amongst my office colleagues. Some of my friends would say that I was mad to go through so much effort when one could easily get similar in a bakery, sometimes even cheaper. But then again it is the pure enjoyment of having to make it yourself and having first whiffs of loaves of bread baking in the oven. If you have ever made bread, you would probably agree with me that the first cut and taste of a fresh loaf is so, so good. Nothing beats this!

cheese bread 3


cheese bread 5


Ham and Cheese Bread

Ingredients:

1 cup scalded milk
3 teaspoons instant yeast
2 cups bread flour
1/4 cup butter
1 1/2 Tbsp sugar
1 tsp salt
2 large eggs
2 - 2 1/2 cups bread flour
150g streaky bacon, diced
1 1/4 cup mixed cheddar cheese
1 small onion, diced finely
1/4 cup chopped mixed fresh herbs (basil,
1/4 loosely packed, cup grated parmesan cheese (for topping)

Method:

1) Heat up a frying pan, add a little oil and fry the bacon until brown. Add in the diced onion and fry for another minute. Remove, set aside to cool. Once cooled, mix in the fresh herbs, set aside.

2) To start your dough, pour your milk into a heavy saucepan and scald. Do not allow the milk to come to a boil. Once it starts to simmer (small bubbles), you can take it off the fire.

3) Pour scalded milk into a large bowl and allow to cool to 105F. Add in 1 cup of bread flour and mix till smooth. Now, add in your instant yeast and another cup of bread flour. Mix with a wooden spoon. The dough will be firm. Cover with plastic wrap and allow to rest for 1 hour in a warm place.

4) Just before the dough is ready, mix your butter and sugar together in a bowl. Using your mixer beat on high speed the sugar and butter together till fluffy.

5) Add in your eggs and continue to mix till for another few minutes. Be sure to scrap the sides of the bowl a few times. Add the butter mixture to the dough and mix till smooth. Add in another cup of bread flour and mix.

6) Add a little flour to a flat surface and continue to add in the rest of the flour. Knead for 8 minutes. You may or may not need all the flour. You want to dough to be a little on the sticky side. But, not sticking to the table.

7) After kneading for 8 minutes, roll the dough into a small rectangle (like a swiss roll) to fit your loaf pan. Sprinkle the bacon mixture all over the dough leaving a 1/2" side. Then sprinkle the cheddar cheese on top. Taking the longer end start rolling the dough away from you as tightly as possible. Seal the seams and tuck in the ends underneath the roll.

8) Place the roll into the loaf pan in a zigg zagg fashion. Cover with plastic wrap and allow to rest for 1 hour or till double in bulk.

9) Preheat oven to 180C.

10) Using an egg white or milk wash, brush the top and then sprinkle with grated parmesan. Bake for 30 - 35 minutes. If your pan is small, the baking time should be shorten accordingly. The loaf should sound hollow when taped on the bottom. Place onto a wire rack and cool.

Note: You can use a mixer with a dough hook to knead the dough instead of doing it by hand. You can also shape the bread into rolls or smaller loaves.

cheese bread 2


cheesebread 4


cheese bread 6

Wednesday, August 3, 2011

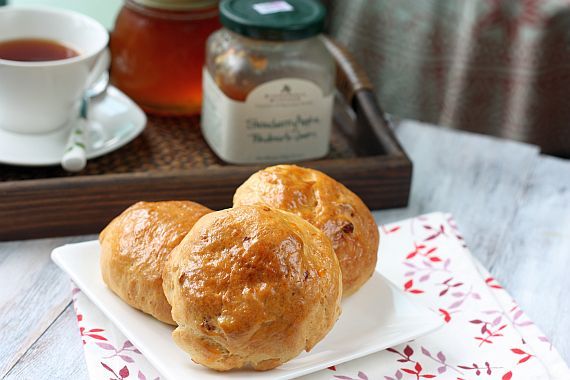
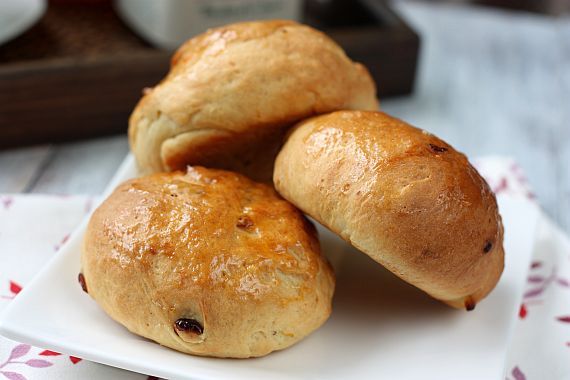
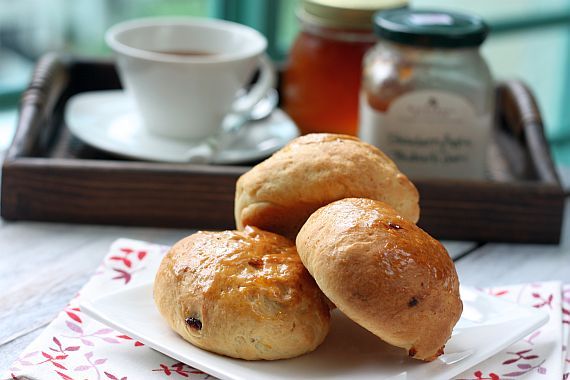
Cranberry Brioche Buns

I was having a chat with some friends recently and comparing notes about the types of bread we would usually bake. Just from that one conversation it had inspired me to make some brioche over the weekend. I usually find home-made breads tend to toughen a bit the next day and because of this I would half the recipe so that I can experiment, especially if it is a new recipe, and don't end up having lots of leftovers.

A brioche seemed to fit perfectly into the scene of things and instead of making a loaf, I fashioned the dough into buns. I added dried cranberries as well as I love dried fruit in sweet breads. These buns make for great tea-time snacks or breakfast. Left overs can be frozen in the freezer or you could tear it up in pieces for a bread and butter pudding. Yummy that's all I can say.

cran brioche 1


cran brioche 4


Cranberry Brioche Buns

Ingredients:

230g bread flour
7g dried instant yeast
2 eggs
50ml of milk (warmed slightly)
20g sugar
1 tsp salt
140g unsalted butter, softened
Zest from one orange
1/2 cup firmly packed dried cranberries (or any other dried fruit)
1 tsp orange extract (or substitute with vanilla extract)
1 egg yolk diluted in a little water for brushing

Method:

1) Sprinkle the yeast in milk and leave to rest for 10 minutes.

2) Sift flour into your mixer bowl. Then add in the eggs, sugar, salt, orange oil, zest and milk/yeast mixture.

3) With the hook attachment, knead until it forms a homogeneous mixture (about 3 to 4 minutes)

4) Add the butter gradually, while beating, until completely incorporated into the batter. Then add in the cranberries.

5) Beat at medium speed for about 15 minutes or until dough is released from the walls of the cup. (Add a little bit more flour if required)

6) Grease a pan with butter and line with cling film or greaseproof paper.
Pour the batter into the pan, cover with cling film and let it rise for about an hour or until double in size.

7) Punch the dough down and reshape into buns. You may want to weight each small ball of dough to get a uniform size. Shape into small buns and place onto baking trays lined with parchment paper. Cover with cling film and leave to rise for another 40 mins.

8) Preheat the oven to 190C. Brush the buns with a little milk and then bake for about 15 minutes. Check for doness by tapping the bottom of the bun - it should sound hollow.

9) Remove from oven, cool slightly and then serve with jam, cream cheese or butter.

cran brioche 3


cran brioche 5

Tuesday, May 24, 2011

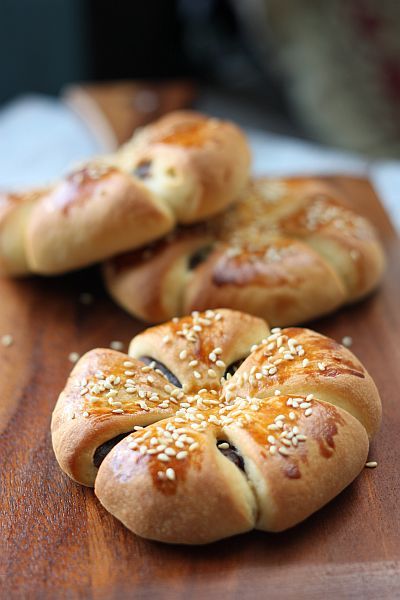
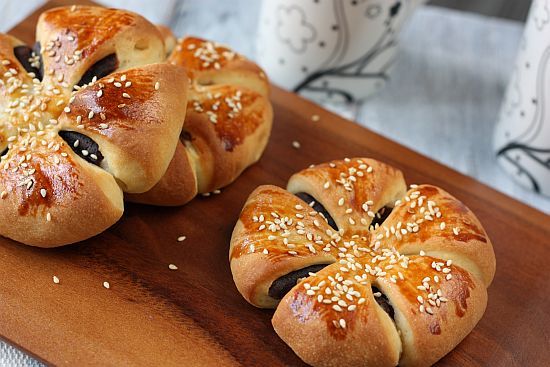
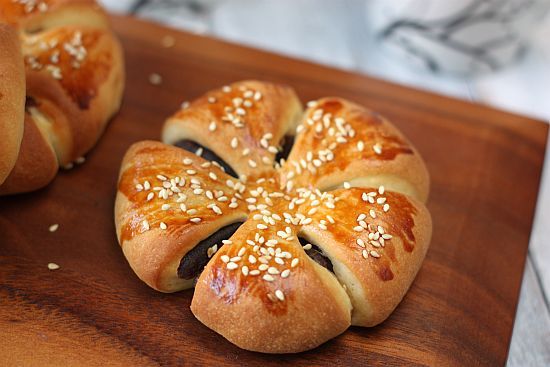
Red Bean Flower Bun

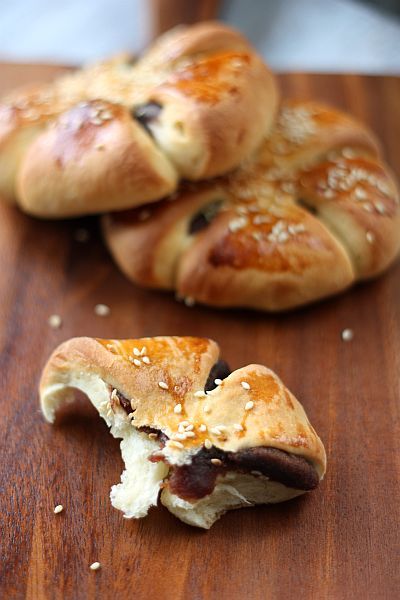
When I first saw these flower buns my first thought was "how pretty they were" and knew immediately that I would love to try my hand at making them. Luckily for me I had some left over red bean paste in the fridge so all I really needed to do was to make the bread dough.

flower bun 2


I really do like making bread especially when I don't have to knead the dough by hand. I leave this job to my trusty KitchenAid (boy am I glad I own one)and it is definitely a breeze! As with any bread recipes, it's not the kneading that takes up your time, it's the rising of the dough. If the recipe requires two rising, then you better set aside at least four to five hours to tackle the recipe. I found this bun to be extremely delicious on the day it was baked. The bread however hardens a bit the next day but if you warm it up quickly in a microwave, it becomes soft again. Altogether a delicious recipe and great for kids who love red bean paste.

flower bun 1


flower bun 3


Red Bean Flower Bun
Recipe Adapted from Happy Home Baking

Ingredients:

143g fresh milk (I used HL low-fat fresh milk)
35g egg (about 1/2 an egg)
25g caster sugar
1/4 tsp salt
250g bread flour
4g instant yeast
38g butter (unsalted)

For the Filing: Store bought red bean paste

Method:

1) Place milk, egg, followed by caster sugar, salt, bread flour and yeast into a large mixing bowl. Using a dough hook knead the mixture for about 12 to 15 minutes on number 2 of your KA. If the dough is still moist, sprinkle with a little bit more bread flour. The dough should be kneaded until it forms a ball and is no longer sticking to the side of the mixing bowl.

2) Lightly oil a separate bowl. Remove dough from the mixing bowl and place in th oiled dough. Coat the dough with the oil and then cover the bowl with cling wrap. Let proof for 60 mins.

3) Remove dough and punch out the gas.

4) Divide dough into 60g pieces and shape into balls. Let the doughs rest and relax for 20 mins. (this ‘relaxing’ time is needed so that the dough will be easier to roll out and shaped). Lightly cover with cling wrap.

4) On a lightly floured surface, flatten one dough into a round disk. Place 35g of red bean paste (rolled into a ball) in the middle of the disk and wrap the filing with the dough. Pinch the joints to ensure that each dough ball is sealed completed.

5) Again, flatten the ball down using a rolling pin. Using a very sharp knife, make deep cuts all the way down around the dough. This will give the bread the flower shape.

6) Brush the top of the bread with a little egg wash and then sprinkle with sesame seeds. Bake in a pre-heated oven of 190C for about 18 - 25 minutes.

flower bun 6


flower bun 4


flower bun 5

Sunday, March 20, 2011

A French Toast Breakfast

There is really nothing better than waking up on a Sunday morning to be welcomed by a plate of delicious warm french toast with maple syrup, fruit and a dollop of my faviourite jam on the side. I love having breakfast such as this.

In fact I think an English breakfast gets me moving faster than an Asian one! Heh I'm Asian right so I should be having my fried beehoon, or porridge or chee kueh .... shouldn't I? When on holidays, the best meal of the day for me would have to be breakfast, especially a buffet spread (ok I love stuffing my face). I thoroughly enjoy moving from one station to another, spread out with fresh fruit, cereal, cold cuts to the guy who keeps flipping sunny side eggs to scrambled eggs. My knees go jello at the sight of this and I would methodologically start with my fresh juice, to fruit and work my way to the main spread of eggs, sausages and pancakes.

Well it's been said that breakfast is the most important meal of the day, so what's your favourite breakfast dish?

fren toast 1


fren toast 3


French Toast
Serves 3 - 4

Ingredients:

8 slices of Brioche loaf, cut into about 1" thick
4 eggs
3/4 cup milk
1/4 cup cream (can be omitted)
1/4 tsp salt
1 tsp vanilla extract
1 tsp cinnamon
1/4 tsp nutmeg
Maple syrup, jam and fresh fruit to serve

Method:

1) Place eggs, milk, cream salt, vanilla extrct, cinnamon and nutmeg into a bowl. Whisk to combine well. Soak the brioche into the egg mixture.

2) Preheat a large frying pan over medium fire. Add about 1 tablespoon oil and about 1 1/2 tablespoon butter.

3) Fry the brioche for about a minute of each side until golden brown. Do not overcrowd your pan. Repeat with the remaining slices.

4) Serve immediately with maple syrup, jam and your favourite fresh fruit.

Photobucket


fren toast 2

Thursday, March 17, 2011

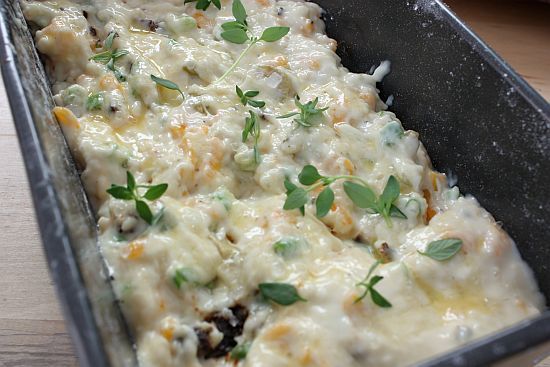
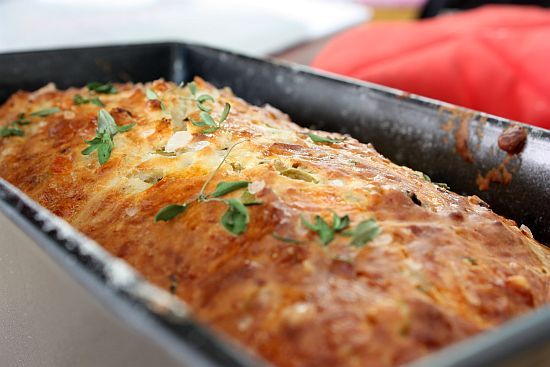
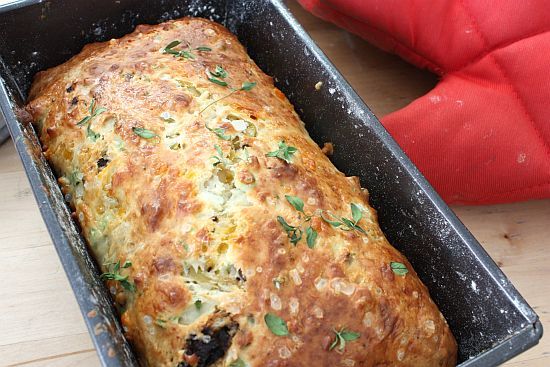
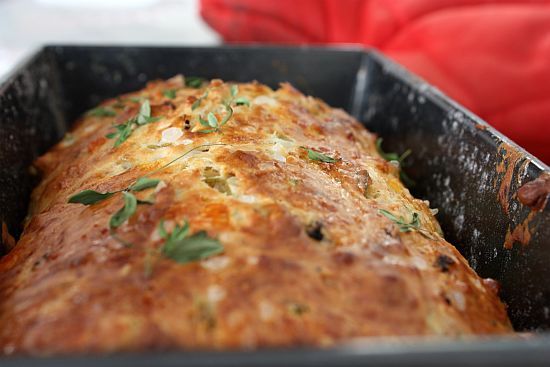
Cheese, Olive and Buttermilk Herb Bread

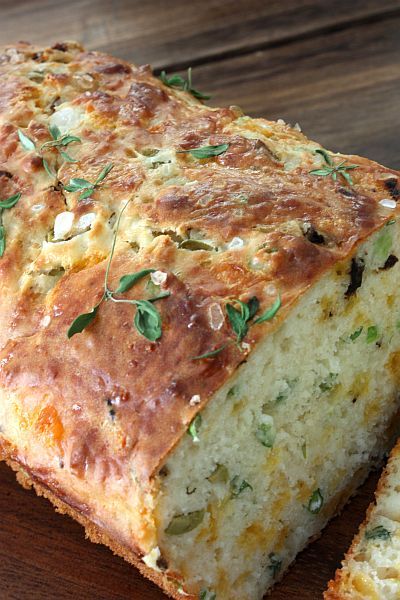
When I first saw the photos of this bread from "Mix & Bake", I immediately knew I had to try out this recipe. It is a non-yeasted bread and the texture is different from a regular loaf of bread. In fact, it is somewhat dense loaf but I guarantee you that it is ever so delicious. I am even dreaming (and salivating as well) of it again as I write this post. This loaf has a scrumptious flavour of two types of cheeses. Not forgetting the rest of the other delicious ingredients that's added to the batter. I must forewarn you that the smell from the oven whilst the loaf is being baked may drive you to stand in front of the oven waiting for the timer to ring.

buttermilk bread 1


Just imagine having a slice of this with a hearty bowl of soup or maybe serve it on the side with a delicious salad. Left overs are great when lightly toasted, hmm that's provided you still have left overs.

This is definitely a recipe keeper. It's so good that my boss has asked for the recipe and she has never done so todate even after sampling my baked goodies for more than a year.

buttermilk bread 2


Photobucket


Cheese, Olive and Buttermilk Herb BreadRecipe Adapted from "Mix & Bake" by Belinda Jeffrey

Ingredients:

2 1/4 cups plain flour
2 tsp baking powder
1/2 tsp bicarbonate of soda
1 tsp salt
1/2 tsp dry mustard powder
60g freshly grated parmesan
60g grated cheddar cheese
1/2 cup green olives, sliced
8 pieces sundried tomatoes, sliced thinly
1 tsp salt
1 tsp freshly ground black pepper
1/4 cup mixture of spring onion and Italian parsley
2 tsp thyme leaves or 1 tsp dried thyme
2 eggs
2 1/2 Tbsp olive oil
1 1/4 cup buttermilk (or use 1 1/4 cup less 1 Tbsp fresh milk + 1 Tbsp white vinegar or lemon juice. Set aside for 10 minutes before using)
Egg wash (optional) made from 1 egg yolk beaten with 2 tsp water
Extra thyme springs and sea salt, for topping

Method:

1) Preheat oven to 180C or 350F. Generously butter a large loaf tin (23 x 13 x 6cm) and either line it with butter parchment paper or dust with flour. Set tin aside.

2) Sift flour, baking powder, soda, salt, pepper and mustard powder into a large bowl. Whisk with a whisk to incorporate the dry ingredients. Add both cheeses, olives, sundried tomatoes, spring onion, parsley and thyme and stir them thoroughly together.

3) In a separate bowl, whisk the eggs, then whisk in the oil and buttermilk until they are well combined.

4) Make a well in the center of the flour mixture and pour in the wet ingredients. Stir together to form a thick, sticky batter. Scrape the batter into the prepared tin and spread it out evenly.

5) Brush the top of the batter with the egg wash and then srpinkly some thyme leaves and sea salt onto the loaf.

6) Bake for 40 - 45 minutes or until a fine skewer inserted in the middle of the loaf comes out clean. If the top starts to burn, place a piece of foil to cover the top of the loaf and continue baking. Leave in tin for 5 minutes before turning ot onto a wire rack.

7) This loaf is best served on the same day. Wrap left overs tighly and store in fridge. Gently reheat in oven if serving left overs.

buttermilk bread 3


buttermilk bread 7


buttermilk bread 5

Friday, December 17, 2010

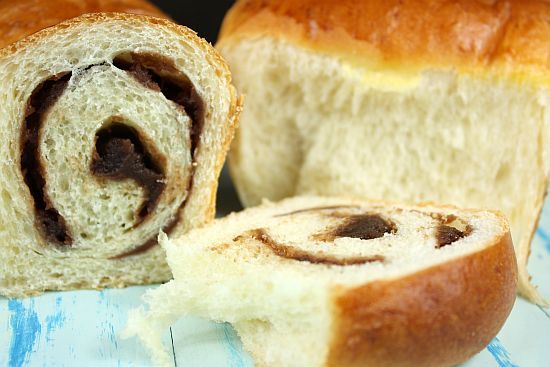
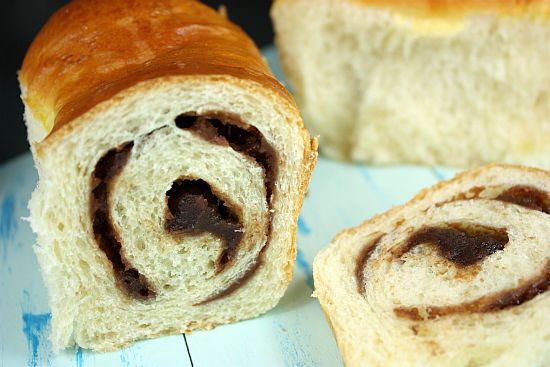
Japanese Style Red Bean Swirl Bread

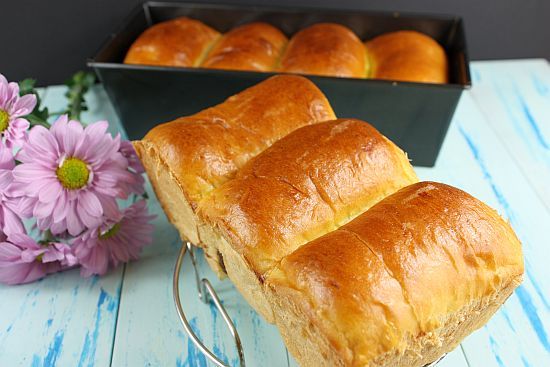
I've met a number of food bloggers who swear by the "tangzhong" method of making breads and so far I have only tried this one time when I was making buns for my Mini Sliders .

The texture of the bread is slightly different and lighter using the "tangzhong" method. However with all home-made breads, I always think it's best consumed on the day they are made. I decided to make a "sweet" loaf rather than "savoury" as I had some left over store bought red bean paste (for my Singapore readers, I bought it from Phoon Huat). I used to fear making bread because I had to do it by hand. I can never tell whether I would have kneaded it enough or not. But ever since I've gotten my KA, it's such a breeze. However do ensure that you have at least half a day set aside when making any yeasted goodies.

red bean bun 2


red bean bun 5


Japanese Style Red Bean Swirl Bread (Tangzhong Method)
Recipe Adapted from here

Ingredients of tangzhong (湯種 )
(Enough for 2 loafs of bread)

50gm/ 1/3 cup bread flour
250ml/ 1 cup water

Method:

1) Mix flour in water well without any lumps. Cook over medium-low heat, stirring consistently with a wooden spoon, whisk or spatula to prevent burning and sticking while you cook along the way.

2) The mixture becomes thicker and thicker. Once you notice some “lines” appear in the mixture for every stir you make with the spoon. It’s done. Remove from heat.

3) Transfer into a clean bowl. Cover with a cling wrap sticking onto the surface of tangzhong to prevent from drying up. Let cool. Chill in fridge for several hours before using. (The tangzhong can be stored up to a few days as long as it doesn't turn grey. If so, you need to discard and cook some more.)

Ingredients for the Bread:

350gm/ 2½ cups bread flour
55gm/3 Tbsp caster sugar
5gm/1 tsp salt
1 egg
1 Tbsp plus 1 tsp milk powder (to increase fragrance, optional and can be omitted)
1/2 cup milk (I used low fat)
120gm tangzhong
2 tsp instant yeast
30gm/3 Tbsp butter (cut into small pieces, softened at room temperature)

Filling: Store bought red bean (azuki) paste

Method:

1) Combine all dry ingredients: flour, salt, sugar and instant yeast in a bowl. Make a well in the center.

2) Whisk and combine all wet ingredients: milk, egg and tangzhong, then add into the well of the dry ingredients. Knead until you get a dough shape and gluten has developed, then knead in the butter. The dough will be extremely sticky.

3) Keep kneading until the dough is smooth, not sticky and elastic. (I added an additional 2 Tbsp of flour just to incorporate the dough). Knead about 12 mins if using KA.

4) Knead the dough into a ball shape. Place in a greased bowl and cover with a wet towel or cling wrap. Let it proof till it's doubled in size, about 40 - 60 mins.

5) Transfer to a clean floured surface. Deflate and divide the dough into four equal portions (or more depending on your tin). Knead into ball shapes. Cover with cling wrap, let rest for 20 minutes.

6) Roll out each portion of the dough with a rolling pin into an oval shape. Spread a thin layer of red bean paste, leaving a 1" border along the sides. The start to roll from the upper, shorter end down to the bottom (as you would a jelly roll). Tuck in the 2 ends and place into your tin, with the sealed end facing downwards. Repeat with the remaining dough.

7) Arrange the rolled-up dough in a greased or non-stick loaf tin. Leave to proof again for 40 mins or until dough has doubled in size.

8) Brush whisked egg on surface. Bake in a pre-heated 180C (356F) oven for 35 to 40 minutes. Remove from the oven and tin. Transfer onto a wire rack and let cool completely. Slice to serve or place in an airtight plastic bag or container once it's thoroughly cooled.

red bean bun 3


red bean bun 4
Related Posts with Thumbnails