Monday, August 17, 2009

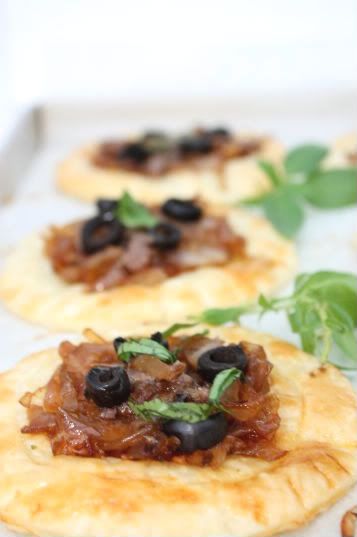
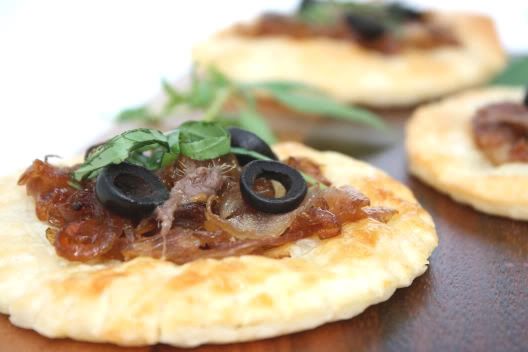
Pissaladiere

I have recently discovered a new baking show which is aired on my local cable network. The show is produced by BBC and is called "Bake" by Rachel Allen. Although it's only a half an hour show, I find her program to be extremely interesting. In the first part of the show, she would whip up a baked recipe and it could be either sweet or savoury. In the mid section of the program, she would cover a short feature. The last one was visiting a local chocolatier and having a quick insight as to how chocolate truffles are made. In the last piece of the program, which is an instructional piece, she would take a group of students through the intricacies of a baked recipe.

This particular recipe which I'm posting now comes from one of Rachel Allen's programs. If you are lazy you have the option of purchasing frozen puff pastry which will save you a bit of time. However if you do have time, it's always better to make your own. My other half who is not a "sweet toothed" person, thoroughly enjoyed this. It's amazing how the carmerlized onions blended so well with the saltiness of the anchovies and black olives. One piece of advice would be to make sure you cut each anchovy in half before latticing your pastry, otherwise it may be way too salty! Also make sure you eat this fresh from the oven. Serve with a side salad or just have it for an afternoon treat.


Pissaladiere
Recipe adapted from Rachel Allen's "Bake"

Ingredients for the shortcrust pastry:

200g plain flour, sifted
100g Butter, chilled and cubed
1 medium egg, beaten (for brushing the pastry)

Ingredients for the topping:

900g Onions, peeled and thinly sliced lengthways
2 cloves Garlic, peeled and crushed
1/2 tsp dried oregano
1/2 tsp mixed dried herbs
30-60g tinned anchovy fillets, drained (liquid saved for shortcrust pastry) and halved lengthways
10 black olives, pitted and sliced
Salt and black pepper to taste
Fresh basil leaves (thinly sliced for decoration)

Method for the pastry:

1) Put the flour, butter and a pinch of salt in a food processor and process briefly.

2) Add half the beaten egg and continue to process. (You might add a little more egg, but not too much as the mixture should be just moist enough to come together.) If making the pastry by hand, rub the butter into the flour until it resembles coarse breadcrumbs then, using your hands, add just enough egg to bring it together.

3) With your hands, flatten out the ball of dough until it is about 2cm thick, then wrap it in cling film or place it in a plastic bag and leave in the fridge for at least 30 minutes or, if you are pushed for time, in the freezer for 10–15 minutes, before using.

Method for the topping:

1) Heat the olive oil in a wide, heavy-bottomed frying pan, then add the onions. Stir the onions and cook over a low heat, covered, for at least 20 minutes, stirring continuously and scraping the base of the pan every few minutes.

2) Add the garlic, herbs and salt, pepper and sugar, and continue cooking for ten minutes, or until the onions begin to melt and turn golden. Remove from the heat.

To Assemble:

1) Preheat the oven to 180C/gas 4.

2) Remove the pastry from the fridge, uncover and, with a floured rolling pin, roll out on a floured work surface into a rectangle to fit a 23 x 33cm swiss roll tin. Lift it onto the tin and prick the whole base with a fork. Bake in the oven for ten minutes, then remove.

3) Cover the pre-baked base with an even layer of onions. Arrange the anchovy fillets in a lattice pattern over the onions, placing a whole or halved olive within each diamond.

4) Return to the oven and bake for a further 25 minutes to allow the flavours to blend, and the pastry is golden brown and crisp around the edges. Serve hot or slightly warm.


Thursday, August 13, 2009

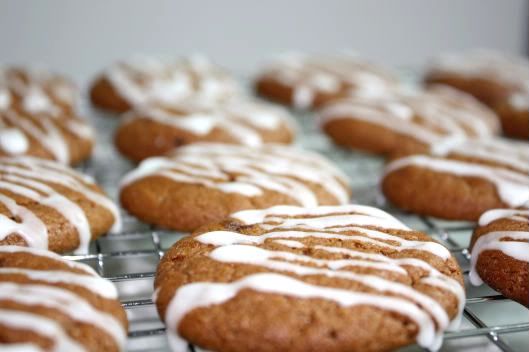
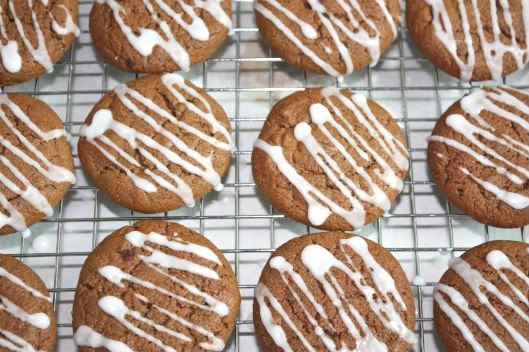
Molasses Cookies

I had spare time on my hands a few weeks back and decided that I'll to try out a cookie recipe I had chanced upon whilst browsing through one of my favourite food blogs, Jen of Use Real Butter . If you have not checked out her blog, I would encourage you to do so. I particularly admire Jen for her great recipes and beautifully taken nature photographs. In addition, I find her to be an amazing person, witty and funny, strong in character but at the same time having such a sensitive nature.

Anyway it was mid week, after work and the telly was showing some really crappy movies. So to while away the spare time, I decided to try out her cookie recipe. It also gives me the opportunity to use up the 2 bottles of molasses I have sitting in my cupboard. I particularly love ginger cookies and when I was young, I would dunk them into a cup of Nescafe and gobble up the soggy bits with such tenacity. Hmmm come to think of it I haven't done that in ages! Since my first batch, I've made three other batches todate and have slightly adjusted the original recipe. All I can say is these cookies are damn, damn good and I'll be making some more pretty soon.


Molasses Cookies
Recipe Adapted from Use Real Butter

Ingredients:

3/4 cup (170g) unsalted butter, softened
1 cup (190g) dark brown sugar, packed (I reduced the sugar to 175g)
1 cup (225g) fine castor sugar (I reduced the sugar to 180g)
2 eggs, well-beaten
1/2 cup (200g) molasses (not blackstrap)
1/2 cup (130g) crystallized ginger, minced
2 tsps (5g) vinegar
1 tbsp vanilla
3 3/4 cups (530g) flour
1 1/2 tsps (7g) baking soda
6 tsps (12g) ground ginger (I added 8 tsps of ground ginger as I do like my cookies with a bit more ginger "kick" to it)
2 tsps (5g) ground cinnamon
1/2 tsp (1g) ground cloves
1/4 tsp (2g) salt

Icing:

2 cups powdered sugar
about 1/4 cup milk (add a bit at a time)

Method:

1) Cream together the butter and the sugars. Stir in the eggs, molasses, ginger, vinegar, and vanilla.

2) In a separate bowl, combine the remaining (dry) ingredients and mix well. Add the dry ingredients to the wet mix and beat until just combined.

3) Preheat oven to 325°F (160C). Form dough into 1-inch balls and place on cookie sheet or Silpat with 1.5 inches of space between each (they spread a bit but if you want a much flatter cooker, just flatten the ball slightly with the back of your palm). I found it easier to chill the dough for a while before shaping it. And in between trays I returned the dough into the fridge to chill.

4) Bake about 12 minutes. Cookies should be still soft when removed from oven. Cool on a wire rack.

To Make the Icing:

Place powdered sugar in bowl and add a little milk, stirring to incorporate. Continue to add milk if required until the glaze has a good thick pouring consistency (but not runny). Fill a squeeze bottle with the glaze and stripe the cookies. Let the glaze set.


Sunday, August 9, 2009

Blueberry Muffins

I love muffins that are soft and more cake like and often than not it's difficult to find such recipes. So when I came across this one which swears that it's soft and moist, I simply had to try it out. Furthermore it's a blueberry muffin and I have heaps of it in my freezer. Blueberries are now amazingly cheap. Just two weekends ago we were at a local hypermart and they were going for (Singapore Dollars)S$3.90 for 250g. A week later another local supermarket had theirs on sale for S$2.90 for 250g. So I decided to stock up my freezer and I do believe I have at least a kilo and half in there! Crazy or what!

Anyway I read from another fellow food blogger who had tried out the same recipe and she recommended reducing the sugar. I thus decided to follow suite and was surprised that her advice was true. After tasting a slightly warm muffin from the oven, I must concur that this indeed is a very moist and soft muffin recipe. I am already thinking of the variations to the batter by adding different fresh and dried fruits, as well as nuts.


Blueberry Muffins
Receipt Adapted from All Recipes
Yields 12 muffins


Ingredients:

113g (1/2 cup) unsalted butter
1 cup fine granulated white sugar (original recipe called for 1 1/2 cups which would have been way too sweet in my opinion)
1/2 teaspoon salt
2 eggs
2 cups all purpose flour
2 teaspoons baking powder
1/2 cup buttermilk *
220g fresh blueberries — rinsed, drained, and dried (if using frozen berries, do not thaw)
1 teaspoon lemon zest

* I didn't have buttermilk so I used slightly warmed low fat milk (you can use regular milk), add 3/4 teaspoon lemon juice or white vinegar and leave standing for 10 minutes before using. Left over should be refrigerated in a tightly sealed container for 2 days.


Method:

1) Preheat oven to 180C. Line muffin or cupcake pan with baking cups.

2) In a large bowl, cream together the butter, 1 cup sugar and salt until light and fluffy. Add in the lemon zest. Then beat in the eggs one at a time.

3) Sift flour, baking powder and salt into a bowl. Take out 2 tablespoon of the flour and put aside,

4) With the remaining flour add to the batter in 3 portions alternating with the buttermilk, mixing just until incorporated.

5) Crush 1/4 of the blueberries, and stir into the batter. Mix the rest of the whole blueberries with the 2 tablespoon of flour, and fold into the batter. (The flour helps to prevent the blueberries from sinking to the bottom whilst baking) Scoop into muffin cups. I find an ice-cream scoop to be most useful when doing this.

6) Bake in preheated oven of 180C for about 25 to 30 minutes, or until golden brown, and tops spring back when lightly tapped.


Thursday, August 6, 2009

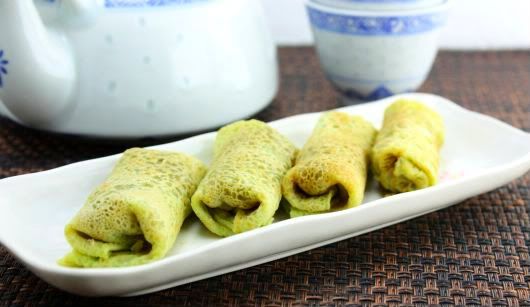
Kuih Dadar (Coconut Pancakes)

My hubby voluntered to go to the nearby shops to buy me some groceries which I had required and this included 2 small packs of coconut cream and 1 pack of pre-packed coconut milk. What he came back with was 2 big packs of coconut cream and 1 pack of pre-packed grated fresh coconut. I guess this is what you get when you send a man to do a woman's job ... (I seriously hope he is not reading this!).

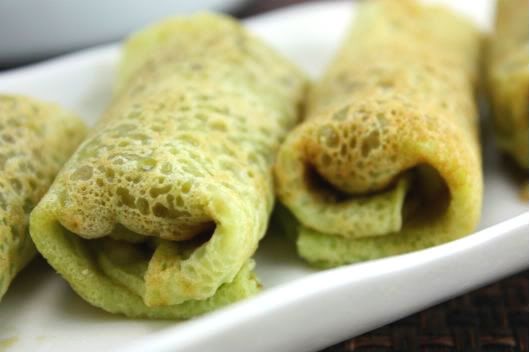
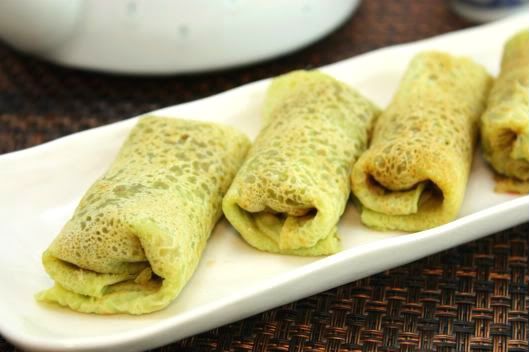
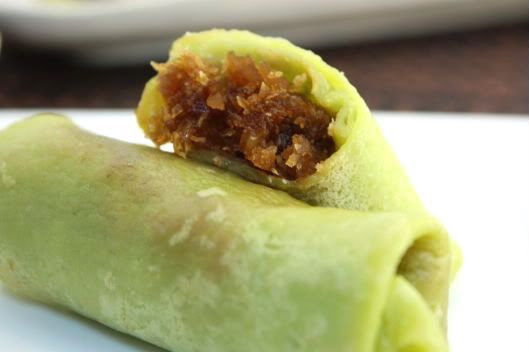
Anyway with an "unplanned" ingredient at hand I decided to try my hand at making kuih dadar for the first time ("kuih" means cake or dessert in Malay). In plain English, it's a pancake with grated coconut filing. Okey to be exact it's a pandan-flavoured pancake with a filing of grated coconut and palm sugar. This pancake is a very popular Malay dessert and as with almost all Malay kuihs, the most common flavouring ingredients are coconut cream or milk, grated coconut, pandan (screwpines) leaves and palm sugar. This kuih is very delicious and quite addictive, and nothing beats eating it fresh and warm, hot from the gridle.

If you like this recipe, you may be interested to try out another popular local Malaysian kuih which is Onde-onde .


Kuih Dadar (Coconut Pancakes)
Makes about 25 pancakes

Ingredients:

150g (1 1/4 cups) plain flour
1/2 tsp salt
2 small eggs, beaten
150ml (2/3 cup) thin coconut milk (you can substitute with plain milk)
100ml (1/2 cup less 5 tsp) pandan juice (refer below)
65ml (1/4 cup) water
1 Tbsp light vegetable oil (such as sunflower or soya)
1 1/2 portions coconut filing (refer below)
oil for greasing small frying pan

Method:

1) Sift flour and salt into a medium sized mixing bowl. Make a well in the centre and into this, pour in the eggs, coconut milk and pandan juice. Using a whisk, gradually incorporate the flour into the liquid, making a smooth batter free from lumps. (If you should have lumps, just strain the batter using a sieve)

2) Thin the batter down with the additonal 65ml of water and stir in the oil. Mix well. Cover bowl and allow batter to stand for 20 - 30 minutes.

3) Make the coconut filing and set aside to cool.

4) To make the pancakes, heat a small non-stick frying pan over medium heat. Using a heat-proof brush, lightly brush you pan with some oil. Ensure your pan is sufficient hot (a drop of water should sizzle instantly) before starting on the pancakes.

5) Stir batter, pour about 2 Tbsp of batter into the pan and immediately rotate the pan so that the batter covers the base in a thin layer. (You want to achieve a pancake size of about 5" circle) Allow batter to set and just begin to brown. Flip pancake over and allow the other side to cook, just for a few seconds.

6) Turn the pancake out onto a plate. Continue making the pancakes, stacking the finished ones on top of each other as you go along. As the batter tends to thicken as you cook the pancakes, you might need to thin it down with a tablespoon or 2 f water.


To Assemble:

Place 1 Tbsp of filing about 1/3 bottom of the pancake.
Fold both sides towards the middle and roll the pancake away from you, neatly enclosing the filing and creaing a little parcel.

To make the pandan juice:
(makes 1/2 cup)

6-8 large pandan leaves
150ml (2/3 cup) water

1) Rinse pandan leaves and cut into 2 cm lengths

2) Place leaves and water in a blender or chopper and process until pulverized. Pour through a fine strainer. Measure out required juice for recipe.

* If you cannot find pandan leaves, you can use the same equivalent of water and add about 2 tsp pandan paste (or essence). Add a bit of green colouring if essence is clear. Pandan essence can be bought at an Asian grocery shop

To make the coconut filing:
(makes 1 cup)

100g (2/3 cup) plam sugar, roughly chopped (can be bought at an Asian grocery shop)
75ml (1/4 cup + 1 Tbsp) water
1 pandan leaf, knotted (can be omitted if you cannot find this)
100g (1 cup) freshly grated coconut

1) Place plam sugar and water in a pan and cook until sugar dissolves. Simmer for 10 minutes until liquid starts to thicken and become syrupy.

2) Add the pandan leaf and grated coconut and continue cooking over low heat for 10 -15 minutes until the filing is thick and glossy. Most of the liquid should have evaporated. Cool and use as desired. Keeps well if stored in a covered container in the fridge for about 3 - 4 days.


Sunday, August 2, 2009

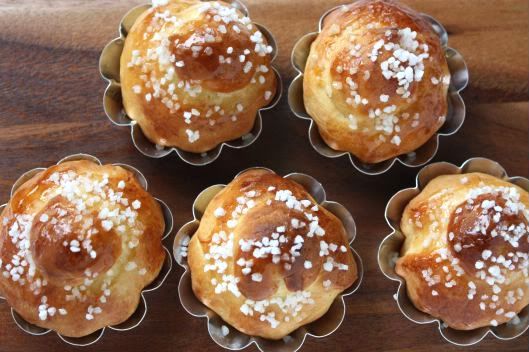
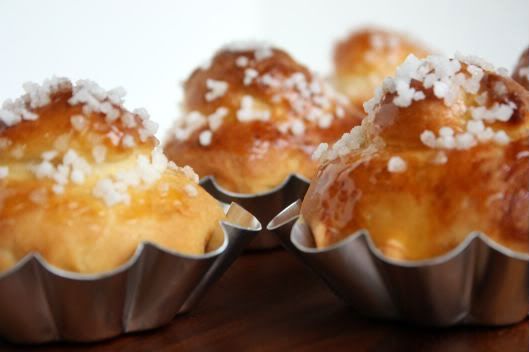
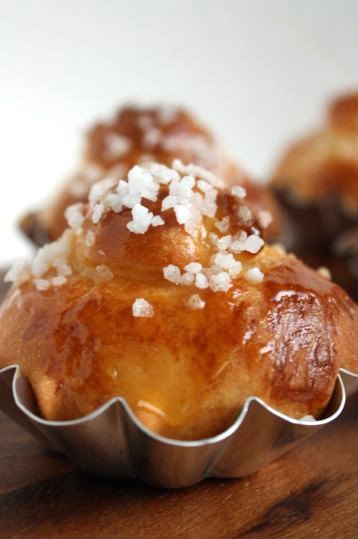
Brioche

Would you believe me if I told you that I have always wondered what a brioche tasted like? It's true ... okey. And I told myself that I am going to find out this weekend as my game plan was to make me a batch of brioches.

I have been trying out a few different yeasted recipes lately and I must admit that my confidence level for making bread has gone up a notch. Previously it was rock bottom! Hmmm come to think of it that was pretty much how I would have described what my bread was like too! I'm pleased to say of the recipes I have tried todate, non have failed me yet and the end result were tasty loafs. So I'm keeping my fingers crossed that the brioches will turn out as they should. If you have not made bread before, bear in mind that you really have to put aside at least 4 hours of "hanging around" time simply because yeasted recipes will require either one or 2 proofings.


I made the full recipe as below but used only half of it which worked out to about 8 brioches. The remaining dough is sitting in the freezer right now and I hope to thaw it out this weekend. Maybe I'll turn them into savoury buns instead. The amount of butter in the ingredients made the brioches extremely moist, soft and buttery .... a little bit difficult to handle if you don't have a sturdy mixer. For the end result .... I must report that they are extremely, extremely delicious - on it's own, slightly warm or served with your favourite jam - yum! I took some to the office (they were left in an airtight container over night) and surprisingly the brioches retained it's fluffiness.

If you like this recipe, you may be interested to try out another yeast recipe, Celebration Bread .


Brioche
Makes about 14 to 15 brioches

Ingredients:

2/3 cup (150ml) whole milk (I used low fat milk as that was what I had in the fridge)
2 1/4 cups (280g) all purpose flour
1 packet (7gr) dry active yeast
1 egg
1/4 cup (50gr) sugar
1/4 teaspoon salt
1 tablespoon orange extract
1/2 teaspoon orange zest
5 tablespoons (70g) butter, at room temperature
egg wash: 1 egg whisked
1/3 cup apricot jam (you can use any other jam you favour)
pearl sugar to decorate (you can use candied fruit as well)

Method:

1) In a microwave safe bowl, warm up the milk for about 25 seconds in the microwave until lukewarm (no higher than 110-112F) and stir in the yeast with a wooden spoon to dissolve. Let stand until foamy, about 10 minutes.

2) Put yeast mixture into a stand mixer bowl, add the egg, sugar and salt. Whisk to combine.

3) Put on low speed (speed 1) and using a dough hook, slowly add in the flour and orange extract. As the flour gets incorporated start adding the butter, one tablespoon at a time. Let the machine run for another 8 minutes to knead. You can do this by hand but the dough is extremely wet and a stand mixer makes it easier to handle.

4) Place the dough in a lightly oil bowl, cover with plastic wrap and let rise at room temperature for about 30 minutes.

5) Then transfer the dough to the refrigerator to rest for an hour. At this point you can leave the dough in the fridge for a day or overnight or proceed with the recipe. (Alternatively you can also freeze the dough for another day)

6)Preheat oven to 180C. On a lightly floured surface, form the dough into a ball and divide it into half. Keep one part refrigerated as you work on the first one.

7) Divide the dough into 7 balls. Pinch a small piece from each ball, the size of a small grape. Shape the remaining into a round ball. Place the large ball onto a brioche mould and the smaller one on top of it. Repeat with the remaining 6 balls. Remove the other half dough from the fridge and repeat the shaping process. Place the brioche moulds on a baking sheet and let rise for 30-40 minutes.

8) Brush with the egg wash and bake for about 20-25 minutes or until golden brown.

9) Let cool. In the meantime, spoon some apricot jam into a bowl and microwave it for about 15 seconds. Using a pastry brush, brush the melted jam on the brioche. Then stick on the pearl sugar on each brioche for decoration. Serve brioche with apricot jam.


Thursday, July 30, 2009

Masala Chicken Curry

I hardly cook Indian food even though we love eating it. I think it's because of the number of ingredients and steps used in the entire cooking process that has always thrown me off. For us it's always easier to go to a restaurant if we have cravings for curries or banana leaf rice (you literally eat off a banana leaf instead of a plate). I guess it also doesn't help when there is an excellent Indian restaurant just outside my apartment block and within easy walking distance. This restaurant serves not only good banana leaf rice but they also whip up a mean Indian fish head curry. I read somewhere that this dish doesn't originate from India but rather from Malaysia and Singapore (and some even say China) but that's another story altogether. I hope to try cooking this one day.

So with some spare time over the weekend and with plentiful of spices which I had purchased a while back, I decided to embark on cooking a masala chicken curry. The last time I had tried my hand for the first time at making chicken briyani rice . I served the curry with some yellow basmati rice cooked with ghee, some tumeric powder, cinnamon stick, cloves, star anise, sliced fresh ginger and shallots, and seasoned with salt.


Masala Chicken Curry
(serves 3 - 4)

For Marinate:
750g kg chicken, washed and cut into medium sized pieces
1/4 cup plain yogurt
1/4 cup of mixed chopped coriander and mint leaves
1 tsp red chilli powder (adjust to suit your spice level)
¼ tsp turmeric powder
salt to taste

For the Paste:
6-7 cashew nuts
4-5 tbsps milk

Dry roast and make a fine powder:
1” cinnamon
10-12 curry leaves
3 cloves

Rest of the ingredients:
3-4 tbsps of ghee (you can use any other oil, except olive oil)
2 big onions finely chopped
1 large tomato finely chopped
1 tbsp of tomato paste
1 tsp ginger-garlic paste
1 tsp coriander powder
3/4 tsp black pepper powder (adjust to suit your spice level)
¼ tsp cumin powder
mint leaves and almond flakes for garnish


Method:

1) Marinate chicken pieces in chilli powder, turmeric powder, yogurt, mint, coriander and salt for 20 minutes.

2) While the chicken pieces is marinating, make a paste of cashew nuts and milk. Keep aside.

3) Dry roast cinnamon, cloves and curry leaves for 1 minute (you can do this in a frying pan over low heat) and grind into a fine powder using your spice grinder.

4) Heat 1 1/2 tbsps of ghee in a pot. Add the onions and saute till soften. Add ginger-garlic paste and saute further for another 3-4 minutes on medium heat.

5) Add coriander, cumin and pepper and combine well and fry for another minute.

6) Add the tomatoes and tomato paste and let it cook for 3-4 minutes. Combine well and cook till oil separates. Dish out into a bowl and set aside to cool. Then add the ingredients into a food processor and blend until it becomes a paste. Keep aside this masala paste.

7) Heat 1 1/2 tbsps ghee in a pot and add the marinated chicken and cook on high flame for 3-4 minutes (make sure you stir to avoid sticking to the base of the pot), reduce heat and cook for another 4-5 minutes.

8) Add the ground masala paste, cashew nut paste and ground powder of cinnamon, cloves and curry leaves and combine well. Cook till chicken pieces are soft and you get the desired curry consistency. Add a bit of water if it looks too dry. Add salt to taste.

9) Garnish with fresh coriander leaves and almond flakes.


Monday, July 27, 2009

Tea Time Treats with Mallows and Milan Cookies

The July Daring Bakers' challenge was hosted by Nicole at Sweet Tooth . She chose Chocolate Covered Marshmallow Cookies and Milan Cookies from pastry chef Gale Gand of the Food Network.

Nicole has mentioned that we could attempt either one or both cookie challenges. I found it pretty intriguing that the first cookie had an element of making your own marshmallows. Not that I am keen at all about marshmallows! I find it too sweet and the texture all too mushy! However trying to attempt something new and this being one, really had me going. I decided to do both cookies as the recipes were pretty simple to follow. I also did some research on how to make marshmallows as well as watching some videos on the entire process. The twist about the marshmallows used in the Mallows cookies was that they didn't require the 12-hour setting period. The marshmallow batter (if you can call it that) was piped immediately onto the cookies instead. I decided to go about making a small batch of strawberry marshmallows to pair off with the cookies.


Would you believe if I told you that I did both challenges over a Saturday? Well I did and I am glad that I had as it left my Sunday free to do other things. I started off with the Milan Cookies first as it was the easier of the two. And like Nicole's instructions, the cookie batter did spread quite a bit. As a result it was difficult getting consistently shaped cookies. Instead of lemon extract, I used orange blossom water and a bit of orange zest to the batter. For the filing, I made lavender bitter chocolate ganache instead of the original posted recipe. As I tasted the first batch that came out of the oven, the taste and texture reminded me very much of another previous Daring Baker's challenge, tuilles.

For the Mallows Cookie, I made strawberry marshamallows and these were piped onto the finished cooled cookie. I also added some mixed spice powder to the cookie batter. I didn't think much of the cookies on it's own when I had a quick taste. In fact I thought it was quite plain and paled in comparison with the Milan Cookies. But once the marshmallow and chocolate ganache were incorporated into the entire assembly, the Mallows tasted fantastic. I must say that the combination of all three worked perfectly. Thanks Nicole for such an interesting challenge this month!


Mallows(Chocolate Covered Marshmallow Cookies)
Recipe courtesy Gale Gand, from Food Network website
Serves: about 2 dozen cookies


3 cups (375grams/13.23oz) all purpose flour
1/2 cup (112.5grams/3.97oz) white sugar
1/2 teaspoon salt
3/4 teaspoon baking powder
3/8 teaspoon baking soda
1/2 teaspoon ground cinnamon
12 tablespoons (170grams/ 6 oz) unsalted butter
3 eggs, whisked together
Homemade marshmallows, recipe follows
Chocolate glaze, recipe follows

Method:

1) In a mixer with the paddle attachment, blend the dry ingredients.

2) On low speed, add the butter and mix until sandy.

3) Add the eggs and mix until combine.

4) Form the dough into a disk, wrap with clingfilm or parchment and refrigerate at least 1 hour and up to 3 days.

5) When ready to bake, grease a cookie sheet or line it with parchment paper or a silicon mat.

6) Preheat the oven to 375 degrees F.

7) Roll out the dough to 1/8-inch thickness, on a lightly floured surface. Use a 1 to 1 1/2 inches cookie cutter to cut out small rounds of dough.

8) Transfer to the prepared pan and bake for 10 minutes or until light golden brown. Let cool to room temperature.

9) Pipe a “kiss” of marshmallow onto each cookie. Let set at room temperature for 2 hours.

10) Line a cookie sheet with parchment or silicon mat.

11) One at a time, gently drop the marshmallow-topped cookies into the hot chocolate glaze.

12) Lift out with a fork and let excess chocolate drip back into the bowl.

13) Place on the prepared pan and let set at room temperature until the coating is firm, about 1 to 2 hours.

Note: if you don’t want to make your own marshmallows, you can cut a large marshmallow in half and place on the cookie base. Heat in a preheated 350-degree oven to slump the marshmallow slightly, it will expand and brown a little. Let cool, then proceed with the chocolate dipping.


Homemade marshmallows:

1/4 cup water
1/4 cup light corn syrup
3/4 cup (168.76 grams/5.95oz) sugar
1 tablespoon powdered gelatin
2 tablespoons cold water
2 egg whites , room temperature
1/4 teaspoon pure vanilla extract

1) In a saucepan, combine the water, corn syrup, and sugar, bring to a boil until “soft-ball” stage, or 235 degrees on a candy thermometer.

2) Sprinkle the gelatin over the cold water and let dissolve.

3) Remove the syrup from the heat, add the gelatin, and mix.

4) Whip the whites until soft peaks form and pour the syrup into the whites.

5) Add the vanilla and continue whipping until stiff.

6) Transfer to a pastry bag.


Chocolate glaze:

12 ounces semisweet chocolate
2 ounces cocoa butter or vegetable oil

1) Melt the 2 ingredients together in the top of a double boiler or a bowl set over barely simmering water.


Milan Cookies
Recipe courtesy Gale Gand, from Food Network website
Serves: about 3 dozen cookies


12 tablespoons (170grams/ 6 oz) unsalted butter, softened
2 1/2 cups (312.5 grams/ 11.02 oz) powdered sugar
7/8 cup egg whites (from about 6 eggs)
2 tablespoons vanilla extract
2 tablespoons lemon extract
1 1/2 cups (187.5grams/ 6.61 oz) all purpose flour
Cookie filling, recipe follows


Cookie filling:

1/2 cup heavy cream
8 ounces semisweet chocolate, chopped
1 orange, zested

1) In a mixer with paddle attachment cream the butter and the sugar.

2) Add the egg whites gradually and then mix in the vanilla and lemon extracts.

3) Add the flour and mix until just well mixed.

4) With a small (1/4-inch) plain tip, pipe 1-inch width sections of batter onto a parchment-lined sheet pan, spacing them 2 inches apart as they spread.

5) Bake in a preheated 350F degree oven for 10 minutes or until light golden brown around the edges. Let cool on the pan.

6) While waiting for the cookies to cool, in a small saucepan over medium flame, scald cream.

7) Pour hot cream over chocolate in a bowl, whisk to melt chocolate, add zest and blend well.

8) Set aside to cool (the mixture will thicken as it cools).

9) Spread a thin amount of the filling onto the flat side of a cookie while the filling is still soft and press the flat side of a second cookie on top.

10) Repeat with the remainder of the cookies.

Related Posts with Thumbnails