Monday, July 11, 2011

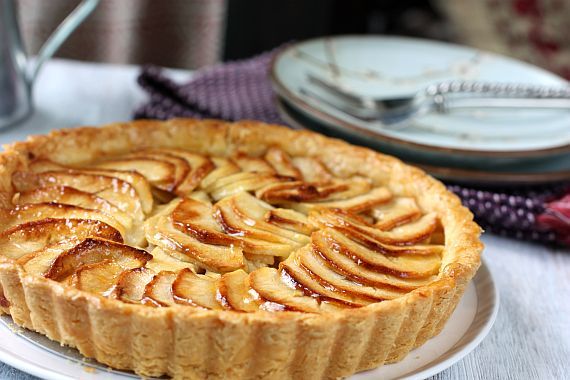
Tarte Aux Pommes (French Apple Tart)

apple tart 1


The best thing about making desserts from apples is that we get the fruit all year round. The apple fruit is believed to have originated from Asia and did you know that there are more than 7,000 varieties of apples which are available worldwide. The fruit is grouped mainly into three categories - cider, cooking and dessert varieties. They are a rich source of vitamins A and C, potassium, fiber and carbohydrates.

Now how can you tell if an apple is good or not? Check by looking at the exterior of the apple - it should be smooth, and free of bruises or cuts. The firmness of the apple is proof of its sweetness. Storage of the apples in an important aspect and care should be taken to store them in a cool and dry place, wrapped in a poly bag. I usually keep my apples in the vegetable compartment of my refrigerator.

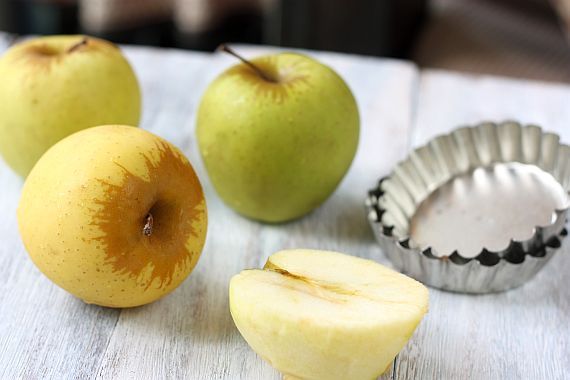
The top five most popular apples which you would usually find in your neighbourhood supermarkets are the Red Delicious, Golden Delicious, Gala, Fuji and Granny Smith. Each type of apple has it's own unique sweetness, texture, shelf life and flavour in a cooked or baked dish. And all of these are equally good eaten on it's own.
applet tart 3


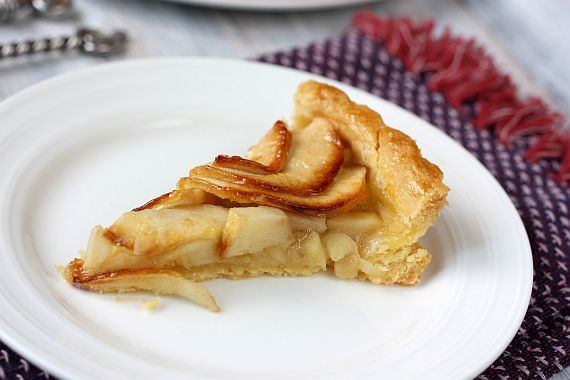
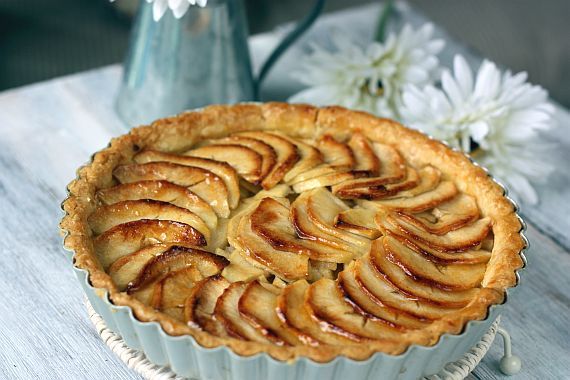
I made this apple tart from a book I had borrowed which centered solely on tarts, both savoury and sweet. The recipe was easy enough and the picture enticed me further. I've very much driven by pictures and presentation whenever I try out a recipe. This tart recipe works extremely well with Golden Delicious as this particular apple can withstand long baking times and is great when made into applesauce. (You could substitute with another flavoured apple but if using Granny Smith, the entire taste would be altered) It is a subtle fragrance which can be smelled when the tart is being baked in the oven. The apple slices did not dry out at all in the oven and the end result was a very moist, delicious apple tart.

apple tart 5


Tarte Aux Pommes (French Apple Tart)
Recipe Adapted from Tarts – Sweet & Savoury by Maxine Clark
Serves 6 – 8

Ingredients:

1 recipe Pate brisee

Apple Filling:

4-5 Golden Delicious (or good well flavoured apples), peeled and cored
3 Tbsp brown sugar
½ tsp cinnamon powder
50g cold unsalted butter, cubed
4 – 6 Tbsp apricot jam

Method:

1) Bring pastry to room temperature. Preheat oven to 200C and put a baking sheet in the oven to heat up.

2) Roll pastry thinly on a lightly floured work surface and line a 25cm loose based tart tin. Chill tart shell for about 30 minutes.

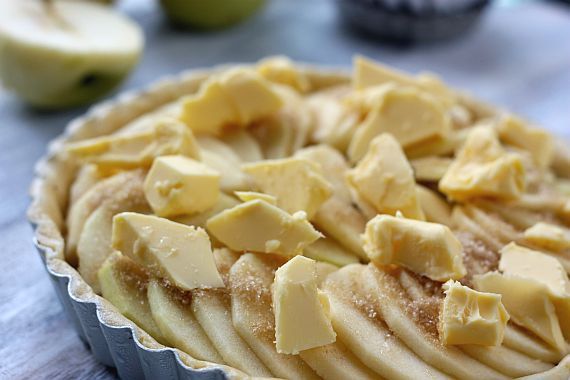
3) Slice apples thinly and coarsely chop up the uneven smaller pieces. Arrange the smaller pieces in the base of the tart shell. Cover the one third of the slices in a circular pattern. Arrange the remaining in a concentric rings over the chopped apples. Sprinkle the sugar and cinnamon powder all over the sliced apples. Then dot with the cubed butter.

4) Set the tart tin on the baking sheet and bake for about 45 mins to an hour until the apples are very well browned and the pastry golden in colour. Remove from the oven and cool for 10 minutes before removing from the tart tin.

5) Brush the top of the tart with apricot jam which had been warmed in a microwave oven. Serve the tart at room temperature.

PATE BRISEE

200g plan flour
½ tsp of salt
125g unsalted butter, softened
1 large egg yolk
2 – 3 Tbsp iced water

Method:

1) Sift flour and salt in a bowl, set aside.

2) Put the butter and egg yolk in a food processor and blend until smooth. Add the water and blend again.

3) Add the flour and salt, and pulse until mixed.

4) Transfer mixture to a light work surface and knead gently until smooth. Form into a ball, flatten slightly and wrap in clingwrap.

5) Chill the dough for about 30 minutes. Return to room temperature before rolling out.
apple tart 2


apple tart 4


applet tart 6

Monday, July 4, 2011

Passion Fruit Chiffon Cake

A colleague of mine was back home in Kuala Lumpur, Malaysia (same home town as myself) a few weeks back and she brought back some local passion fruit for me. I hardly ever buy passion fruit at all and have only used it once in my entire baking/cooking history.

passionfruit 2


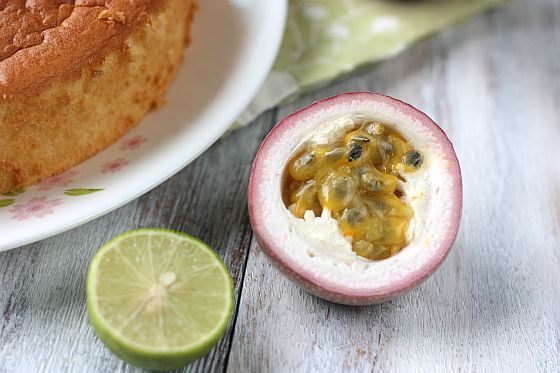
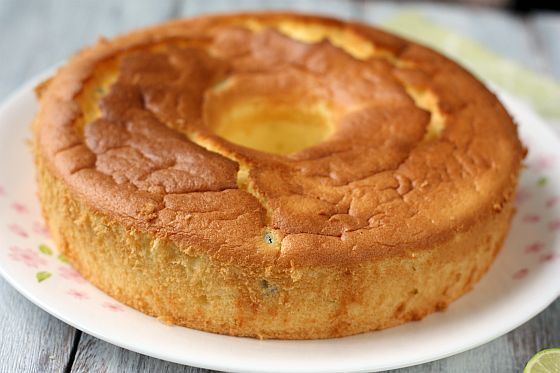
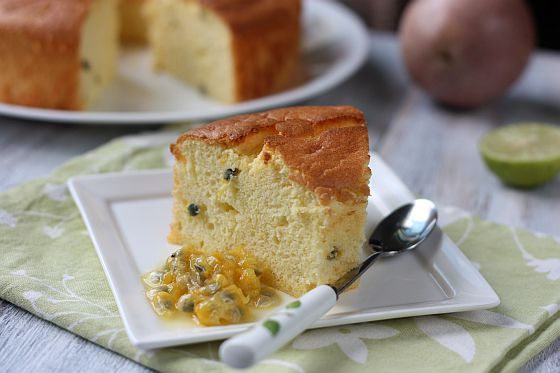
As I was not too partial of consuming the fruit on its own, I decided to use it in making a dessert. You cannot imagine the number of dessert recipes and concoctions that swirled around one head. Talk about indecisiveness! It took me close to a week before I finally got to using the fruit. I ended up with something simple which was a chiffon cake. I have made chiffons before but this time round I used a chiffon pan and imagined my cake to be a deliciously soft, fluffy and high cake. Something majestic would probably be the best word to describe it. I followed the recipe pretty much to the teeth (made a few minor tweaks only). The cake batter looked exactly as it should have looked …. velvety and voluminous! I baked it at the correct temperature and timing.

Unfortunately the cake did not rise as much as I had anticipated it to. I would say that it looked like a very high cake, not a chiffon. I even used a chiffon pan with three legs to try to accomplish this task. I also turned the pan upside down to rest on its legs, as with most chiffons, until the cake was entirely cooled (I left it in this state for 2 hours). What on earth went wrong, I do not know. Having not achieved the height I had hoped, the cake did deliver on taste and texture. It was extremely soft. The chiffon had a bit of tart in it from the passion fruit as well as the lime zest and juice I had added. In addition the passion fruit seeds which I had included gave it some crunch texture. Extremely delicious I must say! I guess all was not lost after all.

passionfruit 3


passionfruit 4


Passion Fruit Chiffon Cake Recipe
Makes a 9" chiffon tube pan

Ingredients:

4 yolks
40g sugar
45g canola oil
65g passion fruit pulp (including the seeds - about 2 to 3 fruits)
20g water
1 tsp lime zest
1 tsp lime juice

100g cake flour
1/2 tsp baking powder

4 whites
40g sugar
1/8 tsp cream of tartar

Method:

1) In a bowl, sift together the flour and baking powder.

2) Whisk together egg yolks and 50g sugar until pale in colour.

3) Gradually add in oil, passion fruit pulp, lime zest and juice and water whisking them all until combined.

4) Add all the sifted flour and baking powder. Whisk until the mixture becomes a thick batter. (This should take no more than a minute)

5) Place the egg whites into a clean metal bow. Using a mixer, beat the whites until frothy. Add in the cream of tartar until whisk for a minute before gradually adding in the 40g of sugar. Continue to beat until stiff peaks are formed.

6) Gently fold in egg white mixture into egg yolk batter in 3 seperate additions until well combined.

7) Pour batter into a 9"/22cm chiffon tube pan. Bake in preheated oven at 175C for 40-45mins.

8) Invert pan immediately to cool completely before unmold.

Note: Cake flour is substituted by 90g plain flour and 10g corn flour

passionfruit 1


passionfruit 5

Wednesday, June 29, 2011

Chinese Roast Pork Belly (Siew Yoke)

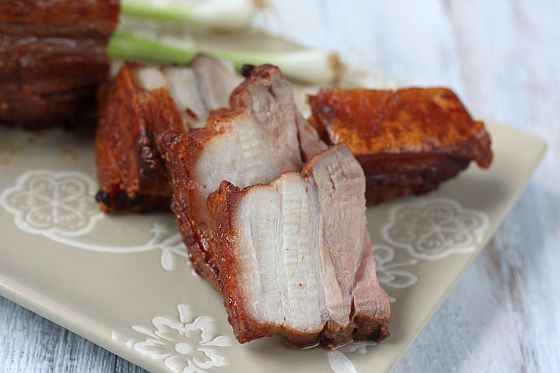
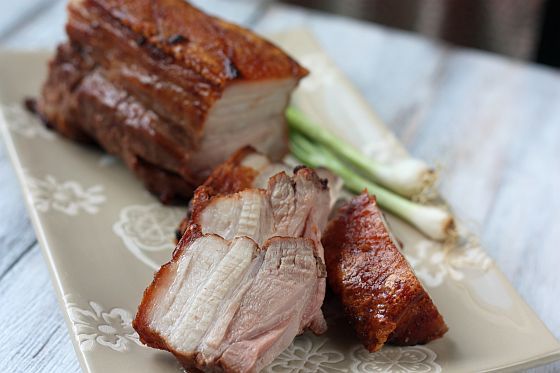
Seriously this has got to be one of the most sinful foods on a Chinese menu. But then again it has got to be one of the most delicious as well ... of course if you are into eating fats! Just think of the taste of crispy pork crackling with layers of fat and moist, tender meat has gotten me going already. I know some of you will probably say urrghh ... look at the amount of fat and cholesterol, and simply shudder by just looking at it. I say indulge in some sinfulness once in a while is okay.

pork belly 1


In my childhood days, my mum would buy Siew Yoke (Chinese Roast Pork Belly) together with Char Siew (Chinese Roast Pork) when she did her weekly marketing. She would slice up both meats and we would have this included in our Sunday repetiore of dishes. Any left over meats would be used to fry rice or added into stir fried vegetable dishes. Those were the days when my family were into so-called "unhealthy" eating habits. These days my parents ever hardly buy Siew Yoke or Char Siew. Definitely not Siew Yoke that's for sure because they have stayed off eating fatty foods. I guess as we grow older, our bodies are unable to adapt so quickly to rich and fatty foods. We would have to make a choice between eating healthy and staying healthy.

I have always been intrigued as to how Siew Yoke was made and after seeing so many photos of it in other foodie blogs I decided to try it out one weekend. I was amazed as to how easy it really is and my first attempt turned out quite nicely. However I must confuse that I did not marinade my pork belly overnight. In my eagerness to make it, I just did a four hour marinade. When I posted up a picture of the cooked Siew Yoke up in my Facebook one of my girlfriends asked me who else had a share in enjoying it. My answer was "me, me and me"!

pork belly 2


Roast Pork Belly (Siew Yoke)

Ingredients:

1 kg pork belly (with skin on)
1 heaped tsp rock salt
1/2 Tbsp sugar
1 large or 2 small cubes nam yue (red fermented/preserved beancurd-available in jars or tins in Asian shops)
1 tsp five-spice powder
1/2 tsp ground white pepper
1 1/2 Tbsp rice vinegar (or ordinary vinegar)
1 Tbsp Shaoxing wine

Method:

1) In a bowl add on the ingredients with the exception of the rock salt and vinegar. Mix the ingredients until it becomes a paste.

2) Clean the pork belly and pat very dry with paper towels.

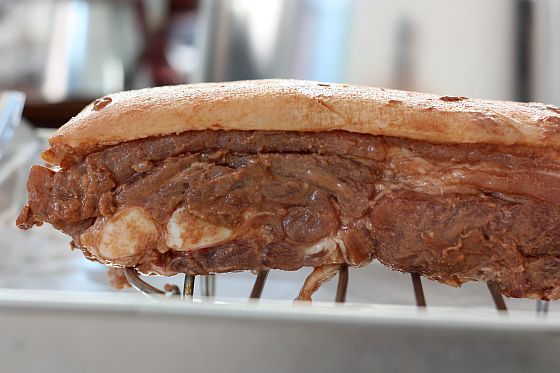
3) Score the flesh part (not the skin) of the pork belly lightly in diagonal lines and rub the joint with the paste marinade. Place the joint in a foil-lined roasting tin, marinated side down so it can sit and absorb the flavours.

4) Score the skin part this time, using a sharp knife and being as thorough as possible. Rub in the rock salt all over the skin making sure you get into the cuts.

5) Place the pork belly in the refrigerator uncovered to dry completely.

6) The next day remove the meat from the refrigerator. Line a baking dish with foil (to catch the drippings) and place the meat (skin facing up) on top of wire rack. Bake the meat in a 200C pre-heated oven for 30 mins.

7) After 30 minus, remove the tray and poke the skin using a fork. Then drizzle the vinegar over the skin.

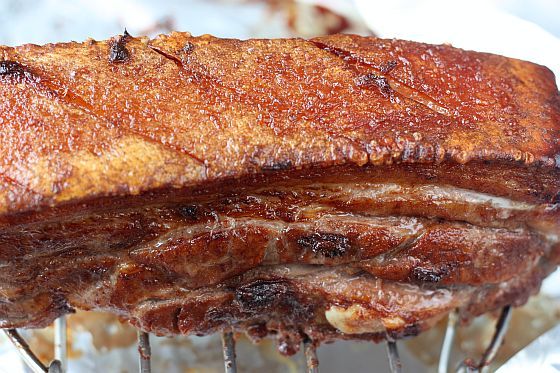
8) Return the tray to the oven and change the settings 250C on grill function (upper heat only). You will see the crackling start to bubble and pop wherever you poked with a fork. Grill for a further 30 mins, opening the oven door intermittently to let smoke escape, until the skin gets slightly burnt and charred. (Any blackened bits can be removed after cooking).

9) Rest the cooked pork belly for 15 minues before slicing.

pork belly 5


pork belly 4

Wednesday, June 22, 2011

Marble Cake

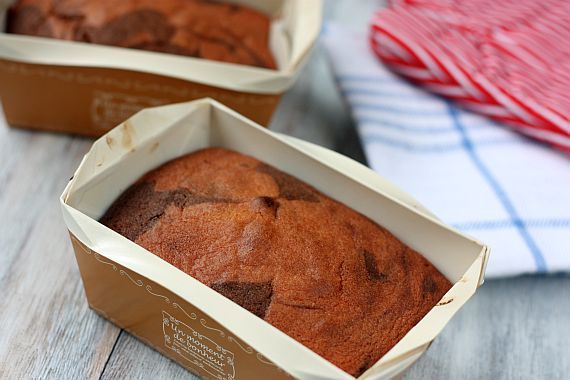
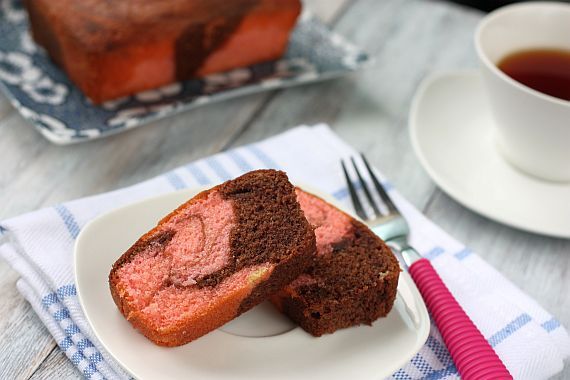
During my childhood we practically grew up on butter cakes and marble cakes. I am sure most of you would have had your fair share of these cakes as well. Those were the days when fancy cakes were practically non-existent.

If my mum was not making any marble or butter cake that month, we would usually get her to buy pre-packed slices from the local bakery or the "roti-man".

Photobucket


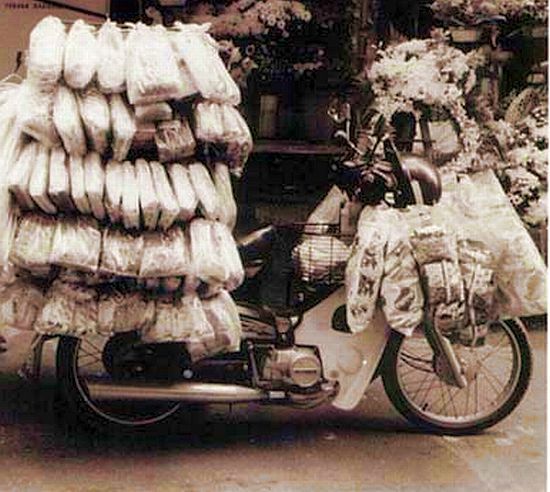
When we were kids, an Indian man would ply our neighbourhood streets with a motorcycle (or sometimes they could be on a bicyle) selling bread and all sorts of snacks hanging on the back of a box and also on the handle bars of his two-wheeler. It really seemed like a circus balancing feat for the rider, with so many packs of bread and snacks on his motorcycle. The vendor had all sorts of local breads, cakes, local snacks like peanuts and crackers and sweets. One favourite goodie of mine would be the cream bun and of course my other, marble cake slices. Sadly the "roti-man" is now practically extinct in the cities. You could however still find them selling their bread in this manner in the villages but even then, it is a rarity.

marble 1


marble 4


Marble Cake
Recipe Adapted from BBC Good Food

Ingredients:

225g unsalted butter, softened
185g caster sugar (reduced from original recipe of 225g)
4 eggs
225g self-raising flour, sifted
3 Tbsp milk
1 tsp vanilla extract
1/4 tsp salt
2 Tbsp cocoa powder
1/4 tsp pink food colouring (or colour of your choice)
1/2 tsp strawberry emulco (or essence of your choice)

Method:

1) Heat oven to 180C. Grease a 20cm cake tin and line the bottom with parchment paper.

2) Beat the butter and sugar together until light and fluffy. Then add the eggs, one at a time, mixing well after each addition.

3) Add the vanilla extract and milk, mix well.

4) Gently fold in the sifted flour and salt in 2 to 3 additions.

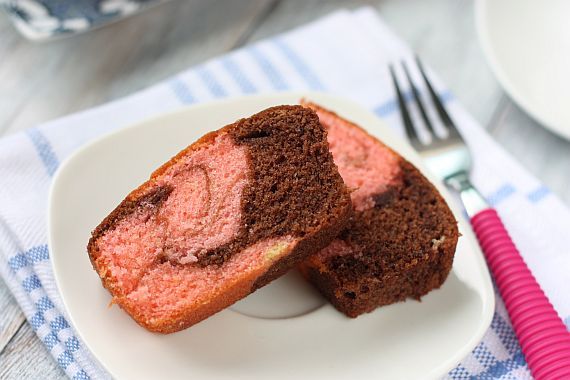
5) Divide the mixture between 2 bowls. Sift the cocoa powder into the mixture in one of the bowls. In the other bowl, add the food colouring and essence. (You can leave the 2nd batter plain if you want to)

6) Take 2 spoons and use them to dollop the chocolate and pink cake mixes into the tin alternately. When all the mixture has been used up, tap the bottom on your work surface to ensure that there aren't any air bubbles. Take a skewer and swirl it around the mixture in the tin a few times to create a marbled effect.

7) Bake the cake for 45-55 mins or until a skewer inserted into the centre comes out clean. Turn out onto a cooling rack and leave to cool before unmolding.

marble 2


marble 3

Friday, June 17, 2011

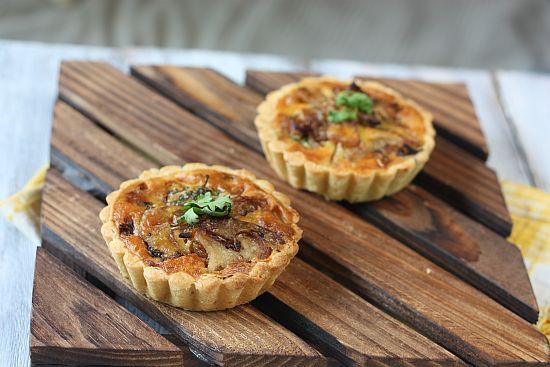
Potato and Caramelised Onion Tart

I have always had a thing about tarts ever since I first started to bake and blog in 2008. Imagine an empty tart shell and the number of possibilities! It is like handing out an empty canvas to a painter! I love baking both savoury and sweet tarts, but I think the preference is steered more towards a savoury tart because it was very much enjoyed by my dearest LT who passed on last year!

Whenever I do make tarts, I would do small ones instead (simply because they are easier to serve and no messy cutting) and I would also tend to make extra shells. I would keep the unbaked shells in my freezer and they could be sitting around for a few weeks or even a month before I have the urge to make something of them. If you have unexpected guests who could just turn up at your door step, you then have something you could easily put together and feed them! Thankfully I don't have unannounced visitors of this nature.

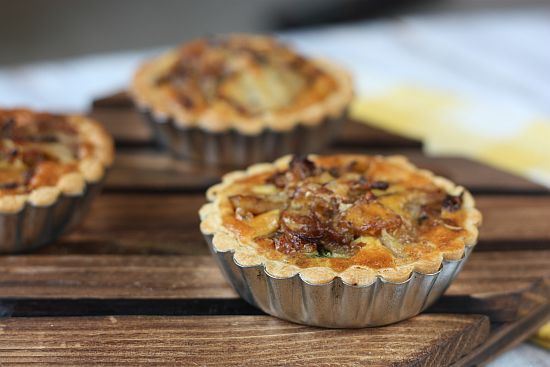
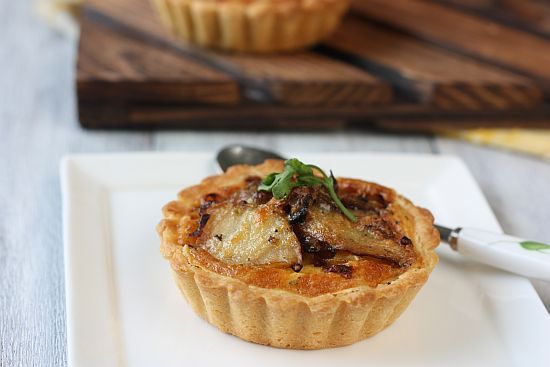
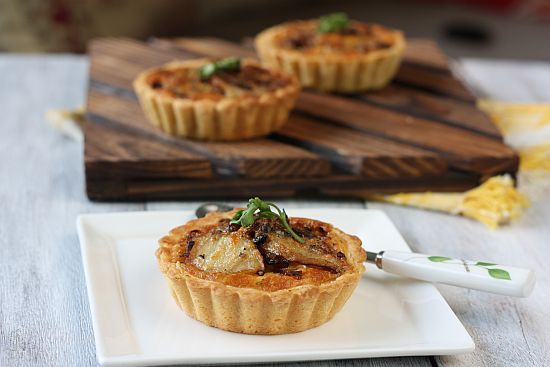
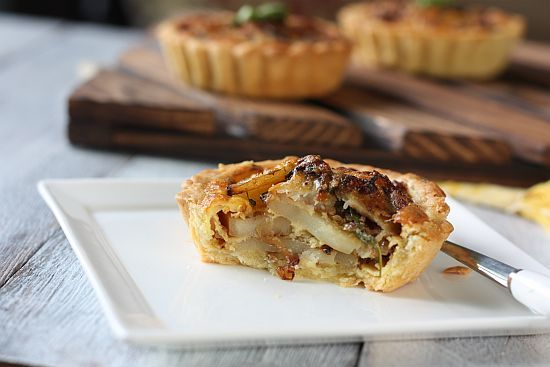
Well, this particular recipe is a savoury tart. You guessed it! I had unbaked frozen tart shells just sitting in my freezer. Plus half a bag of potatoes - hurray for this! Prior to posting I have already made this savoury tartlet on three separate occassions and I guarantee that you would be making it again too if you have tried it. For variation, you could add some bacon bits to give it an extra smokey taste. Hmmm just writing this post already makes me want to whip up another batch!

potato tart 3


potato tart 1


potato tart 5


Potato and Caramelised Onion Tart
Recipe Adapted from Taste.com.au
Makes Eight 3.5" Tartlets

For the Pate Brisee:

250g all purpose flour
150g cold unsalted butter, cut into small pieces
1 tsp fine salt
1 medium egg
1 Tbsp cold milk

Method for the Pate Brisee:

1) Sift flour and salt into a bowl.

2) Add in the butter.

3) Using a pastry cutter, cut the butter into the flour until it resembles rough breadcrumbs.

4) In a separate bowl, lightly beat the egg with the milk and drizzle it onto the flour mixture.

5) Using your hands, blend the mixture together and lighly knead to bring together. Try not to handle the dough too much.

6) Roll the dough into a ball, wrap in plastic wrap, flatten it into a disk and chill for about 45 minutes to an hour.

8) To line your tart tray, I find it easier to roll the dough between two pieces of clingwrap plastic. Roll to about 3" wider than the base of your tray. Remove the top wrap.

9) Lift the dough using the clingwrap plastic and gently flip it into your tart tray. Press the dough onto the tray and trim off the excess.

10) Dock the base of the tart shell with a fork and then place it into the fridge for another hour.

11) Preheat oven to 190C. Bake the shell blind, for about 15 minutes. Then remove the parchment paper and bake for another 5 minutes. Remove from oven and let it cool before pouring in the filing.

Cook's Note:

You can also use your food processor. Just whisk the dry ingredients first. Then drop in the cubed cold butter into the processor. Pulse until the mixture resembles rough breadcrumbs. Then slowly add in the egg and pulse until the dough comes together - do not overdo this otherwise your dough will be very hard.


Ingredients for the Potato Filing :

35g unsalted butter
3 medium sized onions, sliced
1/4 tsp brown sugar
3 medium potatoes, thinly sliced (I used Russett)
1/4 cup finely grated parmesan
4 eggs, lightly beaten
1/2 cup thickened cream
1/2 tsp dried mixed herbs
1/2 Tbs roughly chopped fresh Italian parsley or cilantro
1/4 tsp mixed all spice
Salt and cracked black pepper, to taste
Shredded basil leaves or Italian parsley for decoration

Method for the Tart:

1) Grease the tartlet molds with removable base with oil spray or butter. Line the molds with Pate Brisee pastry. Trim off excess pastry and roll it back into a disk. Refrigerate pans for 20 minutes.

2) Then heat butter in a large non-stick frying pan over medium heat. Add the onions and cook for 15 minutes. Add the brown sugar and potatoes and cook for a further 10 minutes until the mixture is caramelised. Stir in dried mixed herbs, fresh herb, salt and pepper and set aside to cool slightly.

3) Preheat oven to 180°C. Place parmesan, egg and cream in a bowl and whisk to combine. Divide the potato/onion mixture between the chilled tartlet molds. Then spoon the egg mixture over the potato/onion.

4) Bake for 20 minutes or until set and golden on top. Serve warm or at room temperature.

potato tart 2


potato tart 4


potato tart 6

Sunday, June 12, 2011

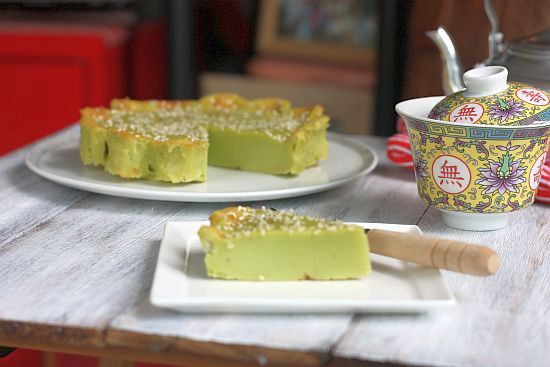
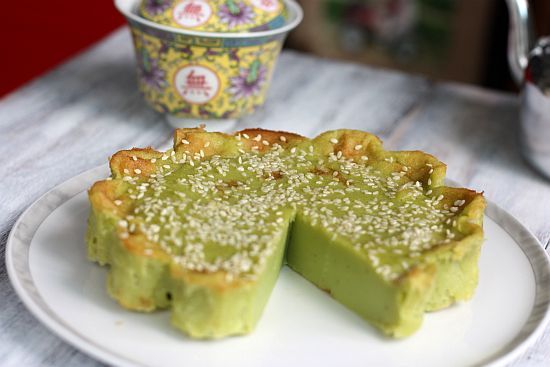
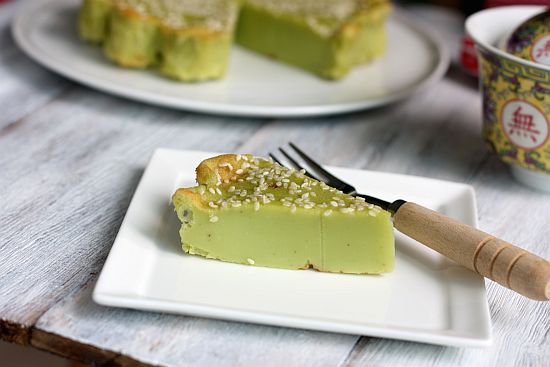
Baked Pandan Cake (Kuih Bakar Pandan)

When we were kids we used to tag along with my dad to visit his Muslim colleagues during Hari Raya (the Muslim New Year). My dad's colleagues would have "open house" during the two days of the Muslim New Year. "Open House" is a local custom whereby you literally open your house for friends and relatives to visit you during the celebrations. During such festivities, you would visit and at the same time partake of either a meal which could be snacks or even lunch.

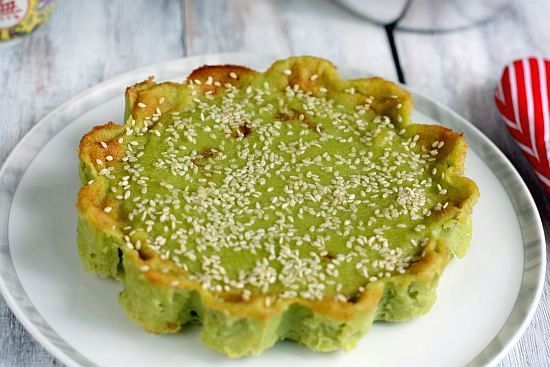
I remember we loved going to a particular "open house" as my dad's collegue's wife bakes the most amazing Kuih Bakar Pandan. The cake was soft, rich with coconut flavour and had the constitency of very thick kaya (coconut jam). It was so, so good that we would eat at least two piece per person. Unfortunately when his wife passed on, no one else seemed able to replicate the recipe.

kuih pandan 2


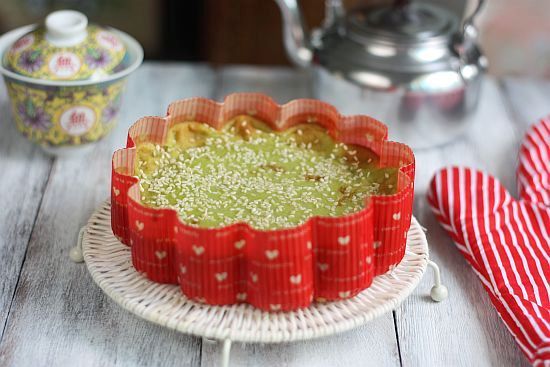
So can you imagine my excitment when I came across this recipe in Zurin of Cherry On A Cake's blog. Her pictures reminded so much of the Kuih Bakar I used to love when I was a kid. And the mere sight of her pictures made me want to try out the recipe as well. Coincidentally I also realized that I had the same flower paper cake mold as Zurin's. I had bought a few packs from Daiso a few months back and had used some for previous bakes.

kuih pandan 1


Baked Pandan Cake (Kuih Bakar Pandan)
Recipe Adapted from Here
Makes one 7" round cake

Ingredients:

300ml coconut cream (I used Kara brand)
100ml water (divide equally into 2 glasses)
4 fresh pandan leaves (each about 15 inches in length), snipped
125g granulated sugar
4 eggs
150g plain four
1/4 tsp salt
1/2 tsp all spice
1 Tbsp sesame seeds
1 Tbs unsalted butter

Method:

1) Preheat oven to 180C.

2) Combine coconut cream and 50ml of room temperature water. Keep aside

3) Into a blender add 50ml water and the pandan leaves. Blend until the leaves become a pulp. Remove and strain the liquid through a sieve. Squeeze the pulp to extract all the juice. Pour the strained pandan juce into the coconut cream mix and keep aside.

4) Sift flour, salt and all spice.

5) Beat eggs and sugar together with a whisk until well combined (about half a minute). Do not over beat. Add the coconut cream and pandan mixture and stir to combine.

6) Add the sifted flour mix and using the whisk fold in the flour mix into the mixture until there are no lumps left. Strain the batter using a sieve to remove any lumps.

7) Add the butter into the cake pan. Place the pan into the oven for about 3 - 5 minutes until the butter has melted and starts to brown around the edges. Remove the pan from the oven and swirl the butter around to coat the pan's sides.

8) Then pour the pandan batter into the pan and bake for about 10 minutes. Remove the pan from the oven and sprinkle the sesame seeds on top of the cake. Continue baking for a total of about 35 to 40 minutes or until the centre feels firm and is not wobbly when gently pressed and the edges are a light golden brown and crusty. Allow to cool completely before cutting into wedges and serving.

kuih pandan 3


kuih pandan 4


kuih pandan 5

Monday, June 6, 2011

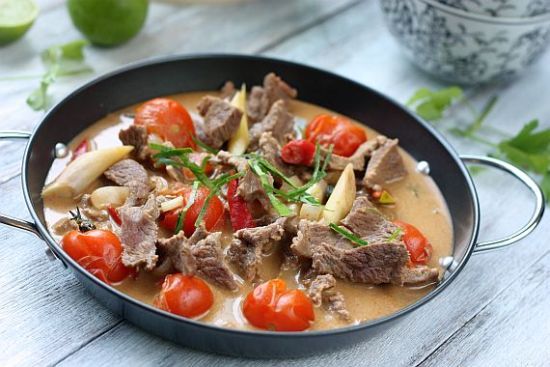
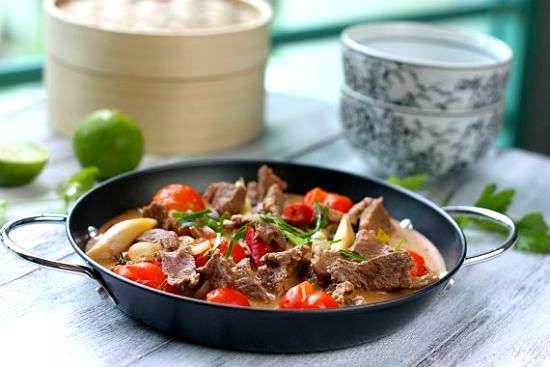
Thai Red Curry with Beef (Phat Phet Neua)

In Thai cooking, their curries come in two different types of bases, coconut based and water based. You would be surprised to find that the spiciest of the two is actually water based curries. The most typical water-based curry is sour curry (gaeng sohm plah) often prepared with fish. Thai coconut-based curries are numerous and the more well known curries are red, green, yellow, panang and masamam curries.

I personally think most people would be more familiar with a Thai green curry dish as compared with a Red curry one. The flavours are quite different. If you are making the paste at home, you can reduce the number of chillies used to get a milder heat. If you like it hot, you can add a couple of bird's eye chillies as well. A variety of meats could be used to cook this curry such as pork, beef, chicken and even roasted duck, cut into bite size pieces.

red curry 2


Thai Red Curry with Beef (Phat Phet Neua)
Serves 4

Ingredients:

300g good quality lean beef, thinly sliced
3 Tbsp cooking oil
4 Tbs packaged red curry paste or homemade(recipe below)
200ml (just under 1 cup) thick coconut milk or cream
1/2 cup of water or stock
8 cherry tomatoes, leave whole
5 peeled shallots, sliced thickly (use can use small onions)
2 lemongrass sticks, use the while part only, thickly sliced
6 kaffir lime leaves, stems removed, thinly sliced
1 fresh red chilli, thinly sliced
Small handful of coriander or chinese celery leaves, roughly chopped

Method:

1) Put the oil into a wok and when it is hot add the red curry paste and fry for 1-2 minutes. Then add half the thick coconut milk and fry for half a minute

2) Add in the shallots, lemongrass, lime leave and red chilli. Stir the fresh spices and then add in the beef.

3) Add in the water or stock and bring to a boil. Cook the curry for about 10 minutes on medium simmer.

4) Add the remaining coconut cream and the tomatoes. Bring to a boil. Season to taste with fish sauce and palm sugar. Cook for a further 4 - 5 minutes. Just before turning off the fire, throw in the coriander leaves and stir it into the curry.

5) Serve hot with steaming white rice.

Red Curry Paste (Nam Prik Gaeng Phet)

1 tsp shrimp paste
1 Tbsp coriander seeds
1/2 tsp cumin seeds
15 dried chillies, deseeded and soaked in warm water
1 stalk lemongrass, white part, finely sliced
2 tsp chopped shallots
1 clove garlic, minced
1 tsp grated galangal
1 Tbsp freshly ground black pepper
2 kaffir lime leaves, sliced
1 tsp kaffir lime zest, finely choppped
1 tsp salt

Method:

Pan fry the shrimp paste until fragrant. Toast the coriander and cumin seeds. Add all the ingredients in the food processor and grind until it becomes a fine paste. Store in the refrigerator. Will keep for about a week.

red curry 1


red curry 3
Related Posts with Thumbnails