Wednesday, October 7, 2009

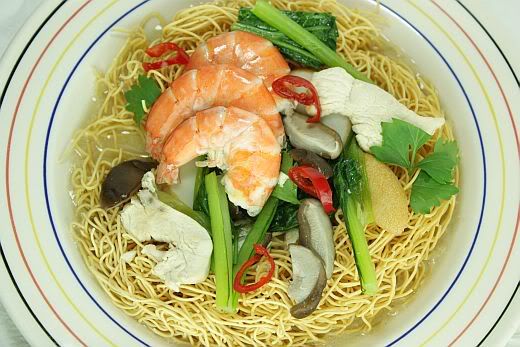
Sang Har Mien (Prawns with Crispy Egg Noodles)

Especially after a day at work and a hectic one at that, I'm always for a quick tasty dinner prepared at home. We opted for noodles rather than rice. So I decided to put together a couple of plates of crispy egg noodles and used whatever I already had in the fridge. This is my quick version of a very popular noodle dish back in Malaysia!

"Sang Har Mien" literally means Fresh Water Prawns mee. Normally the flavor of the fresh water prawn is stronger than salt water ones. The succulent prawns are usually split into two and is served with the crispy noodles. A whole beaten egg is then added to the hot thick gravy and is poured over the noodles. It's simply a very delicious dish altogether.


Sang Har Mien (Prawns with Crispy Egg Noodles) - My Quick Version
(serve 2)

Ingredients:

6 medium size tiger prawns (remove heads, leave the shell intact)
1/3 cup sliced shitake mushroom
100g thinly sliced chicken breast
8 thin slices of fish cake
2 pieces of crispy egg noodle (the noodles usually come in a small round bundle and would be available in any Asian store)
1 small bunch of choy sum (or any other leafy green vegetable)
2 stalks spring onions, cut into 4cm lengths
2 cloves garlic, smashed and chopped finely
1 tbsp finely sliced young ginger
3 cups chicken stock stock (or 3 cups water + 1 cube of Knorr's chicken cube)
1½ Tbsp cornflour mixed with 1 Tbsp water
1 large egg, beaten lightly
Sesame oil, soya sauce and white pepper for seasoning

Method

1) Using a stock pot, add 3 cups of stock, garlic and ginger and bring to a boil.

2) Turn fire to medium heat, add in the chicken and bring to a boil. Then throw in the fish cake and mushrooms and bring to a boil.

3) Then add in the prawns, followed by the beaten egg. Once it starts to simmer add in the cornflour mixture until the entire stock has thicken (it should look a bit gooey). Finally add in the green vegetables and spring onion.

4) Season stock with a drizzle of sesame oil and pinch of white pepper. If required, add soya sauce to taste.

5) Put crispy noodle on a plate and then place into the microwave. Set your microwave to high grill for 30 seconds. Take noodle out to taste if it's cripsy and warm. If not, high grill it for another 15 seconds. (Your grilling time will depend on the microwave capacity). If you don't have a microwave, you would need to do quickly deep fry the noodles in a pot of very hot oil until it turns golden brown and is crispy.

6) To serve pour the gravy directly onto the crispy noodle and serve with deep fried shallots and sliced red chillies.


Saturday, October 3, 2009

My Hanoi Trip (Part 1) - Around the City

I can't believe that our trip to Hanoi has come and gone in a blink of an eye! We left Singapore on 15 Sept evening for our 3 1/2 hour flight to Hanoi's international airpot, No Bai. Hanoi is located in the northern parts of Vietnam and is the 2nd largest city after Ho Chi Minh. Located on the banks of a mighty river, the River Red, Hanoi has served Vietnam as its capital for more than thousand years. The charming city has undergone a lot of foreign influences and preserves the cultural impact of all these conquests. Initially devastated by the War, Vietnam became accessible to tourists in 1989 and has since developed into an exotic tourist destination.

The lights of Hanoi city greeted us as we landed at about 9pm and after exiting immigration and customs, we took a private taxi to our hotel. If it's your first trip to Hanoi, be sure to check out your taxi fares beforehand and the best source would be to refer to your hotel. Most taxis are not metered and you could be easily charged a much higher fare. I must say it was a pretty scarry experience sitting in a Hanoi taxi. The roads are badly lit and motor bikes are everywhere, zig-zagging between other road users. Cars and heavy vehicles as well will use the same roads as the motor bikes. Drivers will flash their car lights and will horn impatiently at each other. In fact I realized throughout our trip there, they tend to horn all the time (so you can imagine how noisy it gets in the city).

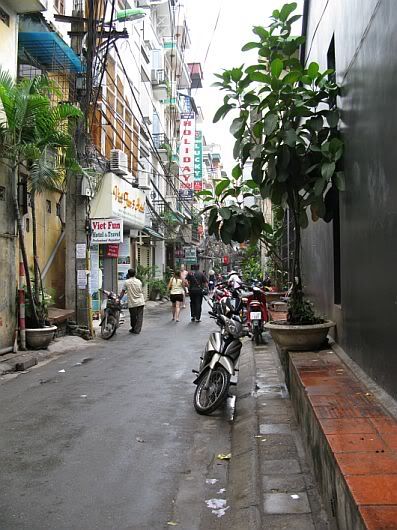
I had booked our hotel, Viet Anh II, through the internet after checking out several recommendations posted online by tourists (Viet Anh is also recommended as a budget accommodation by Lonely Planet). The hotel is located along a narrow alley which made it impossible for vehicles other than motor bikes to enter. The taxi had to alight us on the main road and we then took a short walk to the hotel.


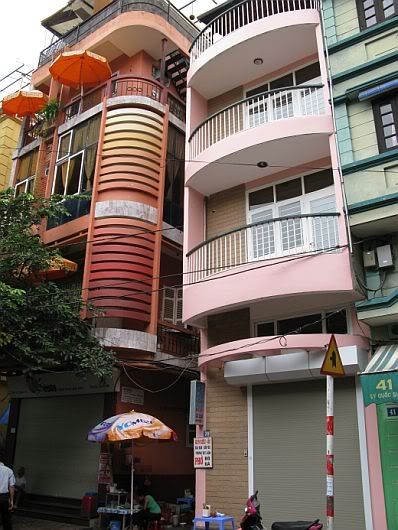
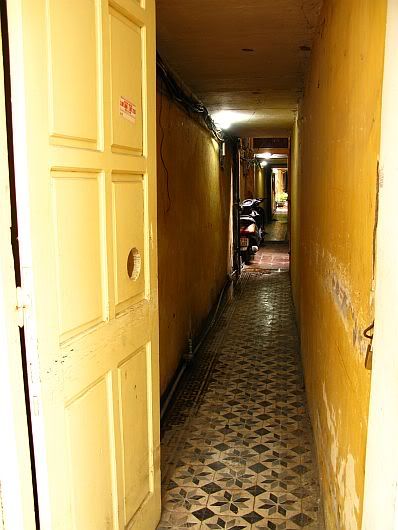
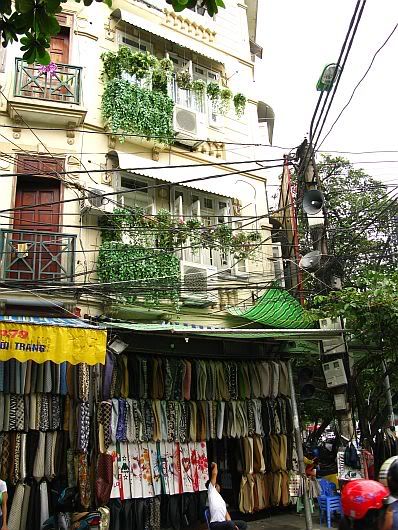
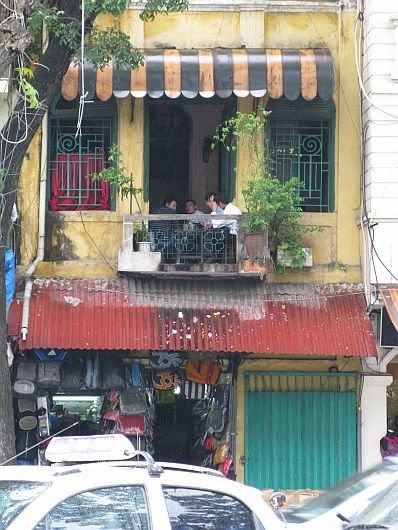
Most buildings (including budget hotels) in Hanoi do not have elevators even though they could be six storeys high. Buildings here have a narrow frontage but are extremely long in depth. The reason is because the government tax building owners on the amount of frontage space they occupy only (not bothering about the depth of the building). Because of this it would be practically impossible to include an elevator shaft within the building. As you can guess it, our hotel didn't have one either but luckily for us our room was on the 2nd floor (I really don't think I could cope with 6 flights of stairs with luggage and all).


This hotel is strategically located. Quite a few tourist sights are all within walking distance, as well as local street food and shops. Over the next couple of days we explored the city by foot. The weather was a bit erratic at times. Some days were gloomy and rained, and other days it was extremely hot and humid. Coming from a developed country like Singapore, Hanoi was a real change. I told my husband that I felt as if I had moved back into time.

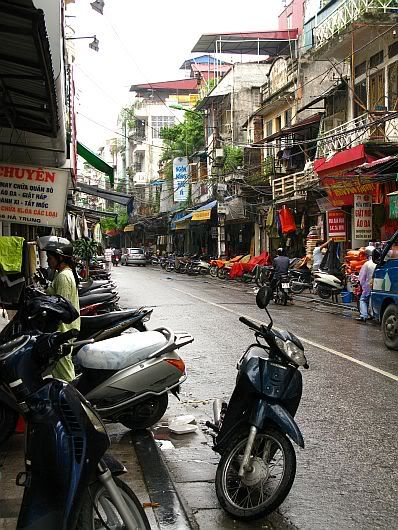
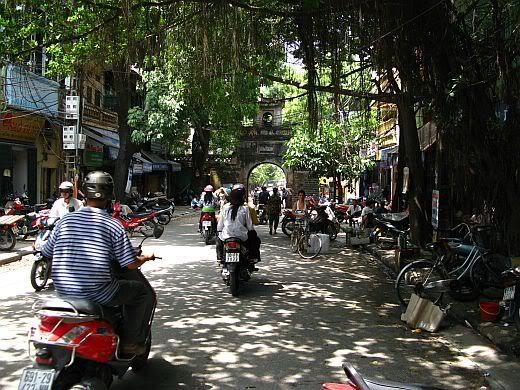
Majority of the locals commuted by motor bikes. You can even see ladies in office attire with 3" heels riding motor bikes to work. The streets are jammed with them! Most of the streets do not have traffic lights and the motor bikes would somehow manage to move through street junctions without encountering any accidents. There seems to be an "unspoken" rule here and amongst all this chaos, there is a form of order! Amazing! Crossing the roads is also another feat for foreigners but to the locals it's nothing at all. We learnt that you just need to walk steadily, make no sudden moves, and the motorbikes will weave around you as you walk. As a first timer, it was really unnerving but after a day or 2, you sort of get the hang of it.


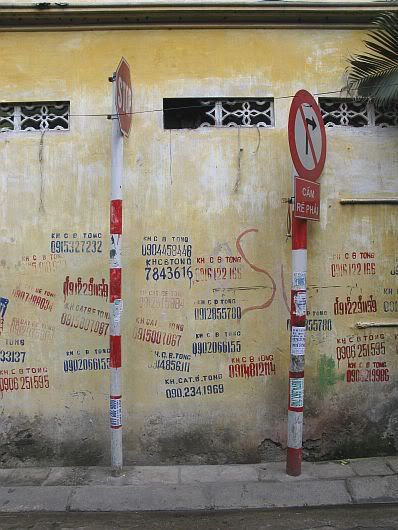
It is also quite unique that any building or alley way or blank wall could be converted to either an advertisement board or cafe for the locals to chat and have a cuppa.


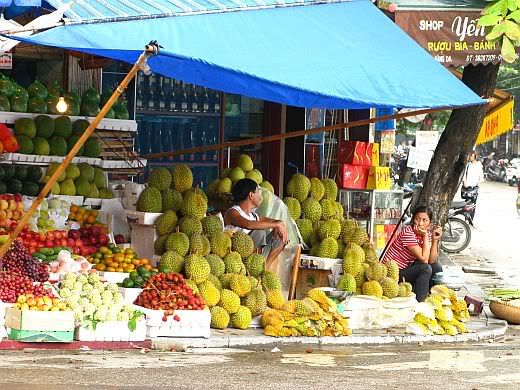
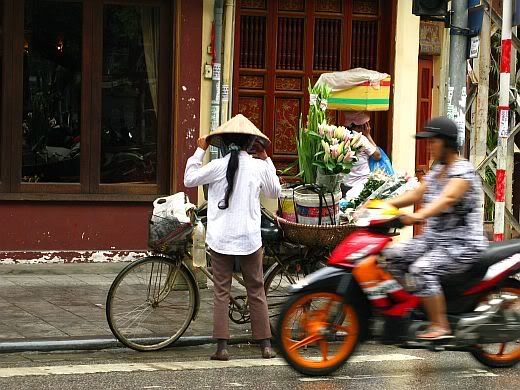
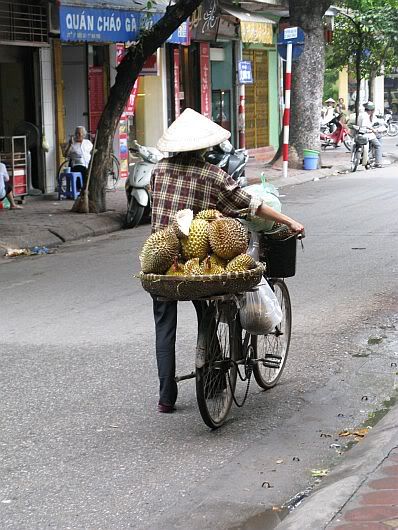
You will also encounter a lot of street vendors selling all sort of goods such as freshly cut flowers, fruit, fresh fish and meat, noodles and baguette.


The oldest church in Hanoi, St Joseph's Cathedral, is just located within a stone's throw to our hotel. St Joseph's Cathedral was known simply as the "Big Church" among the Vietnamese of Hanoi. The church was consecrated on the night of Christmas in 1886 by the French. The style of the cathedral was intended to resemble the Notre Dame of Paris. When the communists took over Hanoi, freedom of religion was suppressed for three decades. Only in 1990 was restrictions relaxed and the church started resuming services and the Vietnamese people once again enjoy freedom of worship.


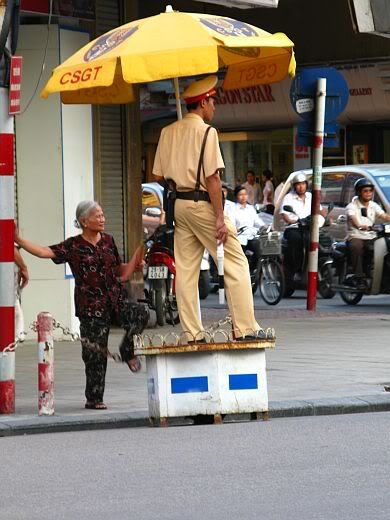
The hotel is also near to Hoan Kiem Lake which means "Lake of the Returned Sword" or "Lake of the Restored Sword". This lake is one of the major scenic spots in the city and serves as a focal point for its public life. You will see locals just sitting by the lake side and chatting with their friends. Groups of young and old would be doing their daily exercise around the lake (either jogging, walking or doing tai-chi). We even caught sight of this elderly lady using a roadside metal chain to exercise her legs - it was quite funny seeing this especially when she was so near to a policeman trying to direct morning traffic.


Near the northern shore of Hoan Kiem Lake lies Jade Island on which the Ngoc Son Temple (Jade Mountain Temple) stands. The temple was erected in the 18th century. It honors the 13-century military leader Tran Hung Dao who distinguished himself in the fight against the Yuan Dynasty, Van Xuong, a scholar, and Nguyen Van Sieu, a Confucian master and famous writer in charge of repairs made to the temple in 1864. Jade Island is connected to the shore by the wooden red-painted Huc Bridge (The Huc, meaning Morning Sunlight Bridge). This bridge can be found in most postcards of Hanoi. The morning we were there, it was a very gloomy day, dull skies and slight rain. We caught sight of a wedding couple on the bridge having their photographs taken.


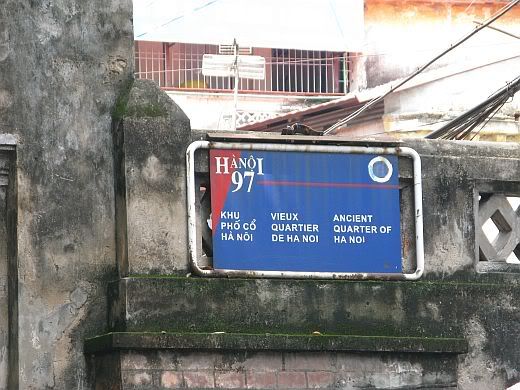
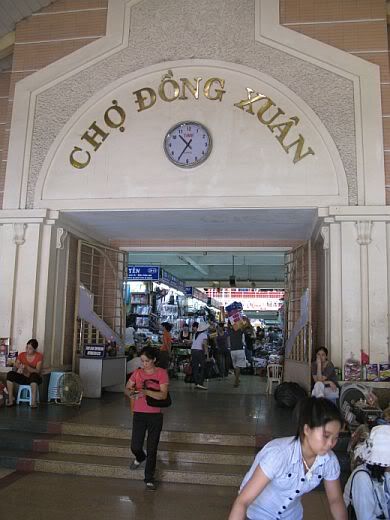
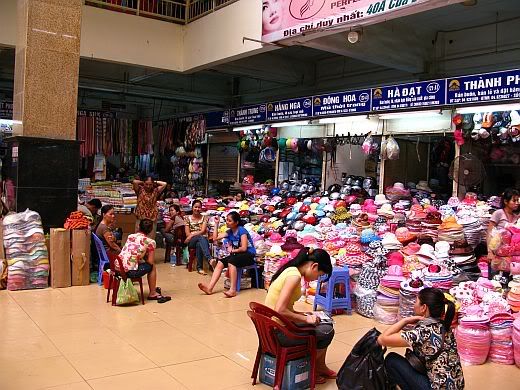
About a 25 minute walk from where we're at, is the Dong Xuan market. Located in the Old French Quarter area, Dong Xuan Market, or Cho Dong Xuan, is the oldest and largest market in Hanoi. It is located at Dong Xuan Street, at the end of Hang Dao Street, on the northern part of the Old Quarters. The original building was constructed in 1889, on the site of one of Hanoi's lakes. It is a street market spreading over a surface of 600 square meters, occupying half of the street. Approximately fifty businesses are operating the forty stands selling food, artifacts, souvenirs and tour packages among others.


The streets outside Dong Xuan market was really congested with traffic. In addition each street seemed to be selling similar items example one entire street could be displaying weaved baskets, another street was selling metal wares, the next was children's toys, or cushions and blankets.


Hope you had fun reading this but do stay tuned for Part 2 of my trip!

Sunday, September 27, 2009

Daring Bakers on a Vols-au Vent Venture!

The September 2009 Daring Bakers' challenge was hosted by Steph of A Whisk and a Spoon . She chose the French treat, Vols-au-Vent based on the Puff Pastry recipe by Michel Richard from the cookbook "Baking With Julia by Dorie Greenspan".

Puff pastry (aka pâte feuilletée) is something most of us usually buy at the grocery store, but I guess being Daring Bakers we have to dare ourselves further! This wouldn't be the first time we would be making puff pastry. In June last year, we were challenged to work with laminated dough to bake a danish braid. A laminated dough consists of a large block of butter (called the “beurrage”) that is enclosed in dough (called the “détrempe”). This dough/butter packet is called a “paton,” and is rolled and folded repeatedly (a process known as “turning”) to create the crisp, flaky, parallel layers you see when baked. Unlike Danish or croissant however, puff pastry dough contains no yeast in the détrempe, and relies solely aeration to achieve its high rise. The turning process creates hundreds of layers of butter and dough, with air trapped between each one. In the hot oven, water in the dough and the melting butter creates steam, which expands in the trapped air pockets, forcing the pastry to rise.

I had skipped the August challenge so when 1st Sept came, I could not wait to find out what would be this month's challenge. When Steph posted that it would be vols-au vent, I was pretty excited! I had in fact planned to make some in the next week or two, so this was indeed perfect timing. And guess what, another challenge which my other half would love to be my "official tester"! I decided to make bite-size vols-au vent; both savoury and sweet. I toyed with several different ideas .... even to extend of mumbling to myself on the type of filings I would use. I'm not sure if my husband thought it was funny or down right irritating by the end of the weekend. Anyway I ended up with several types of filings. For the savoury, it included carmelized onion with tomato confit, a wild mushroom ragoo, an egg mayo salad, apple and walnut chutney and honey baked ham with creme fraiche. For the sweet version, I simply piped each vols-a vent with lemon pastry cream and topped the pastries with filings such as blueberry confit topped with fresh blueberries, freshly chopped figs and miniature marshmallows. Can you imagine that the preparation part took almost a day and the consumption part took about 30 minutes only. So much for that!


Vols-au Vent

Equipment Required:

- food processor (will make mixing dough easy, but I imagine this can be done by hand as well)
-rolling pin
-pastry brush
-metal bench scraper (optional, but recommended)
-plastic wrap
-baking sheet
-parchment paper
-silicone baking mat (optional, but recommended)
-set of round cutters (optional, but recommended)
-sharp chef’s knife
-fork
-oven
-cooling rack

Prep Times:

-about 4-5 hours to prepare the puff pastry dough (much of this time is inactive, while you wait for the dough to chill between turns…it can be stretched out over an even longer period of time if that better suits your schedule)
-about 1.5 hours to shape, chill and bake the vols-au-vent after your puff pastry dough is complete


Forming and Baking the Vols-au-Vent
Yield: 1/3 of the puff pastry recipe below will yield about 8-10 1.5” vols-au-vent or 4 4” vols-au-vent

In addition to the equipment listed above, you will need:

-well-chilled puff pastry dough (recipe below)
-egg wash (1 egg or yolk beaten with a small amount of water)
-your filling of choice

Line a baking sheet with parchment and set aside.

Using a knife or metal bench scraper, divided your chilled puff pastry dough into three equal pieces. Work with one piece of the dough, and leave the rest wrapped and chilled. (If you are looking to make more vols-au-vent than the yield stated above, you can roll and cut the remaining two pieces of dough as well…if not, then leave refrigerated for the time being or prepare it for longer-term freezer storage. See the “Tips” section below for more storage info.)

On a lightly floured surface, roll the piece of dough into a rectangle about 1/8 to 1/4-inch (3-6 mm) thick. Transfer it to the baking sheet and refrigerate for about 10 minutes before proceeding with the cutting.

(This assumes you will be using round cutters, but if you do not have them, it is possible to cut square vols-au-vents using a sharp chef’s knife.) For smaller, hors d'oeuvre sized vols-au-vent, use a 1.5” round cutter to cut out 8-10 circles. For larger sized vols-au-vent, fit for a main course or dessert, use a 4” cutter to cut out about 4 circles. Make clean, sharp cuts and try not to twist your cutters back and forth or drag your knife through the dough. Half of these rounds will be for the bases, and the other half will be for the sides. (Save any scrap by stacking—not wadding up—the pieces…they can be re-rolled and used if you need extra dough. If you do need to re-roll scrap to get enough disks, be sure to use any rounds cut from it for the bases, not the ring-shaped sides.)

Using a ¾-inch cutter for small vols-au-vent, or a 2- to 2.5-inch round cutter for large, cut centers from half of the rounds to make rings. These rings will become the sides of the vols-au-vent, while the solid disks will be the bottoms. You can either save the center cut-outs to bake off as little “caps” for you vols-au-vent, or put them in the scrap pile.
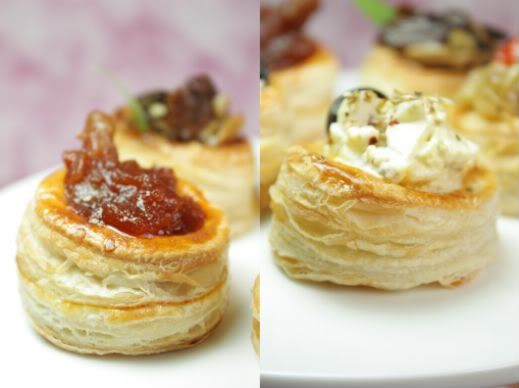


Dock the solid bottom rounds with a fork (prick them lightly, making sure not to go all the way through the pastry) and lightly brush them with egg wash. Place the rings directly on top of the bottom rounds and very lightly press them to adhere. Brush the top rings lightly with egg wash, trying not to drip any down the sides (which may inhibit rise). If you are using the little “caps,” dock and egg wash them as well.

Refrigerate the assembled vols-au-vent on the lined baking sheet while you pre-heat the oven to 400ºF (200ºC). (You could also cover and refrigerate them for a few hours at this point.)

Once the oven is heated, remove the sheet from the refrigerator and place a silicon baking mat (preferred because of its weight) or another sheet of parchment over top of the shells. This will help them rise evenly. Bake the shells until they have risen and begin to brown, about 10-15 minutes depending on their size. Reduce the oven temperature to 350ºF (180ºC), and remove the silicon mat or parchment sheet from the top of the vols-au-vent. If the centers have risen up inside the vols-au-vent, you can gently press them down. Continue baking (with no sheet on top) until the layers are golden, about 15-20 minutes more. (If you are baking the center “caps” they will likely be finished well ahead of the shells, so keep an eye on them and remove them from the oven when browned.)

Remove to a rack to cool. Cool to room temperature for cold fillings or to warm for hot fillings.

Fill and serve.

*For additional rise on the larger-sized vols-au-vents, you can stack one or two additional ring layers on top of each other (using egg wash to "glue"). This will give higher sides to larger vols-au-vents, but is not advisable for the smaller ones, whose bases may not be large enough to support the extra weight.

*Although they are at their best filled and eaten soon after baking, baked vols-au-vent shells can be stored airtight for a day.

*Shaped, unbaked vols-au-vent can be wrapped and frozen for up to a month (bake from frozen, egg-washing them first).


Michel Richard’s Puff Pastry Dough
From: Baking with Julia by Dorie Greenspan
Yield: 2-1/2 pounds dough


Note: This recipe makes more than you will need for the quantity of vols-au-vent stated above. Extra dough freezes well, you can halve it successfully if you’d rather not have much leftover.

Ingredients:

2-1/2 cups (12.2 oz/ 354 g) unbleached all-purpose flour
1-1/4 cups (5.0 oz/ 142 g) cake flour
1 tbsp. salt (you can cut this by half for a less salty dough or for sweet preparations)
1-1/4 cups (10 fl oz/ 300 ml) ice water
1 pound (16 oz/ 454 g) very cold unsalted butter
Extra flour for dusting work surface

Mixing the Dough:

Check the capacity of your food processor before you start. If it cannot hold the full quantity of ingredients, make the dough into two batches and combine them.

Put the all-purpose flour, cake flour, and salt in the work bowl of a food processor fitted with a metal blade and pulse a couple of times just to mix. Add the water all at once, pulsing until the dough forms a ball on the blade. The dough will be very moist and pliable and will hold together when squeezed between your fingers. (Actually, it will feel like Play-Doh.)

Remove the dough from the machine, form it into a ball, with a small sharp knife, slash the top in a tic-tac-toe pattern. Wrap the dough in a damp towel and refrigerate for about 5 minutes.

Meanwhile, place the butter between 2 sheets of plastic wrap and beat it with a rolling pin until it flattens into a square that's about 1" thick. Take care that the butter remains cool and firm: if it has softened or become oily, chill it before continuing.

Incorporating the Butter:

Unwrap the dough and place it on a work surface dusted with all-purpose flour (A cool piece of marble is the ideal surface for puff pastry) with your rolling pin (preferably a French rolling pin without handles), press on the dough to flatten it and then roll it into a 10" square. Keep the top and bottom of the dough well floured to prevent sticking and lift the dough and move it around frequently. Starting from the center of the square, roll out over each corner to create a thick center pad with "ears," or flaps.

Place the cold butter in the middle of the dough and fold the ears over the butter, stretching them as needed so that they overlap slightly and encase the butter completely. (If you have to stretch the dough, stretch it from all over; don't just pull the ends) you should now have a package that is 8" square.

To make great puff pastry, it is important to keep the dough cold at all times. There are specified times for chilling the dough, but if your room is warm, or you work slowly, or you find that for no particular reason the butter starts to ooze out of the pastry, cover the dough with plastic wrap and refrigerate it . You can stop at any point in the process and continue at your convenience or when the dough is properly chilled.


Making the Turns:

Gently but firmly press the rolling pin against the top and bottom edges of the square (this will help keep it square). Then, keeping the work surface and the top of the dough well floured to prevent sticking, roll the dough into a rectangle that is three times as long as the square you started with, about 24" (don't worry about the width of the rectangle: if you get the 24", everything else will work itself out.) With this first roll, it is particularly important that the butter be rolled evenly along the length and width of the rectangle; check when you start rolling that the butter is moving along well, and roll a bit harder or more evenly, if necessary, to get a smooth, even dough-butter sandwich (use your arm-strength!).

With a pastry brush, brush off the excess flour from the top of the dough, and fold the rectangle up from the bottom and down from the top in thirds, like a business letter, brushing off the excess flour. You have completed one turn.

Rotate the dough so that the closed fold is to your left, like the spine of a book. Repeat the rolling and folding process, rolling the dough to a length of 24" and then folding it in thirds. This is the second turn.

Chilling the Dough:

If the dough is still cool and no butter is oozing out, you can give the dough another two turns now. If the condition of the dough is iffy, wrap it in plastic wrap and refrigerate it for at least 30 minutes. Each time you refrigerate the dough, mark the number of turns you've completed by indenting the dough with your fingertips. It is best to refrigerate the dough for 30 to 60 minutes between each set of two turns.

The total number of turns needed is six. If you prefer, you can give the dough just four turns now, chill it overnight, and do the last two turns the next day. Puff pastry is extremely flexible in this regard. However, no matter how you arrange your schedule, you should plan to chill the dough for at least an hour before cutting or shaping it.


Thursday, September 24, 2009

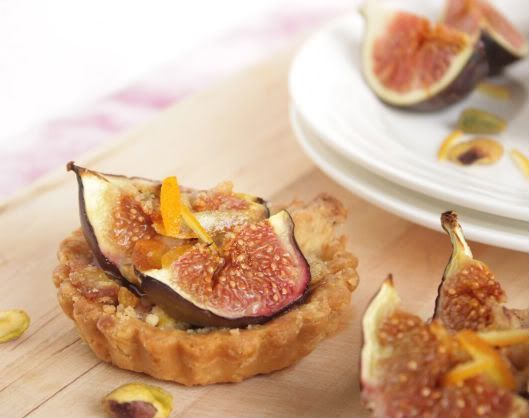
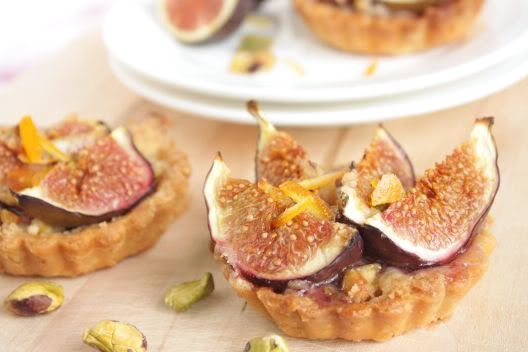
Fig Streusel Tartlets with Pistachios

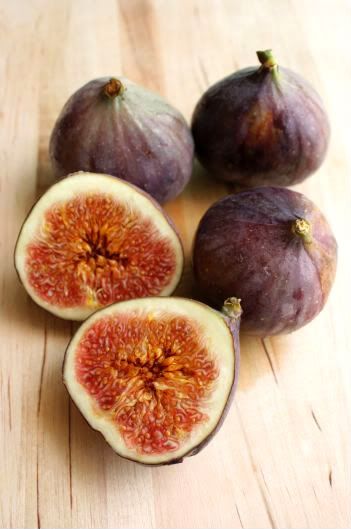
We don't often get fresh figs here in Singapore, so it was quite a nice surprise to come across some whilst doing my weekly grocery shopping. I must say that they are quite expensive though but I could not resist getting a pack of four fesh figs. I had seen a number of fig recipes floating recently in blogsphere and it's probably because it's fig season. These ones that I bought come from Turkey. Just the thought of this country brings back fond memories of my trip there many, many years ago. It was around September and was fig season as well as the local road side vendors were displaying wooden racks of fresh, sweet figs. My first taste of figs was actually there, standing along a dusty country road-side.

I had some mini tartlet shells sitting in the freezer as a result of trying out a Confit Cherry Tomato Tart . This was ideal to try out some fig tartlets.


Fig Streusel Tartlets with Pistachios

For the pate brisee

For the filling:

60g all purpose flour
60g light brown sugar
60g very cold unsalted butter, cut into 1/4 inch pieces
2 tbsp thinly sliced crystallized orange peel (you can use 1 tbsp orange zest as substitute)
2 tbsp roughly chopped pistachio
12 fresh figs, quartered
3 tbsp orange blossom honey (or any other type of honey will do)

Prepare the filling and assemble:

In a large bowl, mix together the flour and sugar. Add the butter and ginger and quickly mix with your fingertips until you get pea sized pieces. Layer 3/4 of the streusel at the bottom of each tart shell. Divide and arrange the quartered figs evenly on top and top with the remaining streusel. Drizzle with the honey and bake an additional 20 minutes or until the streusel is baked and the figs are slightly roasted.


Sunday, September 20, 2009

Triple Chocolate Fudge Cake

I recently discovered that my oven thermostat has gone totally out of whack! How did I find out about it? Well, I baked some cupcakes one week day evening after work and mid way through baking, the cupcakes looked a bit too brown at the edges to me. I thus lowered the oven temperature from 180C to 170C. By the time the cupcakes were done, every single one had cracked domes and the edges were slightly crisp. This got me really puzzled. I then decided to test the oven temperature by using an external oven thermometer (which I rarely use) and it showed that my oven was off by about 15C. By the end of the same week when I had to complete my Cake Slice challenge, I again resorted to using the external oven thermometer rather than rely on the oven's one. Lucky for me I did! My oven thermostat is now off by 50C.

Although it took me a while to get the oven to the right temperature, I finally did manage to get my three cake trays baked. I was a bit sceptical about how this cake would taste like as no butter or oil was used at all. Instead the binding agent was mayonnaise. Who would have thought that mayonnaise would have produced such an excellent fudge cake. I had a small slice to taste after the cake layers were put together. It was yummilicious and the sour cream chocolate icing is one frosting (though I didn't care too much for the white choclate mousse) that I will use over again in the future! It's that good! By the way, this cake will be the last cake from "Sky High Irresistible Layer Cakes" book which our group, Cake Slice Bakers, will be baking. We will be baking from a totally new book next month, so stay tuned!


Triple Chocolate Fudge Cake
Makes an 9inch triple layer cake; serves 12 to 16
(Recipe from Sky High Irresistible Layer Cakes by Alisa Huntsman and Peter Wynne)

2¼ cups all purpose flour
1 cup unsweetened cocoa powder
2¼ tsp baking soda
1¼ tsp baking powder
1 tsp salt
½ tsp ground cinnamon
2 ½ ounces unsweetened chocolate, chopped
1 cup milk
1¼ cups hot, strongly brewed coffee
2 eggs
1 cup mayonnaise (not low fat or fat free)
1½ tsp vanilla extract
2¼ cups sugar

White chocolate mousse (below)
Sour cream chocolate icing (below)


Method:

1) Preheat the oven to 350 degrees F. Butter the bottoms and sides of three 9 inch round cake pans. Line the base of each pan with parchment.

2) Sift together the flour, cocoa powder, baking soda, baking powder, cinnamon and salt. Set aside.

3) Put the chocolate in a large heatproof bowl. Bring the milk to a simmer. Pour the hot coffee and milk over the chocolate. Let stand for a minute, then whisk until smooth. Let the mocha liquid cool slightly.

4) In a mixer bowl, beat together the eggs, mayonnaise and vanilla until well blended. Gradually beat in the sugar. Add the dry ingredients and mocha liquid alternately in 2 or 3 additions, beating until smooth and well blended. Divide the batter among the 3 prepared pans.

5) Bake for 25 to 28 minutes, or until a cake tester inserted in the centre comes out almost clean. Let the cakes cool in their pans for 10-15 minutes before un-molding onto a wire rack and carefully peeling off the paper. Leave to cool completely.

White Chocolate Mousse

4 ounces white chocolate, chopped
1 cup heavy cream
1 egg white
1 tbsp sugar

1) Melt the white chocolate with ¼ cup cream in a double boiler. Whisk until smooth. Remove from the heat and let the white chocolate cream cool to room temperature. When it has cooled, beat the remaining ¾ cup cream until soft peaks form. In a clean bowl whip the egg white with the sugar until fairly stiff peaks form.

2) Fold the beaten egg white into the white chocolate cream, then fold in the whipped cream until blended. Be sure not to over mix.

Sour Cream Chocolate Icing

12 ounces bittersweet or semi sweet chocolate, chopped
1 stick (4 ounces) unsalted butter
2 tbsp light corn syrup
¼ cup half-and-half at room temperature
½ cup sour cream, at room temperature

1) Melt the chocolate with the butter and corn syrup in a double boiler over barly simmering water. Remove from the heat and whisk until smooth.

2) Whisk in the half-and-half and sour cream. Use while still soft.

To Assemble:

1) Place one layer, flat side up, on a cake stand or serving plate. Cover the top evenly with half the white chocolate mousse, leaving a ¼ inch margin around the edge. Repeat with the second layer and the remaining mousse. Set the third layer on top and pour half the sour cream chocolate icing over the filled cake. Spread all over the sides and top. Don’t worry if some of the cake shows through. This first frosting is to seal in the crumbs, and is known as a crumb coat. Refrigerate the cake for 30 minutes.

2) After this time cover the cake with the rest of the icing, smoothing it down the sides. It should be the consistency of mayonnaise. Use a palette knife or the back of a spoon to swirl the frosting around the cake.


Saturday, September 12, 2009

Taking a Well Deserved Break!

I'm will be "off" from blogging next week as I'm taking a well deserved holiday to Hanoi, Vietnam. Will be back the next week-end and hope to update everyone on our trip. In the meantime hope you guys have a great week ahead!

Thursday, September 10, 2009

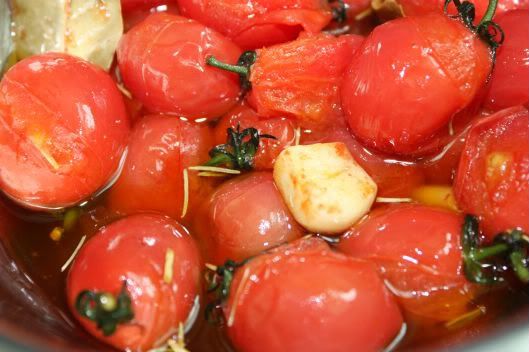
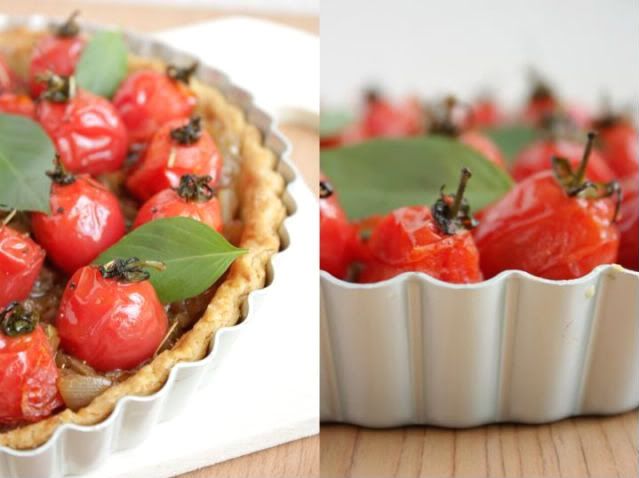
Confit Cherry Tomato Tart with Carmelized Onion

My recent cook book purchase from Amazon.com was to have arrived in the third week of July but when early August came, there was still no sign of my package. I was already imagining that the package was lost in post and that would be the end of it. When I emailed Amazon about this, their customer service told me to wait another two weeks and if it hadn't arrived by then, they would do a refund for me. In the meantime, they were kind enough to waive the shipping cost altogether. I was pretty pleased about it and certainly appreciate their excellent customer service.


Anyway a week after that, my package finally arrived. I was very excited as one of the books I had ordered was by Michel Roux . This book covered the different types of pastry from classic puff, tart dough to pizza dough. Most of the recipes came with beautiful pictures, which is exactly how I like my cook books to be. I immediately got down to trying out his pate brisee recipe, slightly adapting the method of mixing the ingredients together. I also adapted the cherry tomato tart in the same book by including carmelized onions. All I can say is the tart dough is extremely, extremely flaky and delicious. You can even make the pate brisee beforehand - line your tart tray and pop the unbaked tart shell into your freezer, and for up to 2 months too. When ready to bake, immediately take it out from the freezer, dock the dough and blind bake the shell according to the recipe you are making. This pate brisee is great with both savoury and sweet tart filings.


Confit Cherry Tomato Tart with Carmelized Onion
Recipe Adapted from Michel Roux "Pastry"
Makes an 8" tart - serves 6


250g pate brisee
1 cup carmelized onion
500g confit cherry tomato
6 basil leaves

For the pate brisee:

250g all purpose flour
150g cold unsalted butter, cut into small pieces
1 tsp fine salt
pinch of superfine sugar
1 medium egg
1 Tbsp cold milk

Method:

1) Sift flour into a bowl. Add salt and sugar.
2) Add in the butter.
3) Using a pastry cutter, cut the butter into the flour until it resembles rough breadcrumbs.
4) In a separate bowl, lightly beat the egg with the milk and drizzle it onto the flour mixture.
5) Using your hands, blend the mixture together and lighly knead to bring together. Try not to handle the dough too much.
6) Roll the dough into a ball, wrap in plastic wrap, flatten it into a disk and chill for about 45 minutes to an hour.
8) To line your tart tray, I find it easier to roll the dough between two pieces of clingwrap plastic. Roll to about 3" wider than the base of your tray. Remove the top wrap.
9) Lift the dough using the clingwrap plastic and gently flip it into your tart tray. Press the dough onto the tray and trim off the excess.
10) Dock the base of the tart shell with a fork and then place it into the fridge for another hour.
11) Preheat oven to 190C. Bake the shell blind, for about 20 minutes. Then remove the parchment paper and bake for another 20 minutes until the tart is golden brown.


For the Confit Cherry Tomato:
Makes 700g

4 cups light olive oil
1 kg ripe cherry tomatoes
1 Tbsp dried rosemary
1 bay leaf
2 garlic cloves, halved
Salt and black pepper to taste

Method:

1) Heat a pot over stove and then add the olive oil.
2) With the fire on low, add the cherry tomatoes, dried rosemary, bay leaf and garlic and cook for about 5 minutes. Make sure that you continue turning the tomatoes around so that they do not break apart. Season with salt and black pepper.
3) Scoop out from pot and place into a bowl to cool.

For the Carmelized Onions:

4 - 5 large white onions, sliced thinly
Salt and black pepper to taste

Method:

1) Heat a pot over stove and add 3 tablespoon of olive oil.
2) Add the sliced onions and cook over the medium to low fire.
3) Stir continuous so as the onions do not burn. Cook until onions have soften and turn a light brown colour (should take about 15 - 20 minutes)
4) Set aside to cool.

To Assemble Tart:

1) Spread about 3 - 4 tablespoon of creme fraiche on the bottom of the baked tart shell (can be omitted if you do not have any).
2) Spread a layer of carmelized onion
3) Finally place the cherry tomato on top of the onion.
4) Place the assembled tart into a pre-heated oven of 160C for about 5 minutes to warm up the tart.
5) Scatter the fresh basil leaves on top of tart and serve immediately.


Related Posts with Thumbnails