Saturday, August 27, 2011

Classic Cheesecake with Blueberry Compote Topping

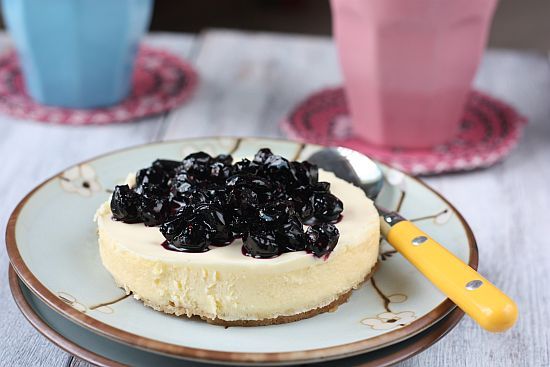
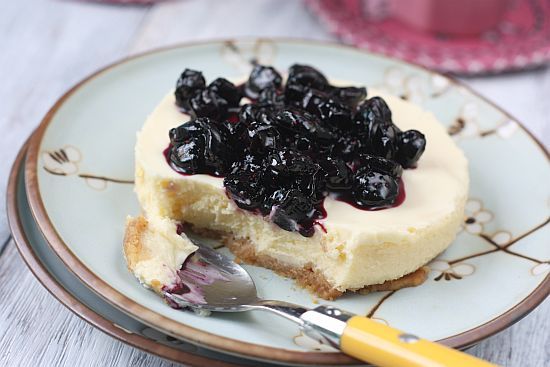
I love cheesecake desserts especially the light ones. It is a relatively easy dessert to put together and you really do have a wide choice of flavours to be added as well as how you plan to serve it. You also have a choice of a baked or unbaked cheesecake. However I personally prefer the individual portions as it is pretty as well as easy to serve. No messy slicing and having crumbs all over the place. The next time round I would love to put together a cheesecake pots version - cheesecake desserts served in a glass. I think this is a totally cool way of wowing your guests!

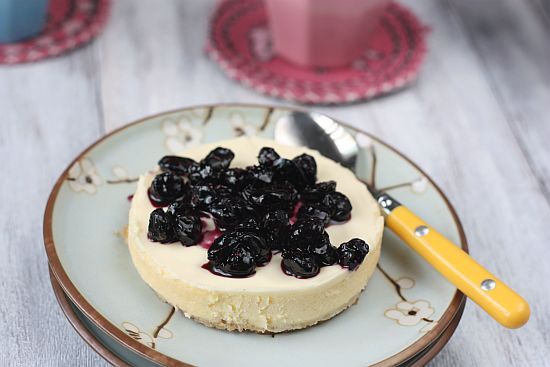
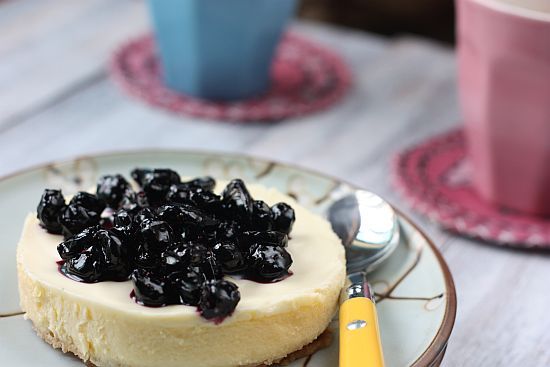
bb cheesecake 2


bb cheesecake 3


Classic Cheesecake with Blueberry Compote Topping
Recipe Adapted from Martha Stewart

For Crust:

5 tablespoons unsalted butter, melted, plus room-temperature butter for pan
12 graham crackers (3-by-5 inch)
1/4 cup sugar
1/4 teaspoon coarse salt

For Filling:

2 1/2 pounds bar cream cheese, room temperature
1 1/4 cups sugar
1 teaspoon finely grated lemon zest, plus 1 tablespoon fresh lemon juice
1/2 teaspoon coarse salt
4 large eggs
1 cup sour cream

Method:

1) Preheat oven to 375 degrees. Make crust: Butter a 9-by-3-inch springform pan. In a food processor, pulse graham crackers until fine crumbs form; add melted butter, sugar, and salt, and pulse to combine. Press crumb mixture into bottom and about 1 inch up side of pan. Bake until set, 12 to 15 minutes; let cool on a wire rack. Reduce oven to 325 degrees.

2) Set a kettle of water to boil. Make filling: Using an electric mixer, beat cream cheese on medium until fluffy, scraping down side of bowl. Gradually add sugar, beating until fluffy. Beat in lemon zest and juice, and salt. Beat in eggs, one at a time, scraping down side of bowl after each addition. Beat in sour cream.

3) Wrap bottom half of pan in foil. Pour in filling; place in a roasting pan. Pour in boiling water to come halfway up side of springform. Bake until just set in center, about 1 3/4 hours. Remove pan from water; let cool 20 minutes. Run a paring knife around edge; let cool completely. Cover; chill overnight.

4) Add 1 1/2 cups of fresh or frozen blueberries in a saucepan. Add 2/3 cup sugar, zest of one lemon and 2 Tbsp lemon juice with the berries. Put the pan on medium fire and once bubbles appear on the sides, bring the fire to low. Reduce the fruit on low heat until it becomes a thick jam consistency. You want some of the fruit to be chunky for texture. Cool and refrigerate.

5) To serve bring cheesecake out from the fridge. Set to room temperature for about 4-5 minutes. Top with blueberry compote before serving.

bb cheesecake 1


bb cheesecake 4

Sunday, August 21, 2011

Pandan Melting Moments with Coconut Cream

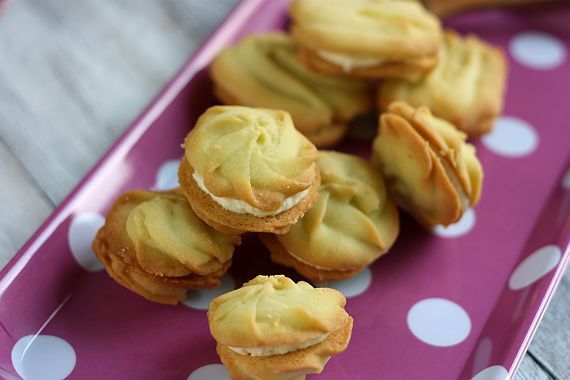
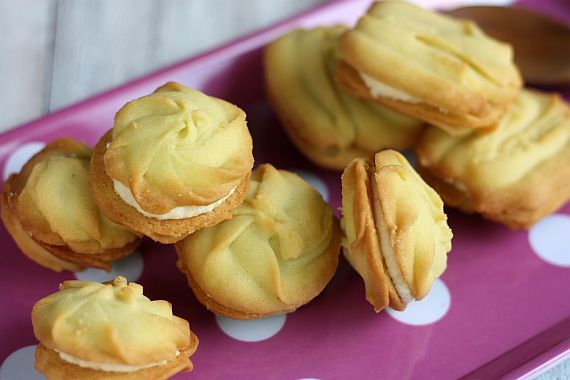
When I think of Melting Moment cookies, I always think of a light cookie that crumbles and dissolves in the mouth. That's why it's called "melting moments" and whoever gave this cookie it's name certainly nailed it.

When I chanced upon this recipe which used the infusion of pandan juice in the cookie dough, I was very interested to try it out. It had the addition of a coconut cream which would go really well with the pandan flavour. The cookies turned out extremely light in texture with a tinge of pandan flavour. At first I had not wanted to make the coconut cream and had thought of just having the cookie on its own. But I was glad that I did as the coconut cream icing elevated a somewhat plain cookie to a new dimension. As I had reduced the icing sugar in the frosting, it was not too sweet at all.

pandan cookie 2


pandan cookie 3


Pandan Melting Moments with Coconut Cream
(Makes about 20 sandwhich cookies)
Recipe Adapted from BBC Goodfood (June 2011 Asian Edition)

Ingredients for the Cookie:

200g unsalted butter, softened
85g icing sugar, sifted
4 Tbsp pandan juice (see below)
225g plain all purpose flour
4 Tbsp cornflour (or cornstarch)
1/4 tsp salt

Ingredients for the Coconut Cream:

60g unsalted butter, soften
100g icing sugar, sifted
2 tsp coconut powder (I used Kara brand)

Method:

1) Prehat oven to 160C.

2) Sift the plain flour, cornflour and salt in a bowl and set aside.

3) In another bowl, beat the butter, icing sugar and pandan juice until light and fluffy.

4) Add in the sifted ingredients into the batter and mix thoroughly until well combined. Place the cookie dough into a piping bag fixed with a star nozzle and pipe the mixture into 1.5cm rosettes onto a baking tray lined with parchment paper.

4) Bake for 10 - 12 mins until the cookies are firm and lightly golden. Set aside to cool completely.

5) To make the coconut cream, beat the butter, icing sugar and coconut powder until pale and fluffy. Spread the coconut cream on one cookie and sandwich with another. Continue until all the cookies are sandwich with the cream.

Note: To make the pandan juice, blend 30 leaves, roughly cut up with 45ml water. Squeeze and strain the mixture through a piece of muslin cloth or very fine sieve.

pandan cookie 1


pandan cookie 4

Sunday, August 14, 2011

Lemon Drizzle Cake

I made this cake ever so long ago and really have no excuse for not posting it up until now. I love desserts with citrus fruit and especially more so if it is lemon.

What I like about this cake is that it uses different texture of flour. The cornmeal gives the cake crumbs a nutty taste quite akin to a semolina (sugee) cake. However if you don't have semolina or cornmeal, you can use self raising flour instead. It will end up tasting more like a citrus butter cake then. The other thing I like about this recipe is that it has a lemon curd that is baked with the cake batter. You would usually think of using lemon curd as a frosting in between layers or on top of the cake. Lastly, it has a lemon drizzle to top it off. This recipe truly is one for lemon dessert lovers. It is great for a afternoon tea and serve this with English tea, I think it goes so well with it.

Drizzle cake 2


Lemon Drizzle Cake

Ingredients:

200g butter, soften at room temperature
170g caster sugar
4 large eggs
100g fine cornmeal or fine polenta
140g self raising flour
1/4 tsp salt
Zest of 3 lemons

For the swirl and drizzle:

4 Tbsp lemon curd
4 Tbsp caster sugar
Zest and juice of 1 lemon

Substitue: If you do not have cornmeal/polenta, substitute with a total of 200g self raising flour for the entire recipe

Method:

1) Heat oven to 180C, middle rack. Butter a rectangular tray 20cm x 30cm, line the bottom with parchment paper.

2) Put all the ingredients in a mixing bowl and beat until creamy and smooth. Scoop the batter into the cake tin and smooth the top

3) Spoon the lemon curd over the batter in thick stripes. Use the handle of a spoon to swirl the curd into the cake. Do not over-swirl as you don't want to mix the curd into the batter, otherwise you do not see the swirls once the cake is baked.

4) Bake for 35 minutes or until golden and risen. The sides will shrink away from the pan slighly and the top will feel springy. Don't open the oven before 30 minutes of baking is up.

5) Leave cake to cook for about 15 minutes before turning out of pan. Place cake on a wire rack.

6) To make the drizzle, mix the sugar and lemon juice together. Then spoon over the cake> Toss the lemon zest with the final tablespoon of sugar and scatter over the cake. Let cool completely and then place cake onto a serving plate, peel away the parchment to serve. Cake can be kept in room temperature in airtight tin for 3 days.

drizzle cake 1


Drizzle cake 3

Monday, August 8, 2011

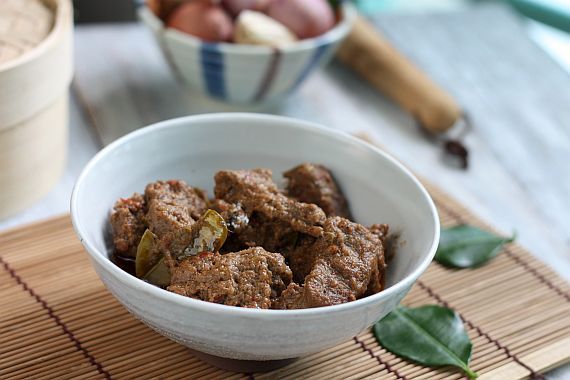
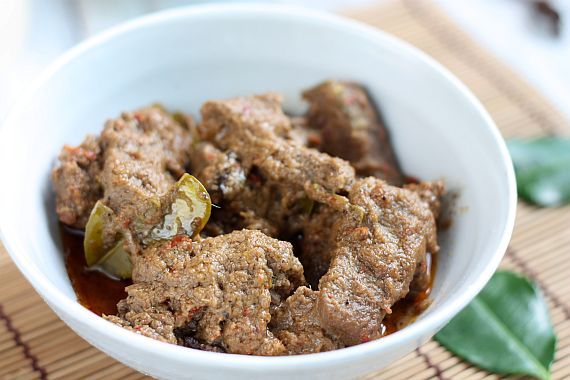
Beef Rendang (Malay Spiced Coconut Beef)

Whenever I think about authentic Malaysian food, the beef rendang would definitely be on my list. This particular dish immediately conjurs about images of tradition, recipe passed down through generations, a motar and pestel, a basket of fresh spices and herbs and a family sitting down to a delicious meal.

Beef Rendang is one dish that does take patience as it needs to be simmered for a couple of hours. I guess nowadays people would take the "cheat" method which is to use packet prepared Rendang paste. I must confess that I personally have tried this method as well but somehow the taste is not the same! Maybe it's me being a fuss-pot but I truly don't mind putting this dish together from scratch.

rendang 2


rendang 4


Beef Rendang (Malay Spiced Coconut Beef)

Ingredients:

700g beef cut into 1 1/2 to 2-inch pieces (I used beef chuck)
2 1/2 cups thick coconut milk (can subsitite with 200ml coconut cream mixed with 1/3 cup water)
1 cup fresh grated coconut, toasted in a pan on low fire until brown and then pound until oil develops (can subsitute with unsweetened desiccated coconut. Alternatively you can buy the prepared toasted coconut or "kerisik" from Asian grocery shops)
2 stalks lemongrass, white part only and slightly crushed
2-3 turmeric leaves [daun kunyit], [Substitute: kaffir lime leaves; or the zest of 1 lime]
1 piece cinnamon stick 2" long
1 Tbsp tamarind paste dissolved in 2 Tbsp water, sieve and keep the tamarind juice (can substitute with lime juice)
3 Tbsp vegetable oil
2 tsp sugar (adjust according to taste)
Salt to taste

Grind into Paste:

10 pieces dried chilli, deseeded and soaked in warm water for 5 minutes (add more if you like)
2 fresh red chillies, deseeded
1 1/2 inch fresh ginger, peeled, sliced
1 1/2 inch galangal [lengkuas in Malay], peeled, sliced
1 inch fresh turmeric root [kunyit basah in Malay], peeled, sliced
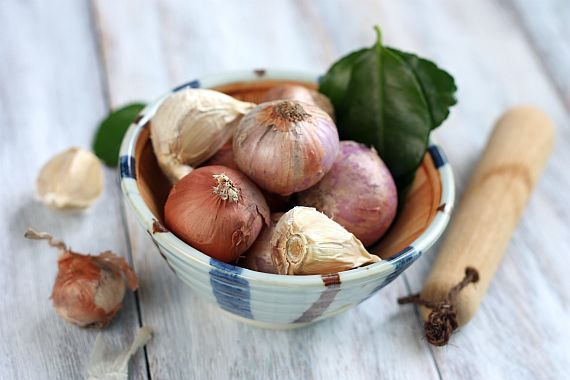
6 red shallots (or subsitute with 2 medium onions)
2 cloves garlic

Method:

1) Grind all the ingredients in a food processor and set aside.

2) Heat wok (or non-stick deep stewing pot) on high, stir-fry spice paste and cinnamon stick for about 4 - 5 mins until fragrant and the oil develops.

3) Add in the lemongrass and beef cubes. Stir for another 3 mins, then add in the coconut milk. Bring to a boil and then turn the fire to a simmer. Add in the tumeric leaf (or lime leaf/zest).

4) Then add in the tamarind juce and cook the beef in a slow simmer for 1 1/2 hours. (Add a little water if it starts to dry up too quickly].

5) Add the toasted coconut paste [kerisik] during the last 30 mins of cooking. Season to taste with salt and sugar.

9) When the beef is very tender - the gravy, thickens and oil starts to float on top - remove from heat and discard the lemongrass stalks and turmeric leaves

10) Serve Beef Rendang with steamed rice, Nasi Lemak [Coconut Rice] or Lontong, a Malay Rice Roll

Note: If you don't eat beef, you can substitute with mutton, lamb or chicken. For chicken, the cooking time should be about 45 mins to an hour. Mutton and lamb should be the same cooking time as beef.

rendang 3


rendang 5

Wednesday, August 3, 2011

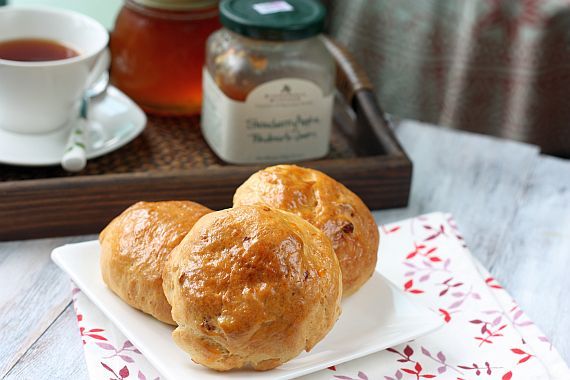
Cranberry Brioche Buns

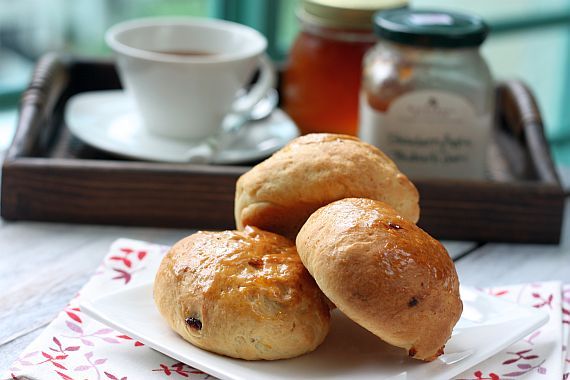
I was having a chat with some friends recently and comparing notes about the types of bread we would usually bake. Just from that one conversation it had inspired me to make some brioche over the weekend. I usually find home-made breads tend to toughen a bit the next day and because of this I would half the recipe so that I can experiment, especially if it is a new recipe, and don't end up having lots of leftovers.

A brioche seemed to fit perfectly into the scene of things and instead of making a loaf, I fashioned the dough into buns. I added dried cranberries as well as I love dried fruit in sweet breads. These buns make for great tea-time snacks or breakfast. Left overs can be frozen in the freezer or you could tear it up in pieces for a bread and butter pudding. Yummy that's all I can say.

cran brioche 1


cran brioche 4


Cranberry Brioche Buns

Ingredients:

230g bread flour
7g dried instant yeast
2 eggs
50ml of milk (warmed slightly)
20g sugar
1 tsp salt
140g unsalted butter, softened
Zest from one orange
1/2 cup firmly packed dried cranberries (or any other dried fruit)
1 tsp orange extract (or substitute with vanilla extract)
1 egg yolk diluted in a little water for brushing

Method:

1) Sprinkle the yeast in milk and leave to rest for 10 minutes.

2) Sift flour into your mixer bowl. Then add in the eggs, sugar, salt, orange oil, zest and milk/yeast mixture.

3) With the hook attachment, knead until it forms a homogeneous mixture (about 3 to 4 minutes)

4) Add the butter gradually, while beating, until completely incorporated into the batter. Then add in the cranberries.

5) Beat at medium speed for about 15 minutes or until dough is released from the walls of the cup. (Add a little bit more flour if required)

6) Grease a pan with butter and line with cling film or greaseproof paper.
Pour the batter into the pan, cover with cling film and let it rise for about an hour or until double in size.

7) Punch the dough down and reshape into buns. You may want to weight each small ball of dough to get a uniform size. Shape into small buns and place onto baking trays lined with parchment paper. Cover with cling film and leave to rise for another 40 mins.

8) Preheat the oven to 190C. Brush the buns with a little milk and then bake for about 15 minutes. Check for doness by tapping the bottom of the bun - it should sound hollow.

9) Remove from oven, cool slightly and then serve with jam, cream cheese or butter.

cran brioche 3


cran brioche 5

Saturday, July 30, 2011

Closure of a Chapter in Malaysian Railway History

On 1 July 2011, the Tanjong Pagar Railway Station was officially closed after being in operations for 79 years. This was a historical chapter in so far as Malaysian/Singapore railway operations was concerned.

The Tanjong Pagar Railway Station, located along Keppel Road, used to be the main passenger station for trains operated by the Malaysian rail operator Keretapi Tanah Melayu (KTM) Berhad travelling between Singapore and Malaysia. The Tanjong Pagar Railway Station was previously known as the Keppel Road Railway Station. Built between 1929 to 1932 by a French construction company, the Station sits on reclaimed land and was officially opened on 2 May 1932.

Over the last few weeks prior to the official closure of the Station and with so much publicity in the media, the Tanjong Pagar Railway Station drew a lot of public interest. Enthusiasts took pictures to preserve the memory of the station, while other visitors purchased KTM souvenirs or sought autographs from station staff. Train rides were also fully booked as many tried to get a seat on board the last few journeys out of the station.

train2-5


train2-1


train2-8


train1-6


train1-4


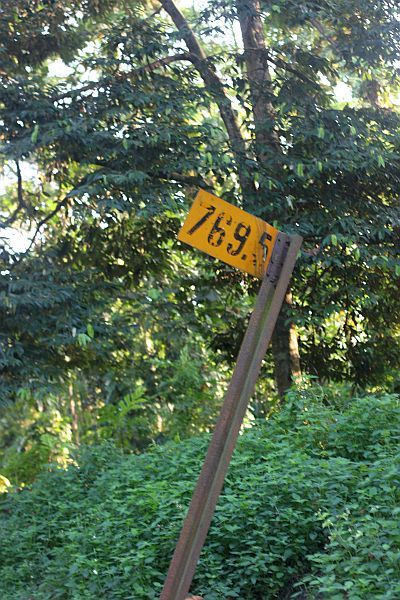
From 1 July to 17 July, the entire track line was opened to the public to explore. After that from 18 July to 31 July, only a 3km stretch remained accessible. During these weeks thousands of people took the opportunity to explore the tracks and there was even organized guided tours. I too joined the thousands to walk the tracks and managed to take some photographs as momentos of a by-gone era. As I write this post, parts of the tracks are already being dismantalled but there is hope that some sections of the tracks especially where the bridges are would be preserved as historical monuments. It would certainly be a shame to loose all of its history to development.

train2-2


train1-1


train1-2


train1-3


train1-5


train2-9


train2-6


train2-7


train2-3

Tuesday, July 26, 2011

Tiramisu Cake ... now that's Indulgence!

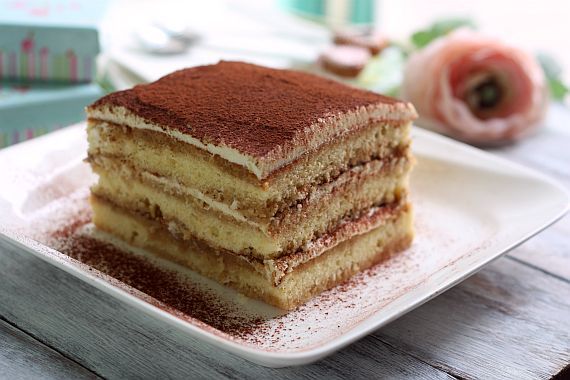
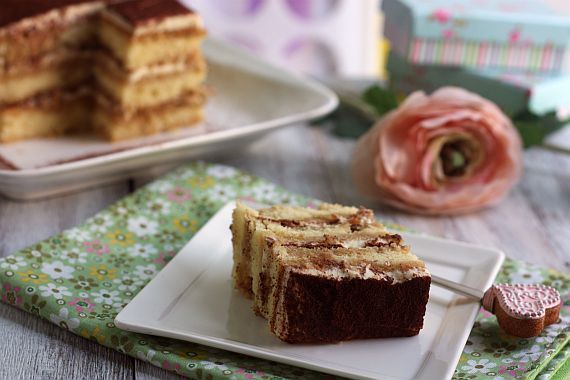
A friend of mine recently ordered a Tiramisu Cake from me and as I didn't have enough time to take pictures of it, I decided to make another one! I have made Tiramisu desserts before in the past but had used sponge fingers in the recipe. A cake version was totally new to me.

Come to think of it I had actually made the cake for an order without even tasting it for quality control checks. Wow! Anyway I did hear from my friend that the cake was scrumptious and everyone had second helpings ... in fact the 9" cake was not enough for the 8 persons it had been catered for.
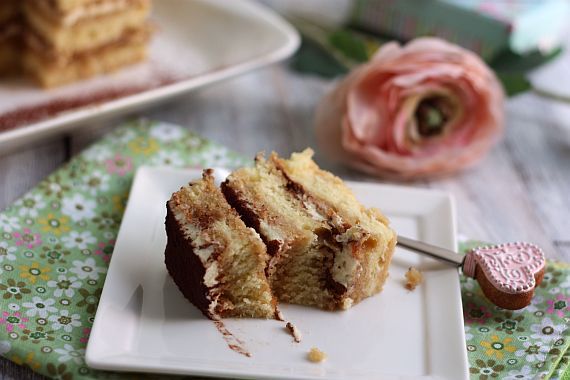
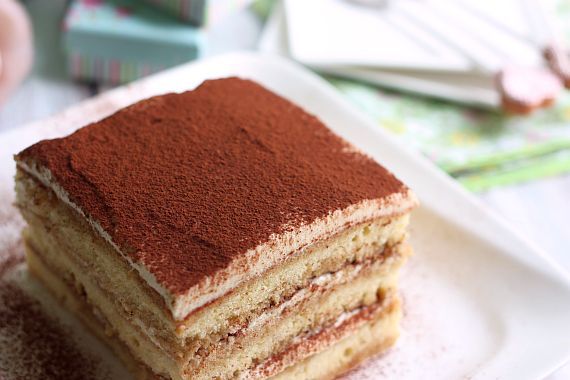
tiramisu cake 2


tiramisu cake 3


Tiramisu Cake
Recipe from "My Home to Yours by Dorie Greenspan"

Ingredients for the Cake:

2 cups cake flour
2 teaspoons baking powder
1/8 teaspoon baking soda
1/4 teaspoon salt
1 1/4 sticks (10 tablespoons) unsalted butter, room temperature
1 cup sugar
3 large eggs
1 large egg yolk
1 1/2 teaspoons pure vanilla extract
3/4 cup buttermilk

For the espresso extract:
2 tablespoons instant espresso powder
2 tablespoons boiling water

For the Espresso Syrup:
1/2 cup water
1/3 cup sugar
1 tablespoon amaretto, Kahlua, or brandy

For the filling and frosting:
1 8-ounce container mascarpone
1/2 cup confectioners’ sugar, sifted
1 1/2 teaspoons pure vanilla extract
1 tablespoon amaretto, Kahlua, or brandy
1 cup cold heavy cream
2 1/2 ounces bittersweet or semisweet chocolate, grated
Cocoa powder, for dusting

Method:

Center a rack in the oven and preheat the oven to 350 degrees F. Butter two 9×2 inch round cake pans, dust the insides with flour, tap out the excess, and line the bottoms of the pans with parchment or wax paper. Put the pans on a baking sheet.

To make the Cake:

1) Sift together the cake flour, baking powder, baking soda, and salt.

2) Working with a stand mixer, preferably fitted with a paddle attachment, or with a hand mixer in a large bowl, beat the butter on medium speed until soft and creamy. Add the sugar and beat for another 3 minutes. Add the eggs one by one, and then the yolk, beating for 1 minute after each addition. Beat in the vanilla; don’t be concerned if the mixture looks curdled. Reduce the mixer speed to low and add the dry ingredients alternately with the buttermilk, adding the dry ingredients in 3 additions and the milk in 2 (begin and end with the dry ingredients); scrape down the sides of the bowl as needed and mix only until the ingredients disappear into the batter. Divide the batter evenly between the two pans and smooth the tops with a rubber spatula.

3) Bake for 28 to 30 minutes, rotating the pans at the midway point. When fully baked, the cakes will be golden and springy to the touch and a thin knife inserted into the centers will come out clean. Transfer the cakes to a rack and cool for about 5 minutes, then run a knife around the sides of the cakes, unmold them, and peel off the paper liners. Invert and cool to room temperature right-side up.

To make the extract:

Stir the espresso powder and boiling water together in a small cup until blended. Set aside.

To make the syrup:

Stir the water and sugar together in a small saucepan and bring just to a boil. Pour the syrup into a small heatproof bowl and stir in 1 tablespoon of the espresso extract and the liqueur or brandy; set aside.

To make the Filling and Frosting:

1) Put the mascarpone, sugar, vanilla, and liqueur in a large bowl and whisk just until blended and smooth.

2) Working with the stand mixer with the whisk attachment or with a hand mixer, whip the heavy cream until it holds firm peaks. Switch to a rubber spatula and stir about one quarter of the whipped cream into the mascarpone. Fold in the rest of the whipped cream with a light touch.

To assemble the Cake:

1) If the tops of the cake layers have crowned, use a long serrated knife and a gentle sawing motion to even them. Place one layer right-side up on a cardboard round or a cake plate protected with strips of wax or parchment paper. Using a pastry brush or a small spoon, soak the layer with about one third of the espresso syrup. Smooth some of the mascarpone cream over the layer – user about 1 1/4 cups – and gently press the grated chocolate into the filling. Put the second cake layer on the counter and soak the top of it with half the remaining espresso syrup, then turn the layer over and position it, soaked side down, over the filling. Soak the top of the cake with the remaining syrup.

2) For the frosting, whisk 1 to 1 1/2 tablespoons of the remaining espresso extract into the remaining mascarpone filling. Taste the frosting as you go to decide how much extract you want to add. If the frosting looks as if it might be a little too soft to spread over the cake, press a piece of plastic wrap against its surface and refrigerate it for 15 minutes or so. Refrigerate the cake too.

3) With a long metal icing spatula, smooth the frosting around the sides of the cake and over the top. If you want to decorate the cake with chocolate-covered espresso beans, press them into the filling, making concentric circles of beans or just putting some beans in the center of the cake.

4) Refrigerate the cake for at least 3 hours (or for up to 1 day) before serving – the elements need time to meld.

5) Just before serving, dust the top of the cake with cocoa.
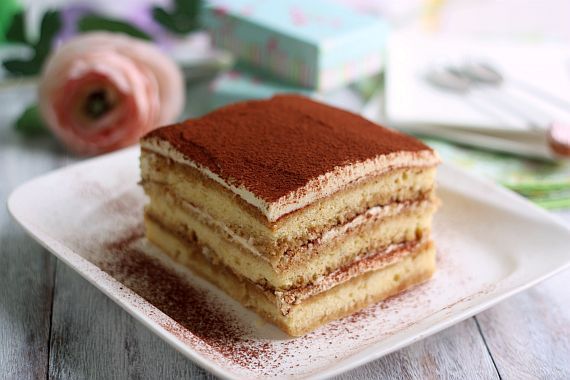
tiramisu cake 1


tiramisu cake 4


tiramisu cake 5
Related Posts with Thumbnails