Thursday, May 23, 2013

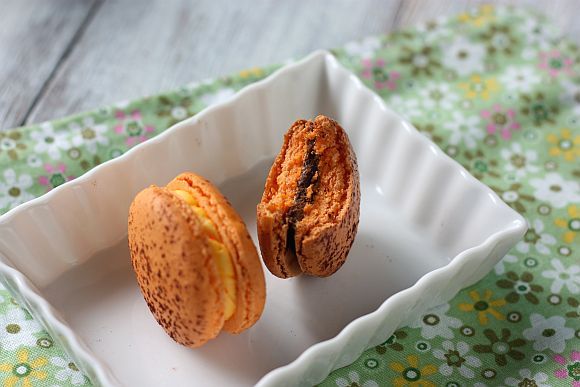
Yuzu Macarons with Orange Buttercream and Chocolate Ganache

It has been a while since I had made macarons and in fact this is not even a recent baking adventure.  I had made this early this year but had not managed to put up the post until now.  These are yuzu macarons and the flavours were really refreshing.

yuzu mac 2 photo yuzumac2.jpg


yuzu mac 4 photo yuzumac4.jpg

Yuzu Macarons with Orange Buttercream
and Chocolate Ganache
Makes about 30 filled macarons
Macaron Template

For the Macaron Batter

Ingredients:

98g almond powder or almond meal
98g icing sugar
67g egg whites (aged 2 - 3 days in the refrigerator)
50g caster sugar
1/2 tsp cream of tartar
1 1/2 tsp egg white powder (dehydrated egg white)
1/2 tsp dried yuzu fruit powder
Food colouring

Method:

1) Combine the icing sugar, yuzu powder and almond flour in a food processor. Pulse until fine and powdery.

2) Remove and then sift into a dry bowl. Set aside.

3) Add the egg white powder to the caster sugar and stir with a spoon until mixed through.

4) Place egg whites into another clean bowl. Beat with mixer on medium. until frothy. Then add in the cream of tartar and beat until it is mixed - about one minute. Then slowly add in the sugar with egg white powder. Switch to high and continue beating until medium peaks.

5) Then add in the food colouring and continue to beat until stiff peaks.

6) Add 1/3 of the almond flour mixture into the meringue and fold to combine. Then add in the rest. Don’t overfold, but fully incorporate your ingredients. Spoon the mixture into a pastry bag fitted with a plain half-inch tip, pipe 1.5 cm rounds onto baking sheets lined with parchment paper.

7) Once you have finishing piping all the macarons lift each baking sheet with both hands and then bang it down on the counter (you need to get the air out of the batter).

8) Rest the macarons for an hour to develop a skin on the surface.

9) Preheat oven to 150°C. Bake for about 15 minutes (baking time can be varied, from 12-15 depending on your oven) or until firm to the touch. Mid way through baking, rotate the pans.

10) Remove from oven and cool on trays. Slide a knife under each macaroon to release from paper. Store in an airtight container for up to 1 week or until ready to assemble. Once assembled put the macarons into the refrigerator. Best eaten a day later so that the flavours will develop.

Chocolate Ganache:

3/4 cup heavy cream
1 cup bittersweet chocolate (65%)

In a heavy saucepan set over medium heat, bring the heavy cream to a boil. Remove from the stove and add the chocolate to it. Let stand 2 minutes and then stir until fully combined. Let cool in the fridge until firm enough to put in a small piping bag.

Orange Buttercream:

1 cup (2 sticks) unsalted butter, softened
3 cups powdered sugar
1 tsp orange extract
1-2 tbsp milk, if necessary
Pinch of salt
1-2 drops of orange food gel

In a large bowl, cream together butter, salt and powdered sugar. Add orange extract. Stir in milk, one tablespoon at a time, until desired consistency is reached. Stir in orange food gel. Put in the fridge to set slightly before putting into a small piping bag.


yuzu mac 4 photo yuzumac4.jpg


yuzumac3 photo yuzumac3.jpg

Wednesday, May 8, 2013

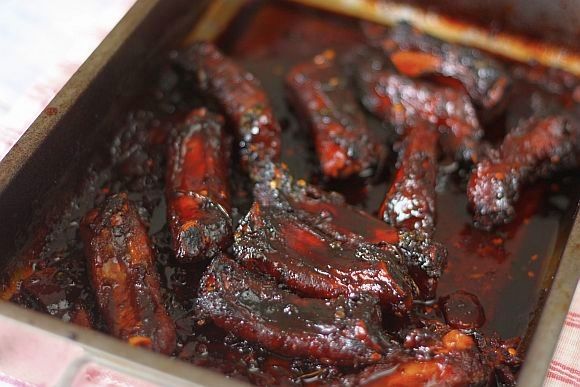
Ultimate Sticky Pork Ribs

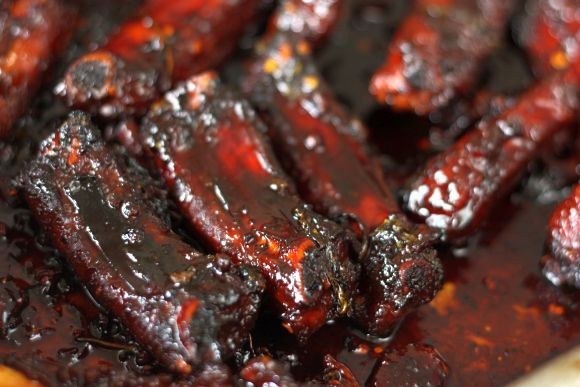
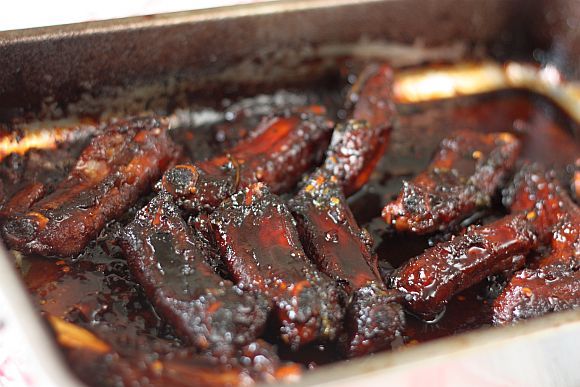
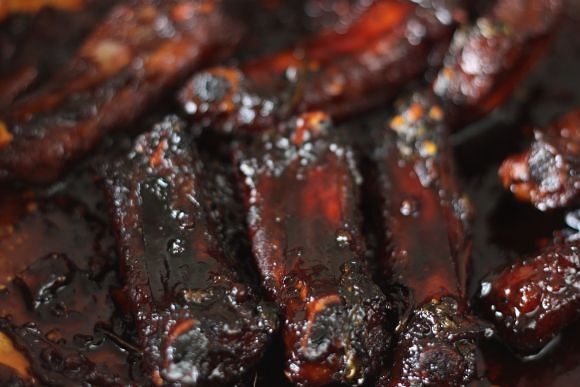
The secret to this dish is to get the ribs really well caramelised before you add any of the other ingredients. As they braise in the oven, all that colour will turn into the most amazing flavour. The glaze is packed full of vibrant, citrusy flavours, with the sweetness of the honey counteracting the spices.  It is the ultimate sticky ribs for me! 


 photo Ramsayribs2_zpsc995f836.jpg


 photo Ramsayribs4_zpsd5116e24.jpg


Sticky Pork Ribs
Recipe Adapted from "Gordon Ramsay" Ultimate Cookery Course"
Serves 6 - 8

Ingredients:

2kg pork ribs, separated
sea salt and freshly ground pepper, to taste
vegetable oil, for frying
6-8 garlic cloves, peeled and sliced
10cm piece ginger, peeled and sliced
2-4 tsp dried chilli flakes, to taste
8 whole star anise
2 tsp Sichuan peppercorns
8 tbsp honey
280ml light soy sauce
4-5 tbsp rice vinegar
600ml Shaoxing rice wine or medium-dry sherry
10 spring onions, trimmed and sliced
800ml chicken stock

Method:

1) Preheat oven to 180°C.

2) Season the ribs with salt and pepper, pushing the seasoning into the meat.

3) Heat a roasting tray on the stove top with a little olive oil and brown the ribs for 5-10 minutes until they are coloured on all sides. Add the garlic, ginger, chilli flakes, star anise, Sichuan peppercorns and honey and continue to cook over the heat for 2 minutes until the honey begins to caramelise.

4) Add the soy sauce, rice vinegar and Shaoxing wine and bring to the boil, simmering for 1 minute.

5) Taste and adjust the flavours, adding a little extra vinegar if necessary. Add the spring onions and stock and bring to the boil.

6) Place in the preheated oven and cook for 1 hour until tender, turning the ribs halfway through the cooking time.

7) Remove the pan from the oven and place back on the stove top. Heat the marinade and reduce for 8-10 minutes until the sauce is thick and syrupy. Turn the ribs in the sauce to coat them well, then serve.

 photo Ramsayribs1_zps9fcf2766.jpg


 photo Ramsayribs3_zpsa4096915.jpg

Wednesday, April 24, 2013

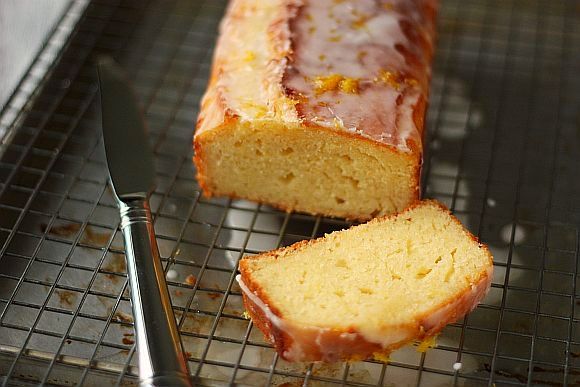
Lemon Yogurt Cake

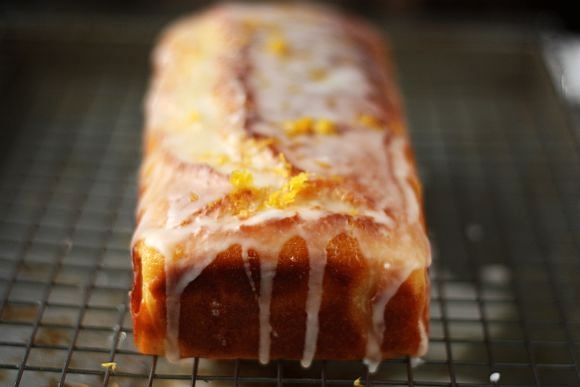
I recently bought some cook books from The Book Depository and one of them was Ina Garten's "Barefoot Contessa at Home".  In it was this absolutely delicious looking lemon cake which I had to try over the weekend.

I am so totally for any desserts which has lemon in it ... all that citrus makes me feel less guilty if I have more than one!  If you have not tried this recipe as yet, I so encourage you to do so.  It cannot be any easier - two bowls and you are done - forgot about even taking out your handmixer.

Lemon yoghurt 2 photo lemonyoghurt2_zpsdcc388a4.jpg

Lemon yoghurt 1 photo lemonyoghurt1_zps1d10ffd2.jpg


Lemon Yogurt Cake
Recipe Adapted from "Barefoot Contessa at Home"
Yields One Loaf

Ingredients:

1 1/2 cups all-purpose flour
2 teaspoons baking powder
1/2 teaspoon salt
1 cup low-fat plain whole-milk yogurt
3/4 cup + 1/3 cups sugar, separated
3 extra-large eggs
2 teaspoons grated lemon zest (2 lemons)
1/2 teaspoon pure vanilla extract
1/2 cup vegetable oil
1/3 cup freshly squeezed lemon juice

For the glaze:

1 cup confectioners' sugar
2 tablespoons freshly squeezed lemon juice

Method:

1) Preheat the oven to 350 degrees F. Grease an 8 1/2 by 4 1/4 by 2 1/2-inch loaf pan. Line the bottom with parchment paper. Grease and flour the pan.

2) Sift together the flour, baking powder, and salt into 1 bowl.

3) In another bowl, whisk together the yogurt, 3/4 cup sugar, the eggs, lemon zest, vegetable oil and vanilla.

4) Slowly whisk the dry ingredients into the wet ingredients. Make sure all ingredients are incorporated - however do not over-mix.

5) Pour the batter into the prepared pan and bake for about 40 - 50 minutes, or until a cake tester placed in the center of the loaf comes out clean.

6) Meanwhile, cook the 1/3 cup lemon juice and remaining 1/3 cup sugar in a small pan until the sugar dissolves and the mixture is clear. Set aside.

7) When the cake is done, allow it to cool in the pan for 10 minutes. Carefully place on a baking rack over a sheet pan. While the cake is still warm, pour the lemon-sugar mixture over the cake and allow it to soak in. Cool.

8) For the glaze, combine the confectioners' sugar and lemon juice and pour over the cake.


Lemon yoghurt 4 photo lemonyoghurt4_zps08cacb8c.jpg


Lemon yoghurt 3 photo lemonyoghurt3_zps2a62794f.jpg

Wednesday, March 20, 2013

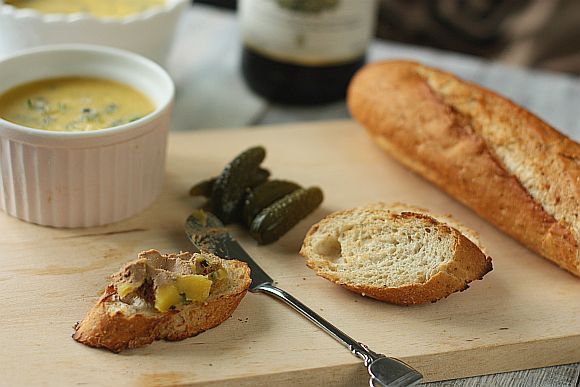
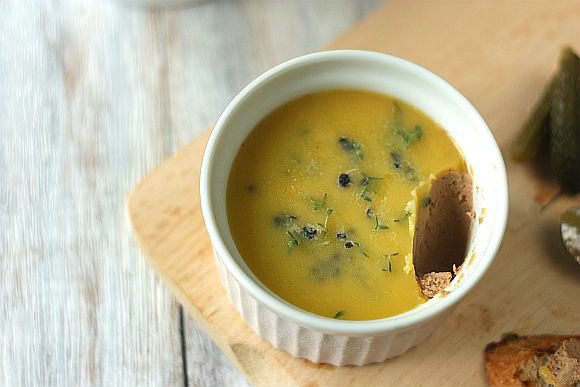
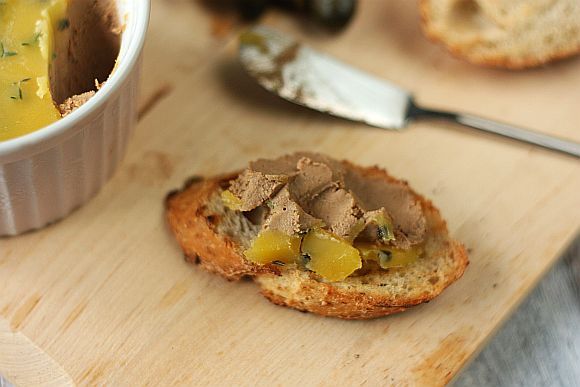
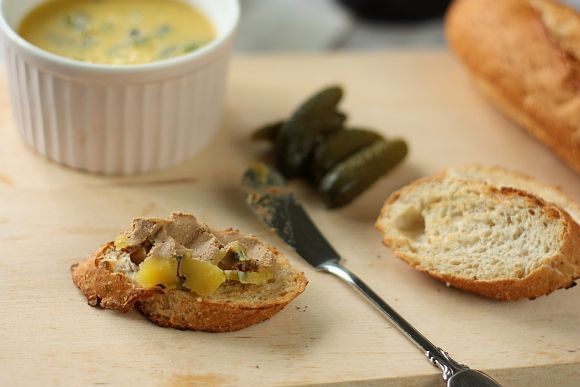
Duck Liver & Thyme Pâté

This is my very first pâté and I used duck livers instead of chicken.  It's probably not a dish for you if you don't like eating livers of any kind. 

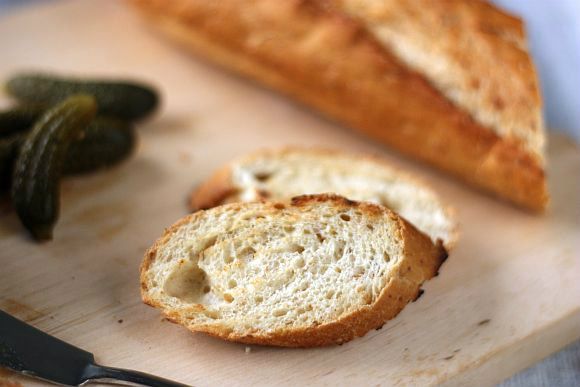
Chicken and duck livers are really inexpensive and this makes an impressive starter for a western sit down dinner.  Serve this with baguette or melba toast with a sides of cornichons. 

Duck liver 1 photo Duckliver1.jpg


Duckliver3 photo Duckliver3.jpg


Duckliver5 photo Duckliver5.jpg


Duck Liver & Thyme Pâté
Recipe Adapted from Antony Worrall Thompson "Saturday Night Kitchen"
Serves 6

Ingredients:

175g/6oz unsalted butter, softened
450g/1lb duck livers, trimmed and cleaned
2 shallots, finely chopped
2 cloves garlic, finely chopped
½ tsp freshly ground black pepper
2 tbsp brandy or port 
55g/2oz clarified butter, melted
1 tsp of fresh thyme leaves

Method:

1)  Heat 15g/½oz of the butter in a frying pan until foaming.

2) Add half the livers and fry quickly on all sides until golden, but still pink in the middle, about 4-5 minutes.

3) Repeat with a second batch of butter and livers.

4) Place the livers and juices in a food processor.

5) In the same pan heat another 15g/½oz butter, add the shallot, garlic and cook over a moderate heat until the shallot is soft but not coloured.

6)  Add the brandy and freshly ground black pepper, and scrape the bottom of the pan to release any coagulated juices.

7)  Place everything in the food processor, including the remaining unsalted butter. Blend until smooth.

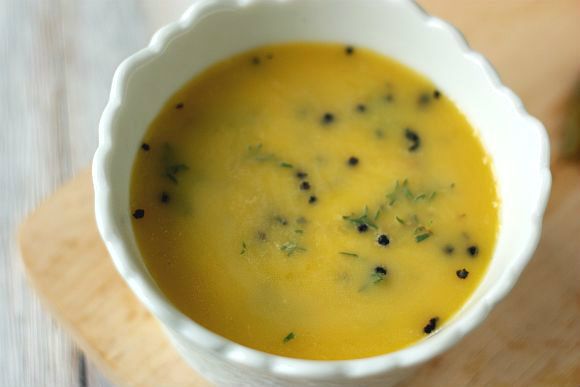
8)  Pass the mixture through a fine sieve and put in a ramekin. Pour the clarified butter over the mixture, give another sprinkle of freshly ground black pepper and top with thyme.  Cover with the cling film, cool then refrigerate.

9) To server, stand in room temperature for about 15 minutes.  Serve with crusty toasted baguette and cornichons.


Duck liver 4 photo Duckliver4.jpg


Duck liver 2 photo Duckliver2.jpg


Duckliver6 photo Duckliver6.jpg

Sunday, February 24, 2013

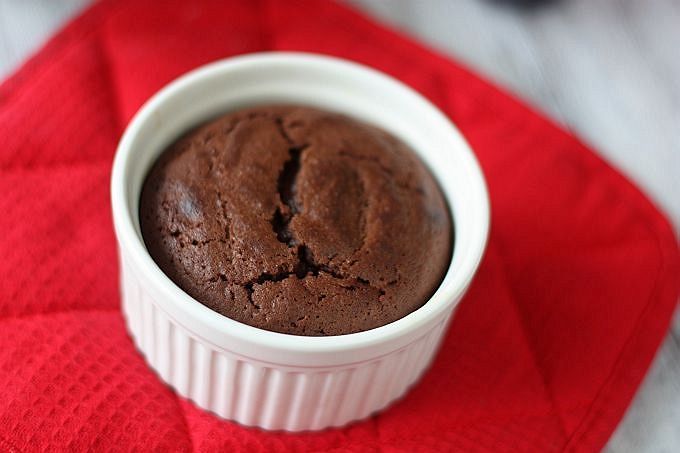
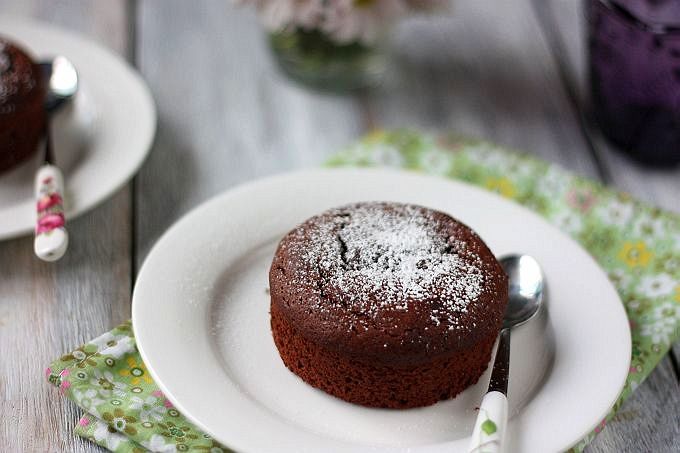
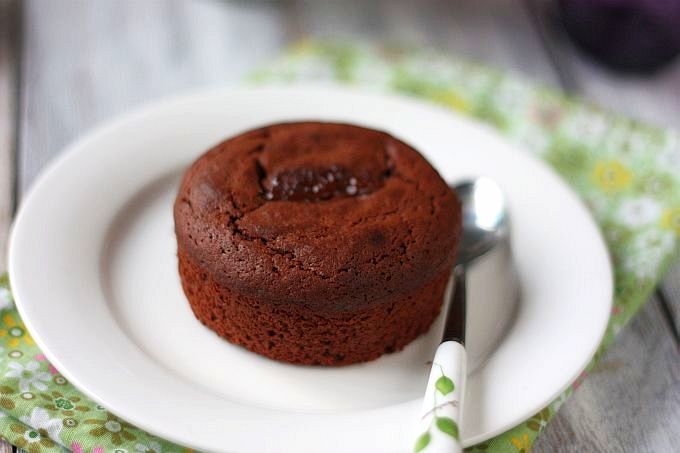
Lava Chocolate Cake

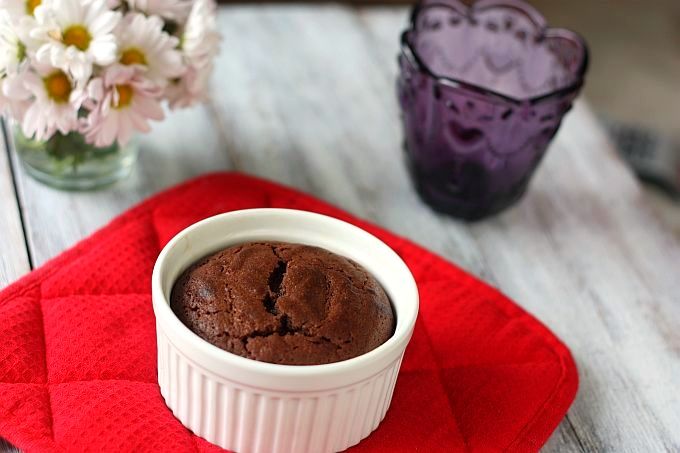
I love lava chocolate cakes as it makes such an elegant dessert to round off a good meal.  I had always thought it was a difficult dessert to make but after making it once (and dare I say that it was successful), I realized that it is actually very easy.  The first lava cake I had tried a couple of years back came from Martha Stewart's Living recipes.  It was delicious!

lava 1 photo lavacake1_zpsd65cbe2a.jpg

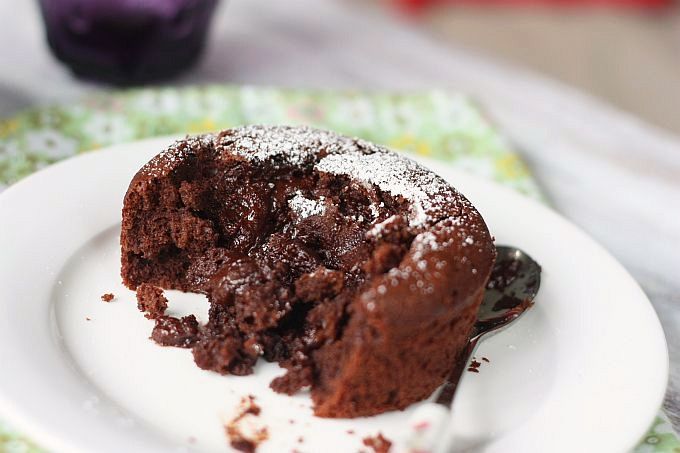
This is the second time I am making a lava cake again and this too doesn't have many ingredients to content with and the preparation and baking time is really "singe".  The main thing to remember is to use good quality chocolate and don't over bake it - you want the chocolate to be oozing out!

lava 5 photo lavacake5_zps0b563944.jpg


lava 2 photo lavacake2_zps21947889.jpg


Lava Chocolate Cake
Recipe Adapted from Delia Smith
Serves 4

Ingredients:

115g good quality dark chocolate (about 65 - 70% cacao)
115g salted butter
1 tsp of coffee extract or Tbsp of instant coffee granules
2 whole eggs
2 egg yolks
60g caster sugar
30g all purpose flour, sifted

Method:

1) Preheat oven to 200°C. Grease and butter 4 x 125ml ramekins.

2)  In a heavy based pan over low heat, melt the chocolate, butter and coffee extract until melted. Stir to a glossy batter. Set aside to cool for 5 minutes. (You can also use a baine-marine to melt the chocolate and butter)

3) In another mixing bowl, beat eggs, egg yolks and sugar with an electric mixer for at least 5 minutes or until pale, thick and leaves ribbons trails.

4) Add chocolate and sprinkle the flour into the egg mixture and gently fold until just combined. (You can also use a whisk.) Be careful not to knock too much air out of the batter.

5) Divide batter amongst ramekins and place on a baking tray. Fondants can be covered with clingwrap and stored in the fridge or freezer at this stage. Bake for 12 minutes or until the tops have risen and have set (but still soft underneath). If baking straight from the fridge, bake for about 13 minutes. If frozen, bake for 14 minutes.

6) Remove fondants from the oven and leave to sit for about a minute.  Run a palette knife around the edges and turn out onto a plate. If baked from frozen, rest for 2 minutes before unmolding.

7) To serve dust with icing/powder sugar.  Serve warm and if you want add a dollop of good vanilla ice-cream.


lava 4 photo lavacake4_zps66289bda.jpg


lava 3 photo lavacake3_zps4f1f9790.jpg


lava 6 photo lavacake6_zps13ad5a11.jpg

Thursday, January 17, 2013

Vote for Ringo ..... "Star Pooch of the Month"

Yeah!!  And thanks if you have voted.  Ringo has been picked TOP 6 and has advanced to the final rounds of voting.  If you have not voted, please do and if you had voted earlier, please do vote one more time.  Votes are now counted from zero again ...... closing date is 27 January.   Keeping my fingers crossed! 

******************************************************************************

I recently entered Ringo, my Boston Terrier into a competition which is meant for three different dog breeds - Botson Terriers, French Bulldogs and Pugs. 

The top two pooches with the most number of votes will receive a spa treatment and a make-over.    There are 2 rounds of competition and the first six pooches with the most number of votes will advanced to the second round. 

So as a "mummy" and with all parents, you would want your child to win!  In my case, the "child" happens to be a 4-legged furkid.  So I am reaching out through my blog to ask that you Vote for Ringo - "Star Pooch of the Month" .

You would need to LIKE the Facebook page first before you can vote.  Only one vote per person is allowed - and here is a sneak of Ringo's picture.   Isn't he adorable?  He is a very sweet doggie and I adopted him in April 2012.  He is 7 and half years old and loves ... absolutely loves to play fetch.  He is very good at it too.  I think in his order of life it would be food, ball, sleep!

Please do vote for Ringo as he whispered to me last night that he "oooh so want to have a spa treatment".

Ringo2

Friday, January 11, 2013

Zinio Give Away Results

If you had participated in the recent ZINIO GIVE AWAY, you must be anxiously waiting for the results.  Well, wait no longer!

Ten lucky winners have been picked using Random.Org and they are, in no particular order:

*  Cathy of Cathy's Joy
* Jasmine of The Sweetylicious
* ykristen
* Ann of Anncoo Journal
* Lubna of Kitchen Flavours
* Esther (wikilOv@gmail.com)
* Jesslyn
* Sinsationscakes
* Janine
* Kim Reid

Kindly drop me an email at jos2829@yahoo.com.sg with your email address and also confirming the choice of your subscription.  Please do so within the next 48 hours.  Your contact details will then be forwarded directly to Zinio to commence your subscription.

Happy reading and have a great weekend ahead!


Doc 1
Related Posts with Thumbnails