Friday, March 11, 2011

Lemon Sugar Cookies

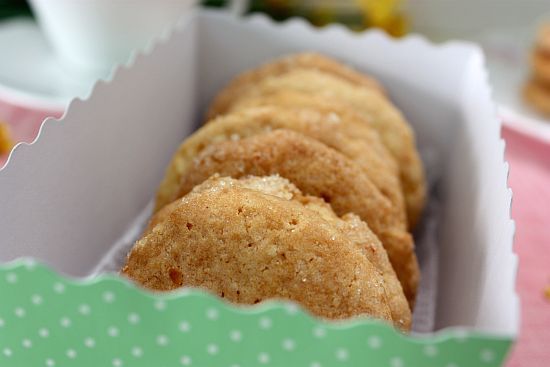
I really do like baking with lemons as it gives such refreshing flavours to baked goodies. So when I stumbled upon this lemon cookie recipe, I simply could not resist and as I've not used lemon in a cookie dough before, the idea was even more tempting. Every so often I'm bugged at work as to why I have not been bringing any goodies to work lately. So a batch of these would definitely work at keeping those "hungry palates at bay"! I must say thought that the cookies turned out great! Extremely light and with a freshing lemon zest flavour.

I made the full recipe posted here and packed them into two separate jars. One to be taken to office and a smaller one to be given to a friend whose birthday had just passed early this week. On the day I brought the lemon cookies to work, I distributed a few around. I guess the cookies must have been really delicious because the cookie jar seemed to have missed a few more lemon cookies the very next morning when I got into the office. A "big rat" and a two-legged one at that must have snucked in and ran off with a few cookies!


lemon cookie 4


lemon cookie 3


Lemon Sugar Cookies
Recipe Adapted from "Taste of Home"
Yields between 36 - 40 cookies


Ingredients:

1 3/4 cups white castor sugar
Zest of 2 large lemons
226g unsalted butter, softened
2 large eggs, at room temperature
2 tsp lemon extract
1 1/2 Tbsp lemon juice
2 3/4 cups all-purpose flour
1/4 tsp salt
2 tsp cream of tartar
1 tsp baking soda

Method:

1) For the lemon sugar: Combine 1/3 cup sugar with 1 tsp lemon zest in a bowl. Use your fingers to rub the zest into the sugar and break up any clumps. Set aside.

2) For the cookie dough: Sieve flour, salt, cream of tartar and baking soda in a medium bowl. Use a whisk to mix and set aside.

3) In a large mixing bowl, cream butter with remaining sugar. until light and fluffy. Add in the eggs, one at a time and beat until well incorporated.. Add lemon extract, lemon juice and reserved lemon zest. Add flour mixture, one cup at a time, blending well after each addition, until all flour is incorporated. Refrigerate dough for at least 1 hour.

4) Preheat oven to 180C. Shape dough into balls about 1 1/2 Tbsp in size for eadh cookie. (I used a small ice-cream scoop to do this). Roll the dough in the lemon sugar and place onto lined baking sheets about 3" apart. Flatten the dough to about 1/4" and for 12-14 minutes. The cookie will be slightly soft in the center. if you want a crispier cooker, bake another minute longer but watch out in case it gets too brown.

5) Let cookie sit on tray for 5 minutes before transferring to cooling rack.


lemon cookie 1


lemon cookie 2

Monday, March 7, 2011

Asparagus and Sundried Tomato Tart

I love making tarts because I can split the process into two stages, which is what I usually do. I would make the tart shell mid week after work and throw the unbaked shell into my freezer. I would sometimes even forget that I even had the shell in the freezer. Those are the days when weekend becomes a real treat. I usually try to work with smaller shells as it is so much easier to put together and I often cut the recipes into half. In that way I could whip up a variety of tart flavours from one batch of dough.

I have tried a variety of doughs but I often tend to stick to two particular recipes which I find is most suited for sweet tarts and savoury tarts. This particular Pate Brisee recipe is one of them, absolutely flaky and buttery, and most suited for all sorts of savoury tarts.

Asparagus tart 1


asparagus tart 4


Asparagus and Sundried Tomato Tart Recipe adapted from "Savory & Sweet" by Michel Roux

Ingredients:

350g Pate Brisee
48 medium asparagus spears
Salt and Fresh ground pepper
5 sundried tomato, thinly sliced
1 medium egg
2 medium egg yolks
200ml heavy cream
Pinch of freshly grated nutmeg
1/4 tsp mixed dried herbs

Method:

1) Roll out the dough to 1/4" thickness and line a loose bottom rectangular tart pan measuring 14" x 4.5" x 1" deep. Chill for about 30 minutes.

2) Preheat oven to 190C. Prink the base of the tart shell and bake blind for about 20 minutes. Lower oven setting to 170C. Remove the beans and paper and return the tart to the oven for 10 minutes. Remove from oven and set aside.

3) Cook the asparagus in boiling salt water until just tender. Drain and refresh in cold water, and pat dry. Trim the asparagus to the width of the pan.

4) Slice the sundried tomatoes, do not use the oil. Line the tomatoes on the bottom of tart shell.

5) Mix the whole egg, egg yolks and cream together in a bowl with a whisk. Add in the mixed herb, nutmeg and season with salt and pepper. Pour two thirds of the egg mixture in the tart pan.

6) Lay the asparagus over the sundried tomatoes. Carefully spoon the remaining egg mixture over the asparagus. Immediately bake the tart for 30 minutes. Slide the tart onto a wire rack and leave to cool for 20 minutes before unmoulding.

asparagus tart 2


asparagus tart 3

Wednesday, March 2, 2011

Marble Molasses Pound Cake and a Little Nap Time ....

This fondant cake design comes from my limited collection of children's fondant books, one of which is by Debbie Brown's "50 Easy Party Cakes". I have not done fondant cakes for a long while now and decided that I had better get at it before I loose my touch. It also gave me a chance to use my bowl shape cake pan which I had bought more than a year ago. I guess I'm the type who buys things and uses only half of them.

I wasn't sure what type of cake to make as its base but something simple would do most nicely. I had struggled between a chocolate cake or a marble cake and finally decided on trying out a new recipe which was a molasses marble cake. It's pretty close to a marble cake except it uses molasses and has the hint of spices, like a Christmas fruit cake. I must say that it is a really, really delicious cake and moist as well, especially since it's a pound cake. Definitely a recipe to used again in the future! As I could not cut the cake to show a cross section of it, I decided to take a picture of it directly from "Southern Cakes" book.

Molasses cake


crib cake 3


Marble Molasses Pound Cake
Recipe Adapted from "Southern Cakes"

Ingredients:

2 cups shifted plain flour
2 tsp baking powder
1/4 tsp salt
113g unsalted butter, softened
2/3 cup sugar (reduced from original recipe)
2 eggs
2/3 low fat milk (you can use regular milk)
3 Tbsp molasses or pure cane syrup
1 tsp ground cinnamon
1/2 tsp ground nutmeg
1/2 tsp ground cloves

Method:

1) Preheat oven to 180C. Grease a 9" by 5" loaf pan and line the bottom with parchment paper. The lightly flour the pan, shaking off the excess.

2) Combine flour, baking powder and salt into a flour. Use a whisk or fork to mix well.

3) in a large bowl, beat butter on high until light and fluffy. Add sugar and beat for a minute. Then add both eggs into the mixture and continue beating for another 1 or 2 minutes. In-between scrap down the bowl.

4) Add about a 1/3 of flour mixture and beat on low. Stop mixer and add in half the milk and beat to mix. Alternate with the rest of the flour and milk.

5) Scoop out 1/3 of the cake batter into a clean bowl and add in the molasses and spices. Stir to mix well.

6) Spoon each batter into the pan, alternating between the plain and spiced batters. Run a table knife through the batter in a figure eight pattern to swirl the batters together.

7) Bake for about an hour, until the cake is golden brown and springs back when touched lightly in the center, and until an inserted skewer comes out clean. Cool for about 10 minutes in its pan before unmoulding. To loosen cake from pan, run a table knife along the sides. Cool completely, top side up before serving.

crib cake 2


crib cake 1

Saturday, February 26, 2011

Yam Som-O (Spicy Pomelo Salad)

I was pleasantly surprised when I was checking my personal emails one evening to receive an invitation from Jasmine to attend a Food Bloggers tea-party. I did not know who Jasmine was but did know a couple of bloggers on the invitation list, namely Edith and Zhuoyuan . The tea-party would be hosted at Edith's house. This would not be the first time Edith would be hosting a food bloggers gathering. A year and half ago, she had hosted our first gathering and it was a tremendous success. Again Edith has so kindly opened her beautiful home to all of us.

Photobucket


Blog 4 1


As usual whenever food bloggers get together there would be a huge assortment of treats. This time round was no exception and the menu consisted mainly of desserts with a couple of savoury items thrown in. Almost everyone brought two types of desserts and we ended up with a huge feast. We had cupcakes, brownies, lemon bars, durian swiss roll, durian chiffon cake, cheesecakes, meat balls, macarons and more. Check out the below blogs of my "old" and new blogger friends, each and every one so very talented as well.

Edith of Precious Moments
Wendy of Wen's Delight
Cathy of Cathy's Joy
Jean of Noms I Must
Jess of J3ss Kitch3n
Jasmine of The Sweetylicious
Zhuoyuan of Baking Library

I decided to bring something savoury instead. And as I didn't have much time over the week, I made a Thai pomelo salad instead.

pomelo salad 2


Yam Som-O (Spicy Pomelo Salad)
Serves 6

Ingredients:

1 medium sized pomelo or 2 grapefruits
2 Tbsp lime juice
1 Tbsp fish sauce
1 Tbsp sugar
150g cooked prawns, sliced half lengthwise
200gm cooked chicken breast, shredded
2 Tbsp dessicated coconut
1/2 cup coconut cream
1 Tbsp dried shrimp, toasted and finely chopped
1 Tbsp toasted sesame seeds
Handful of mint leaves

Method:

1) Peel pomelo and shread the flesh. Leave as chunky pieces.

2) Place lime juice, fish sauce and sugar in a bowl and stir to mix until sugar has dissolved.

3) Then add in the prawns, chicken, dessicated coconut and coconut cream. Toss to coat the pomelo. Add in the mint leaves and transfer to serving platter. Sprinkle the top with dried shrimp and toasted sesame seeds and a few mint leaves.

4) Serve immediately as this salad does not keep over night.

Pomelo salad 1


pomelo salad 2

Sunday, February 20, 2011

Cheesecake Chocolate Brownie

I have not baked for a long while now and was in the mood to do so after coming home from work. I wanted to make something that was quick and didn't take too long in the kitchen. Something which didn't require creaming and one of the recipes which fall into this category would have been a brownie. However I wanted something different, not the usual chocolate brownie and decided to try my hand at a cheesecake brownie. I love the swirl look of this dessert, coupled with the fact that it is intensely chocolatey, not forgetting you have the cheese element thrown in as well.

This recipe comes from "Ready for Dessert" by David Lebowitz, one of my recent acquisitions to my baking library books. You can serve this brownie with a scoop of vanilla ice-cream or just eat it on its own. Great with a cuppa coffee that's for sure! As usual my office colleagues benefited from my baking evening and they gave the thumbs up for this brownie.

Photobucket


Cheesecake Chocolate Brownies
One 9-inch (23cm) or 8-inch (20cm) square pan
Adapted from "Ready for Dessert by David Lebowitz"


Ingredients:

85g unsalted butter, cut into pieces
110g bittersweet chocolate chips
110g sugar (reduced from original recipe)
2 large eggs, at room temperature
70g plain flour
1 Tbsp unsweetened cocoa powder
1/8 tsp salt
1 tsp vanilla extract
1/2 cup Valhora chocolate pearls, for sprinkling
1/4 cup roughly chopped pecans

For the cheesecake topping:

200g cream cheese, at room temperature
1 large egg yolk
60g sugar (reduced from original recipe)
1/8 tsp vanilla extract

Method:

1) Line a 9-inch (23cm) or 8-inch (20cm), for a higher brownie square pan with foil, making sure it goes up all four sides. Use two sheets if necessary. Mist with non-stick spray or grease lightly.

2) Preheat oven to 350 degrees (180C).

3) In a medium saucepan, melt the butter and chocolate over low heat, stirring until smooth. Remove from heat and beat in the sugar, then the eggs.

4) Mix in the flour, cocoa powder and salt, then the vanilla and pecans. Spread evenly in the prepared pan.

5) In a separate bowl, beat together the cream cheese, the yolk, 5 tablespoons (75g) of sugar, and vanilla until smooth.

6) Distribute the cream cheese mixture in eight dollops across the top of the brownie mixture, then take a dull knife or spatula and swirl the cream cheese mixture with the chocolate batter. Sprinkle the top with the chocolate pearls.

7) Bake for 35 to 40 minutes, or until the batter in the center of the pan feels just set.

8) Let cool, then lift out the foil and peel it away. Cut the brownies into squares.

Storage: These will keep in an airtight container for a couple of days. They also freeze well, too.

Photobucket

Friday, February 11, 2011

Vietnamese Spring Rolls (Cha Gio)

I guess if you happen to venture to a Vietnamese restaurant for a meal you would definitely order their fresh Vietnamese rolls. The fried version of this is called Cha Gio which does resemble the Chinese fried spring rolls. Cha gio comes in many different sizes and can be made with spring roll wrappers or rice paper. Traditionally, rice paper is used in Vietnam to make this rolls and you would likely find the filling to be made from pork, shrimps and crab meat. This is a really simple dish to make and makes for a delicious tea-time snack or an appertizer to a main meal.

Viet FSR1


Vietnamese Spring Rolls (Cha Gio)
Serves 4 - 5

Ingredients:

200g minced pork
150g medium prawns, de-shelled/deveined and minced
1/2 cup shredded carrots
50g mung bean noodles/cellophane noodles/glass noodles – soaked in hot water for 30 minutes or until they turn very soft, cut into 3" length
2 cloves garlic, minced
1 shallot, minced
2 pieces fungus ear, soaked until soft and sliced thinly (can be replaced with 6pieces shitake mushroom, thinly sliced)
1 1/4 tsp fish sauce
1/2 Tbsp oyster sauce
1/2 tsp sesame oil
1/4 tsp white pepper
2 Tbsp roughly chopped coriander leaves
Vietnamese rice paper

Method:

1) Place all ingredients into a bowl and mixed well. Leave in the refrigerator for about an hour before using.

2) Place some warm water into a large shallow plate. Set aside a clean dry kitchen towel on a flat surface. Quickly dip a rice paper into the water and place on top of the kitchen towel. Place 1 heaped tablespoon of the filling on the bottom 1/3 of the roll. Fold the bottom part of the rice paper over the filling. Then tuck in the sides, then roll to form a cyclinder about 3 inches long. Lightly dampened the edges to ensure that the roll is properly sealed.

3) Heat oil over medium heat in a wok or a large frying pan. When the oil is hot, gently place a few of the rolls into the oil Do not over crowd. Fry slowly until the rolls turn golden brown. Dish out and drain the excess oil by lining them over some paper towels.

4) Serve immediately with a chilli dip and fresh herbs.

5) To make the dip, minced 3 fresh red chillies and 3 cloves of garlic finely. In a bowl add 1/3 cup white vinegar and sugar to taste. Add in the minced chillie and garlic and set aside for about 15 minutes before using.

Viet FSR


Viet FSR 3


Viet FSR 2

Wednesday, February 2, 2011

Ichigo Daifuku (Strawberry Mochi)

I love eating mochi because of it's chewy texture and have always thought that it would be most difficult to make. When I did find out how easy it was and with so few ingredients, I could not help by giving it a try. I used strawberries and azuki bean paste as the filling and to me it so resembles Japanese desserts. I can once you have mastered a perfect mochi, you could put any type of filling inside. The possibility of different flavours is pretty much endless I think!

mochi 4


mochi 2


Ichigo Daifuku (Strawberry Mochi)
Recipe adapted from Here
Makes about 6 - 8 mochi


Ingredients:
1 cup glutinous rice flour
1/4 cup icing sugar
2/3 cup water
1/2 cup adzuki bean paste (home made or store bought)
6 to 8 strawberries
For dusting, corn flour

Method:

1) Wash strawberries and remove the calyxes. Wrap a strawberry with about a spoonful of adzuki bean paste and rounds to make a ball. Make 6 to 8 balls depending on the size of your strawberries.

2) Put 2/3 cup of water and 1/4 cup of sugar in a microwave bowl and mix well. Add glutinous rice flour in the bowl and mix well. Put the bowl in microwave and heat the dough for two minutes. Remove and stir quickly. The dough will be somewhat heavy and very sticky.

3) Dust a flat tray with corn flour. Also, dust hands with some flour. Remove the hot mochi from the bowl to the pan by hands. Dust hands with more flour and divide the mochi into 6 to 8 pieces, depending on the size of the strawberries.. The mochi is hot and sticky, so be careful not to burn your hands. Make 6 to 8 flat and round mochi.

4) Put a piece of strawberry and adzuki filling on a mochi piece and wrap it by stretching mochi. Pinch the ends tightly to ensure that they stick together. Lay each mochi, seam downwards, onto a plate lightly dusted with cornflour Repeat the process until all the dough has been used up.

mochi 3


mochi 1
Related Posts with Thumbnails